Breast pumping is a key part of feeding your baby, but it can be tricky to get right. As a mom who pumps – whether you’re going back to work, building your milk supply, or sharing feedings with family members – knowing the right techniques helps you pump more effectively. While many moms run into similar problems when pumping, most issues have simple fixes.

Mistake #1: Using the Wrong Flange Size
The flange, also called a breast shield, connects your breast to the pump. Using the wrong size isn’t just uncomfortable – it can significantly reduce how much milk you collect. Pumping with an ill-fitting flange can lead to poor milk removal, nipple damage, and decreased milk supply over time.
Warning Signs You’re Using the Wrong Size
Watch for these signals:
- Your nipple rubs against the sides of the tunnel
- More than a small part of your areola gets pulled into the tunnel
- You feel pinching or pain during pumping
- The suction feels weak even at higher settings
- Your breasts don’t feel fully emptied after pumping
- Milk flow stops unusually early in your session
How to Fix It
Start by measuring your nipple diameter when it’s relaxed, not during or right after pumping. Most brands offer sizing guides with clear measurements. For accuracy, you can:
- Ask a lactation consultant to help you measure
- Use the measuring tools that come with your pump
- Compare your nipple to size charts available from pump manufacturers
The right flange leaves a small gap around your nipple as it moves during pumping. Your nipple should move freely without touching the sides, and only a small part of your areola should go into the tunnel. If you’re between sizes, try the larger size first for comfort.
When to Check Your Size Again
Review your flange fit:
- During the first few weeks of pumping
- If you notice any new discomfort
- When you see changes in your milk output
- After significant weight changes
- If your nipple size changes during your pumping journey
Mistake #2: Neglecting Pump Maintenance
Common Equipment Care Errors
Many mothers make these critical equipment mistakes:
- Ignoring unusual pump noises and decreased performance
- Using worn-out parts (cloudy valves, stretched membranes)
- Choosing the wrong type of pump for their needs
- Lacking backup parts
These errors lead to inefficient pumping sessions and wasted time and effort.
Essential Equipment Maintenance
Regular inspection and replacement prevent equipment failures. With frequent use, key parts should be replaced every 2-3 months or sooner. Watch for warning signs: changes in pump sound, weakened suction, and worn or damaged parts. Weekly battery life checks and power cords ensure your pump is ready when needed.
Backup Solutions
Keep these essential backup items in your pump bag:
- Extra valves and membranes
- Backup batteries or car adapter
- Spare collection bottles
- Manual pump for emergencies
Good equipment care can make a big difference in pumping success. A well-maintained pump with proper backup parts helps you avoid stress and maintain consistent milk production.
Mistake #3: Following an Ineffective Pumping Schedule
Common Scheduling Errors
Long gaps between pumping sessions tell your body to slow down milk production. Many mothers make these harmful timing mistakes:
- Waiting longer than 4 hours between daytime sessions
- Rushing through sessions in under 10 minutes
- Skipping all-night pumping sessions
- Following an inconsistent daily schedule
These timing errors often lead to decreased milk supply, uncomfortable engorgement, and potential duct blockages.
How Often to Pump Correctly
A good schedule matches your baby’s natural feeding pattern. Plan to pump every 2-3 hours during the day, aiming for 6-8 sessions in 24 hours. For working mothers, this typically means:
- Morning pump after the first feed
- Mid-morning session
- Lunch break pump
- Mid-afternoon session
- After-work pump
- Evening session
Session Length and Night Pumping
Each pumping session needs 15-20 minutes. Your first letdown usually happens at 2-3 minutes, with more letdowns following. Between 1-4 AM, your milk-making hormones peak – skipping night pumping can significantly impact your supply. One session during these hours, especially in the first few months, helps maintain milk production. Working mothers might find an early morning session (around 4-5 AM) fits better with their schedule.
Mistake #4: Incorrect Suction Settings
Many mothers mistakenly turn their pump to maximum suction, thinking stronger pulls mean more milk. This often leads to painful pumping sessions, nipple damage, and, surprisingly – less milk output. High suction can compress milk ducts and block milk flow. Some mothers also experience bruising or blisters, making future sessions uncomfortable or impossible.
Mimicking Natural Feeding Patterns
Babies begin nursing with quick, light sucking that triggers letdown, then switch to slower, rhythmic pulls. Your pump should follow this same pattern. The letdown phase (quick, light suction) signals your breasts to release milk. The expression phase (slower, deeper pulls) removes milk effectively.
Finding Your Optimal Settings
The right suction level allows comfortable pumping – any pain means it’s too high. Most mothers get their best output at medium settings, around levels 6-8 on most pumps. Start with letdown mode until milk flows, then switch to expression mode. Your comfort level might change throughout the day, so adjust as needed.
Mistake #5: Improper Positioning and Assembly
Milk spraying from connections, loss of suction, or uneven milk flow often point to assembly problems. You might hear air leaks or feel weak suction when parts aren’t connected properly. An off-center nipple can cause friction on one side, while poor posture can block milk ducts and reduce flow.
Essential Assembly Steps
Before each pumping session, check these key connections:
- Press the valve firmly onto the flange until it clicks
- Lay the membrane completely flat on the valve without any curling edges
- Center your nipple in the middle of the flange tunnel
- Connect the bottles with a full twist until secure
- Attach tubes firmly to both the pump body and flanges
- Give each connection point a gentle tug to test security
Body Position for Best Flow
Your back needs support against a straight-backed chair. Sitting properly upright allows milk to flow with gravity while keeping your ducts open. The bottles should hang straight down, not tilted. A hands-free pumping bra can help maintain proper flange position without muscle strain. Some mothers find that a small pillow in their lower back helps them maintain good posture throughout the entire session.
Mistake #6: Improper Milk Storage and Handling
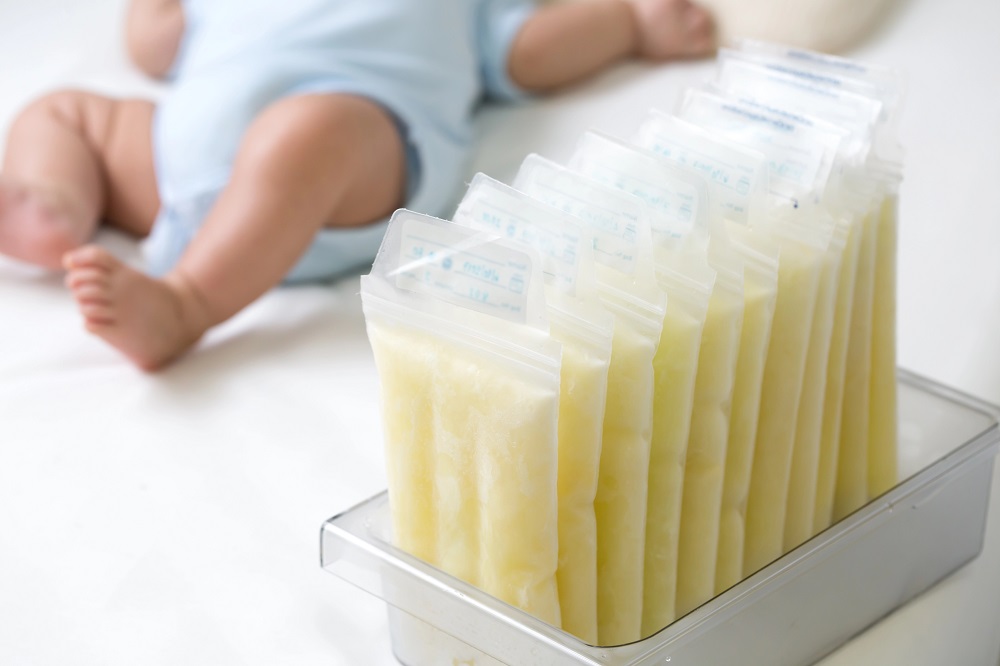
Not all containers are suitable for breast milk storage. Regular plastic bags can leak and may contain harmful chemicals, and bottle liners are too thin for freezing. The right containers—specially designed milk storage bags or hard plastic bottles—protect milk quality and prevent waste. These containers should be BPA-free and specifically marked safe for breast milk storage.
Safe Storage Times
Fresh milk requires quick attention. While you can safely leave it at room temperature for 4 hours, refrigeration extends storage to 4 days. Storage guidelines for breast milk:
- Room temperature (77°F/25°C): 4 hours max
- Insulated cooler with ice packs: 24 hours
- Refrigerator (39°F/4°C): 4 days
- Deep freezer (0°F/-18°C): 6-12 months
Essential Labeling Information
Each container needs:
- Date of pumping
- Volume of milk
- Your baby’s name (if going to daycare)
- Any dietary restrictions that affected the milk
Write this information clearly before refrigerating or freezing – memory can be unreliable later.
Proper Thawing Methods
Frozen milk needs gentle thawing to preserve its nutrients. Never microwave breast milk or thaw it on the stove. Instead:
- Move milk from freezer to refrigerator overnight
- Place the frozen container in a bowl of warm water
- Hold under running warm (not hot) water
- Use thawed milk within 24 hours
- Never refreeze thawed milk
Mistake #7: Neglecting Your Pumping Environment
Environment Errors That Reduce Milk Flow
Many mothers make these harmful environmental mistakes:
- Pumping in stressful spaces (bathroom stalls, storage closets)
- Starting sessions without water or snacks nearby
- Missing items for letdown support (baby’s photo, familiar items)
- Using harsh lighting or uncomfortable seating
These mistakes can block your letdown reflex, making sessions less productive and more stressful.
Setting Up a Better Space
Your pumping area needs basic comfort items. A water bottle and easy-to-reach snacks help maintain your energy. Proper lighting and temperature control make a big difference. A comfortable chair with back support prevents strain during sessions.
Supporting Natural Letdown
Your body responds to familiar baby cues. Keep a small photo nearby or a recording of your baby’s sounds. Some mothers find success with a piece of their baby’s clothing nearby. A consistent pre-pump routine helps signal to your body that it’s time to produce milk.
Mistake #8: Inadequate Hygiene Practices
Breast milk can easily become contaminated through unclean hands or poorly sanitized equipment. Small amounts of bacteria from unwashed hands multiply quickly in milk, especially at room temperature. The moist environment of pump parts also provides an ideal breeding ground for harmful microorganisms.
Daily Cleaning Requirements
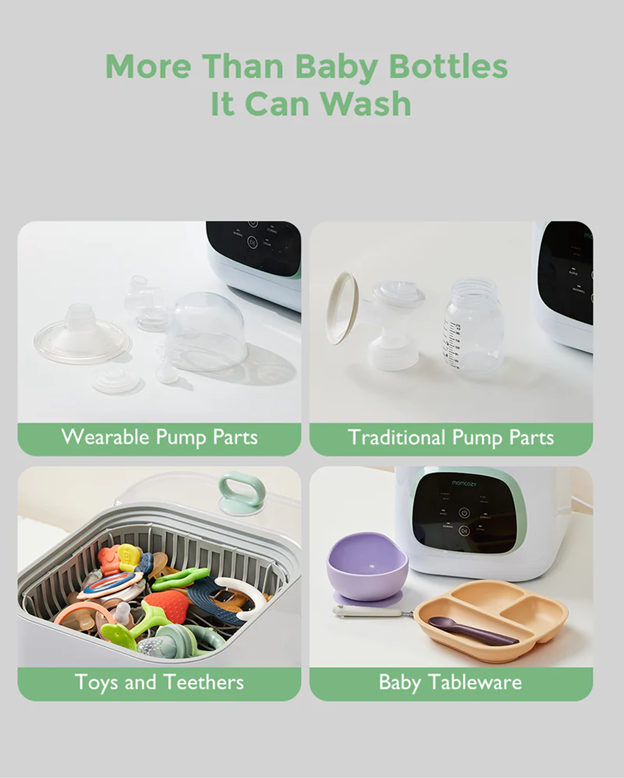
Soap and hot water remain your first line of defense. Your hands need thorough washing with soap for at least 20 seconds before handling any pump parts or milk collection. Each pump part that touches milk requires cleaning immediately after use – leaving parts unwashed until evening allows bacteria to grow and makes cleaning more difficult. For convenient and thorough cleaning, you can use an all-in-one sterilizer and dryer like the Momcozy Baby Bottle Washer and Sterilizer that washes, dries, and sterilizes pump parts efficiently.

Sanitization Rules
Some parts need regular sanitization beyond daily washing. Medical-grade wipes don’t replace proper cleaning and sanitizing. The CDC recommends sanitizing pump parts once daily for healthy babies and after each use for premature or immunocompromised infants. Disposable parts like breast milk storage bags and some valves should never be reused, even if they appear clean.
Mistake #9: Delaying Professional Help
Red, hot, or painful breast areas signal potential problems. A hard lump that persists after pumping, flu-like symptoms, or unexplained drops in milk supply require immediate attention. A fever above 101°F (38.3°C) combined with breast pain often indicates mastitis, a serious infection that requires medical treatment.
When to Call Your Healthcare Team
Contact your healthcare provider or lactation consultant when you experience:
- Severe or persistent nipple pain that doesn’t improve
- Sudden drop in milk supply despite regular pumping
- Fever and flu-like symptoms with breast pain
- Hard lumps that don’t soften after pumping
- Blood or pus in your milk
- Damaged or cracked nipples that won’t heal
- Persistent poor milk transfer despite proper pump use
Finding Reliable Support
Professional lactation support comes in many forms. Hospital lactation departments often provide free phone consultations. Many pediatrician offices have lactation consultants on staff. Local La Leche League groups offer mother-to-mother support and can recommend qualified professionals in your area. Virtual consultations have made expert help more accessible than ever.
Make Your Pumping Journey Easier!
Your pumping success comes from paying attention to the basics: the right equipment, a good schedule, clean parts, and a comfortable space. While every mother’s experience differs, getting early help can prevent many common problems. Remember – lactation consultants and healthcare providers are there to support you when challenges arise. With good habits and proper support, you can maintain a healthy milk supply for your baby.

