
Did you know that being surrounded by greenery is psychologically proven to be good for our mood? As a work-from-home mom, I try to follow the 20-20-20 rule. Every 20 minutes, I take a short break, look at something green for 20 seconds, and let my eyes rest. Most of the time, that something green is the garden that I’ve worked hard on since the pandemic started (it’s where I found my love for plants and spent a good amount to buy pots, soil, and plants).
But then the DIYer in me suddenly kicked in when I saw garden beds being used in one home remodeling TV show I watched on Netflix. I mean, instead of buying one, why not challenge myself and do my own garden bed? Here’s what I’ve learned so far.
Table of Contents
- What Is a Garden Bed?
- Why Do We Use Garden Beds for Gardening?
- What Are the Different Types of Garden Beds?
- What Is the Best Location for Garden Beds?
- Raised Garden Bed
- How to Build A DIY Wooden Raised Garden Bed
- How to Build A Brick or Stone Raised Garden Bed
- How to Build a DIY In-Ground Garden Bed
- How to Repurpose Containers for Garden Beds
- Garden Bed Frequently Asked Questions
What Is a Garden Bed?
Garden beds are designated planting areas for vegetables, flowers, herbs, and other plants. They help organize the garden, are easy to maintain, and make your garden prettier. They can also make it easier for you to water, fertilize, and take care of your plants.
Why Do We Use Garden Beds for Gardening?
Garden beds make gardening so much easier because they can increase the efficiency, productivity, and aesthetics of your garden space. There are practical and aesthetic purposes of using garden beds that you must know.
- Garden beds let you start fresh with good soil. You don’t have to worry about fixing the old soil that might not be great for veggies or flowers.
- Garden beds stay a little warmer than the ground, which is great if you want to start planting early in the spring or keep things growing a bit longer in the fall.
- They give plant roots more room to grow down. You can fit more plants in a smaller area, and it’s one of the best ways to make the most out of your garden space.
- Garden beds drain water faster than in-ground soil. This keeps your plants from sitting in soggy soil and actually makes them healthier.
- They make gardening easier on your body. It will be easier to bend and kneel to water, weed, and harvest without hurting or straining your back.
- Garden beds make your garden look neat and organized. Even when nothing is growing, they give the yard a cleaner look.
What Are the Different Types of Garden Beds?
There are a few ways to set up a garden bed, depending on your space and what you want to grow. Each type has its own advantages, and you can choose the one that fits your garden style and needs. Here’s a simple breakdown:
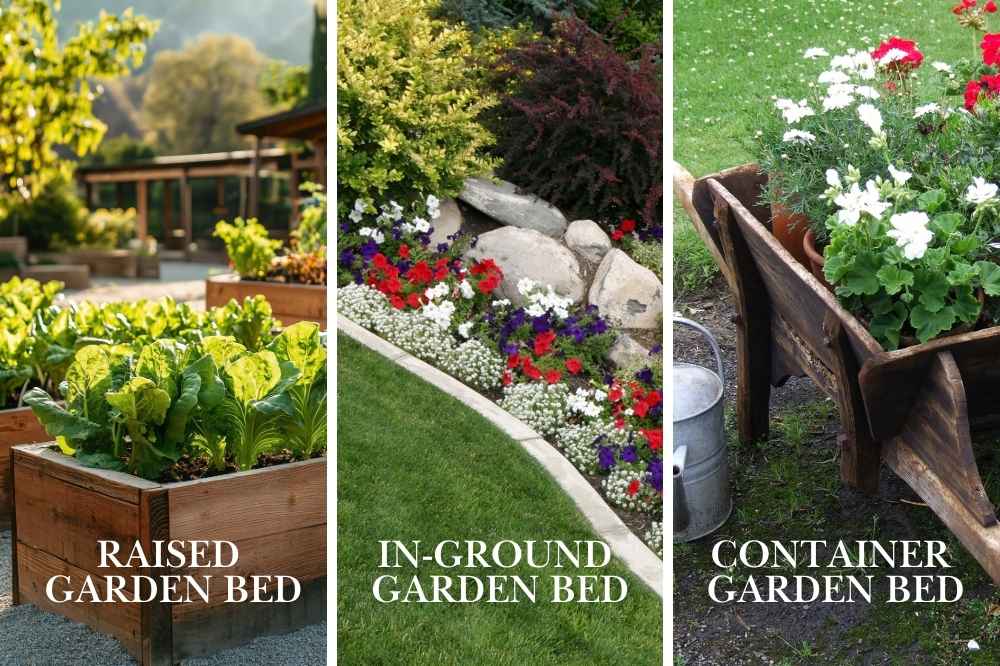
There are three types of garden beds that you can choose from:
1. Raised garden beds – these are built above the ground using wood, stone, or metal frames. They’re great if you want better soil control, fewer weeds, and easier access without bending over too much.
2. In-ground garden beds – these garden beds are dug directly into your yard. You can edge them with stones, bricks, or wood. They work well if you have plenty of space and want a natural look.
3. Container garden beds – these are great for patios, balconies, or small spaces. They’re often waist-high. That means it’ll be easier to plant and water, and they keep your plants separate from the lawn or other areas.
What Is the Best Location for Garden Beds?
Choosing the right spot for your garden bed makes a big difference in how well your plants grow. If you’re looking for the best location for your garden beds, here are a few key points to think about:
- Make sure it gets plenty of sun – pick a spot that gets at least six hours of direct sunlight each day. More sun is better! Try to avoid shady areas near tall buildings or fences. If you only have four hours of sun, stick to herbs and salad greens that don’t need as much light.
- Make it look nice in your yard – think about how the garden bed fits with your home and yard. It would be nice to position it along fences, patios, or driveways so it feels like a natural part of your space.
- Place it somewhere convenient – put your garden near where you spend time, like the kitchen, back door, or patio. That way, it’s easy to grab fresh herbs or veggies while cooking.
- Keep it close to water – your garden bed should be near a spigot, rain barrel, or irrigation system. Doing this will make sure you have access to water. That will keep your plants happy and healthy.
How to DIY Your Garden Bed
Building a garden bed yourself might seem like a lot of work at first, but it’s actually easier than it sounds. I’ve tried all three, so I wanted to share what I’ve learned and some simple ways to make each one.
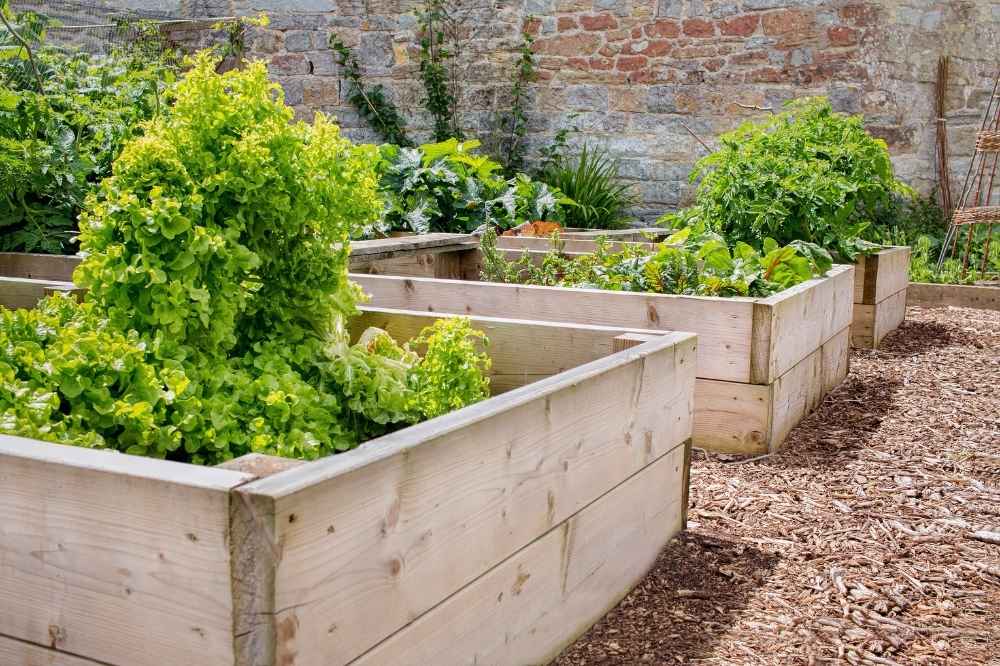
Raised Garden Bed
Building a garden bed yourself might seem like a lot of work at first, but it’s actually easier than it sounds. I’ve tried all three (stone-raised, wood, and in-ground garden beds), so I wanted to share what I’ve learned, what I’ve done, what I should’ve done, and how I’ll do it next time to make them better.
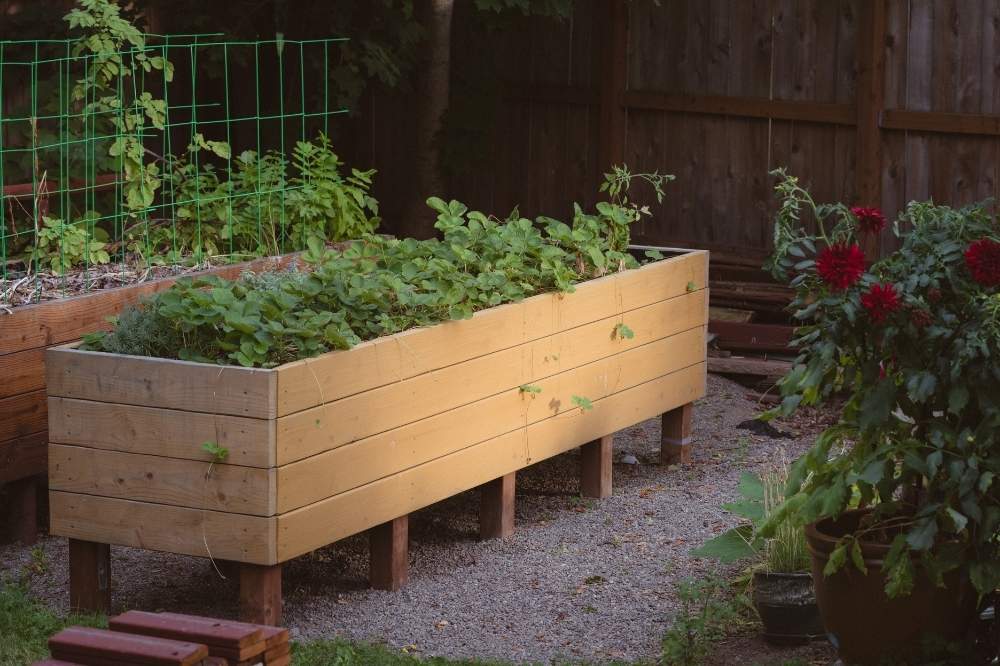
How to Build A DIY Wooden Raised Garden Bed
Materials Needed
Wooden boards (cedar or redwood works best for durability)
Screws or nails
Drill or hammer
Measuring tape
Saw (if you need to cut the boards to size)
Level (to make sure the bed is even)
Steps on How to Build a Wooden Raised Garden Bed
1. Planning – Measure and decide how big or small you want your garden bed to be. Do more in-depth research as needed. If it’s your first time doing this or if you’re not sure what to do exactly, it would be extremely helpful to watch YouTube videos or any video tutorial at that.
2. Choose your desired spot – Look for the spot where you want your garden bed to be placed. It would be great to place it in a sunny and level area in your yard.
3. Build the frame – When you already have the right size of wood boards, start attaching them together using nails and screws to form a rectangle or square shape. It’s very important to make sure that the corners are tight and even.
4. Paint or seal the garden bed – I highly recommend you paint or varnish your wooden garden bed before putting soil as it helps protect the wood from moisture and insects. However, you need to use non-toxic, water-based or garden-safe wood paint or natural or plant-safe wood sealant. Only paint the outer sides and leave the other side bare or lined.
5. Line the bottom – This is optional, but if you want to avoid weeds, you can add landscape fabric or even cardboard at the bottom to help block weeds. However, airborne weeds can still reach your plants so you have to be careful.
6. Add soil to your raised garden bed – Once your garden bed is ready, you can start filling it with a mix of garden soil, compost, and organic matter. Make sure to level it out nicely. If you’re using fertilizers, always check the proper usage and if it’s suitable for the plants you’re planning to plant.
How to Build A Brick or Stone Raised Garden Bed
Materials Needed
You can choose from bricks, stones, and cinder blocks
Cement
Sand
Spray paint
Garden soil
Compost soil
Gravel
Fertilizer
Shovel
Leveling tool
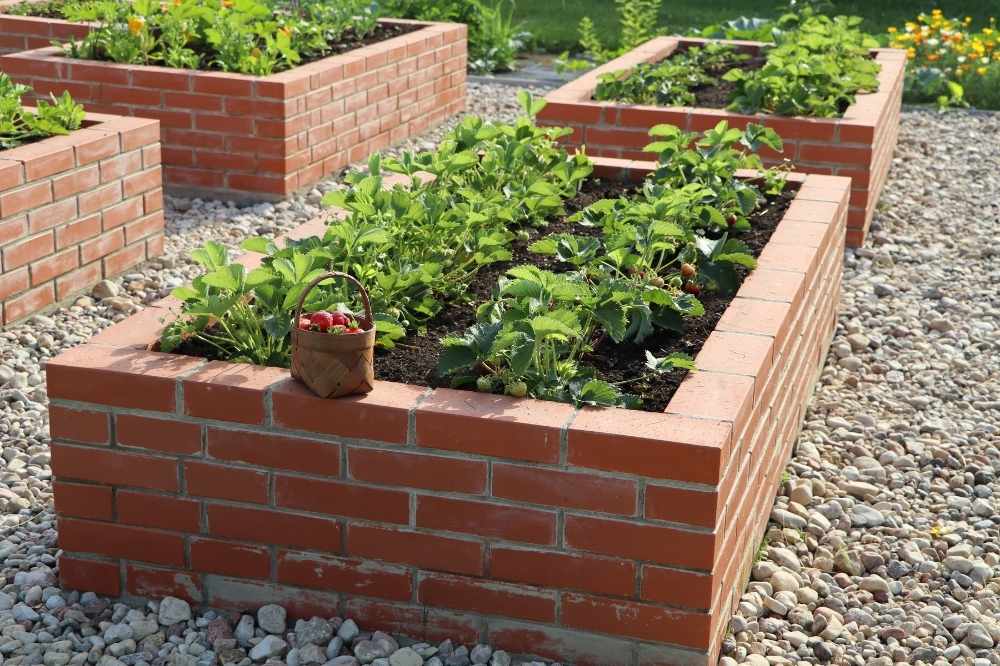
Steps in How to Build a DIY Brick and Stone Raised Garden Bed
1. Planning – Create a plan, do some research, and prepare the materials needed.
2. Mark the area – Mark the area you want to build your brick or stone garden raised bed using markers like spray paint.
3. Weed Removal – Remove weeds and loosen the soil.
4. Dig the Foundation area – Dig a shallow trench for the base of your brick or stone wall.
5. Lay a gravel base – Add a layer of gravel to the trench to help improve the drainage, then level and compact it.
6. Build the stone wall – Lay the first brick or stone and ensure it’s leveled. Then start stacking the bricks or stones. Add landscaping adhesive to glue the brick or stones together. For a more traditional approach (recommended), mix mortar, a combination of cement and sand, and apply it between the stones.
7. Fill the raised garden with soil – After the cement dries, you can start to fill the raised garden with soil and compost. You can also add fertilizer to make the soil healthier. Make sure that the fertilizer you will add is for the plant you wish to plant, and follow the instructions to make sure the plants will grow healthy.
If you have the budget to splurge, you can use cinder blocks or concrete blocks to build a stone raised garden bed. Same instructions as above, and paint the cinder blocks with your desired color.
INTERESTED IN LANDSCAPING YOUR RAISED GARDEN BED? YOU CAN TRY THIS OUT.
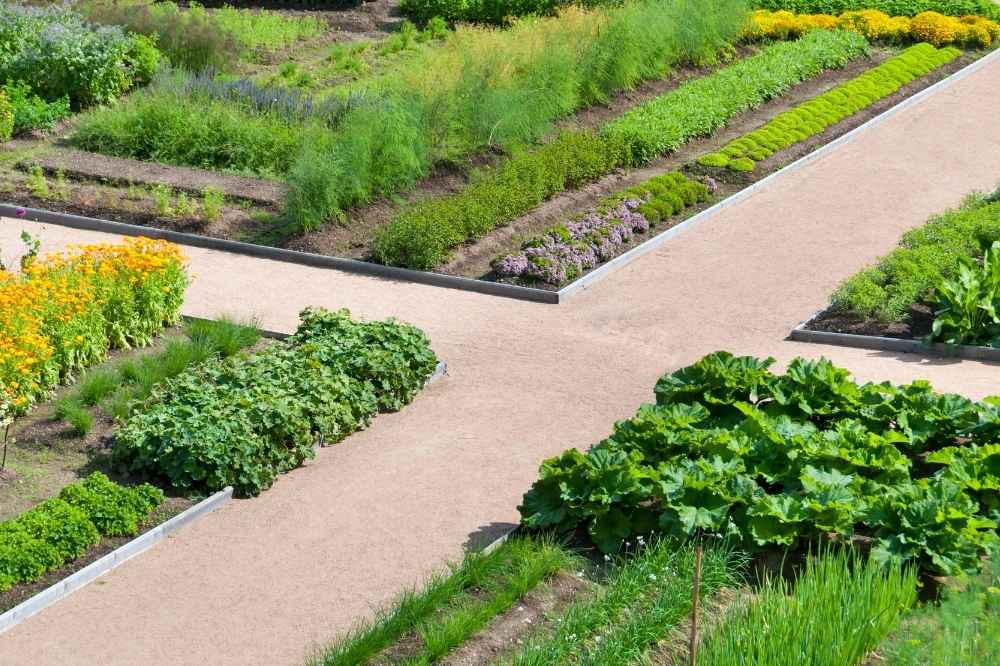
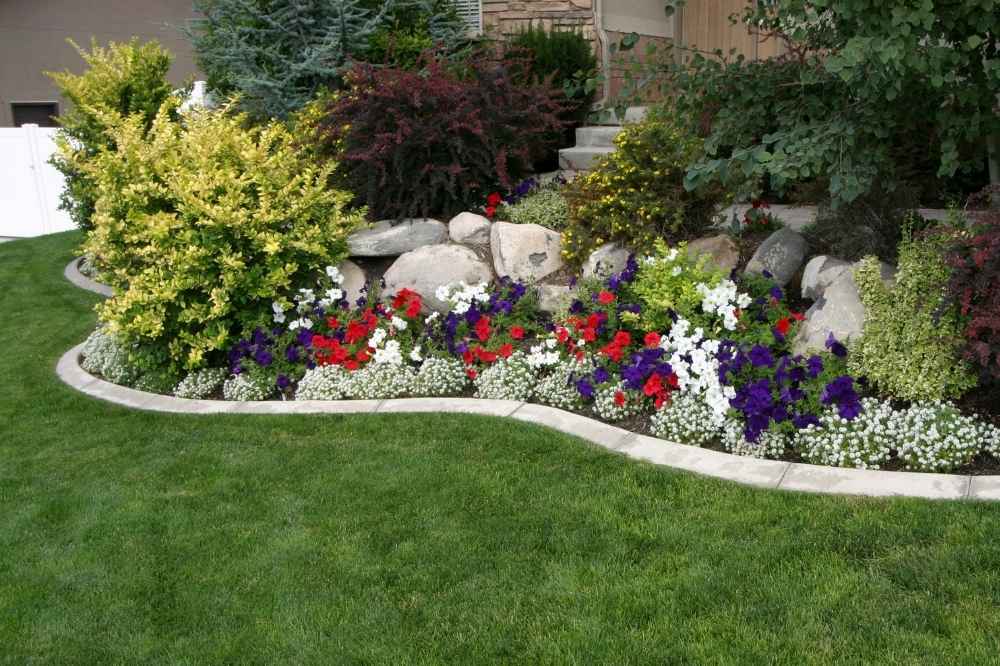
How to Build a DIY In-Ground Garden Bed
If you’re looking for the cheapest option, in-ground garden beds will be your best friend. It’s also the easiest to do for your garden and for landscaping front yards. It’s also the most flexible as you can be as creative as you want because you can make any shape, no matter where you want to place it.
Materials Needed
You can choose from wood, bricks, stones, cinder blocks, and plastic garden edging fence
Sand
Spray paint
Garden soil
Compost soil
Fertilizer
Shovel
Leveling tool
Steps on How to Build a DIY In-Ground Garden Bed
1. Preparation – Do some research and prepare the materials needed for your in-ground garden bed.
2. Mark the area – Mark the area you want to build your in-ground garden bed. You can create an in-ground garden bed in any shape you desire.
3. Remove the weeds – Clear out any grass, weeds, or roots in the area where you’ll place the bed. Loosen the soil underneath to help with drainage and make it easier for plant roots to grow.
4. Dig the edge area – Dig a shallow trench for the base of your in-ground garden bed.
5. Adding the wall for the edge – You have three options for edging your in-ground garden bed. You can use bricks, stones, cinder blocks, wood, and plastic garden edging fence.
A. For bricks, stones, and cinder blocks, lay a single layer, and that would be your edging for your in-ground garden bed. For sturdier, you can add cement and sand, mix them together, and apply them in between the stones.
B. For a wood fence, you can buy a ready-made garden picket wood fence on Amazon or at your local garden center. You just insert the garden picket wood fence in the ground as your edging for your in-ground bed. Easy-peasy right?
If you have time to do a DIY garden picket wood fence for your in-ground garden bed, you can use scrap wood or wood pallet materials and paint it with your desired color. Check this garden picket wood fence tutorial on YouTube.
C. For plastic garden edging fence, you can also buy this on Amazon and from any garden center near you. Same as the wood fence, you just insert the plastic edging fence in the ground and voila! You now have an edging to your in-ground garden bed. You can also add stones to cover the plastic fence to make it prettier. Don’t forget to make sure your edging is leveled.
6. Make your soil healthier – Add compost soil and then mix it with the existing soil. Add fertilizer to help the soil be healthier. Make sure the fertilizer you will add is for the plants you desire to plant in the in-ground garden bed and follow the fertilizer’s instructions.
7. Planting – Whether it’s vegetables, flowers, or any plants you wish to plant. Plant away!
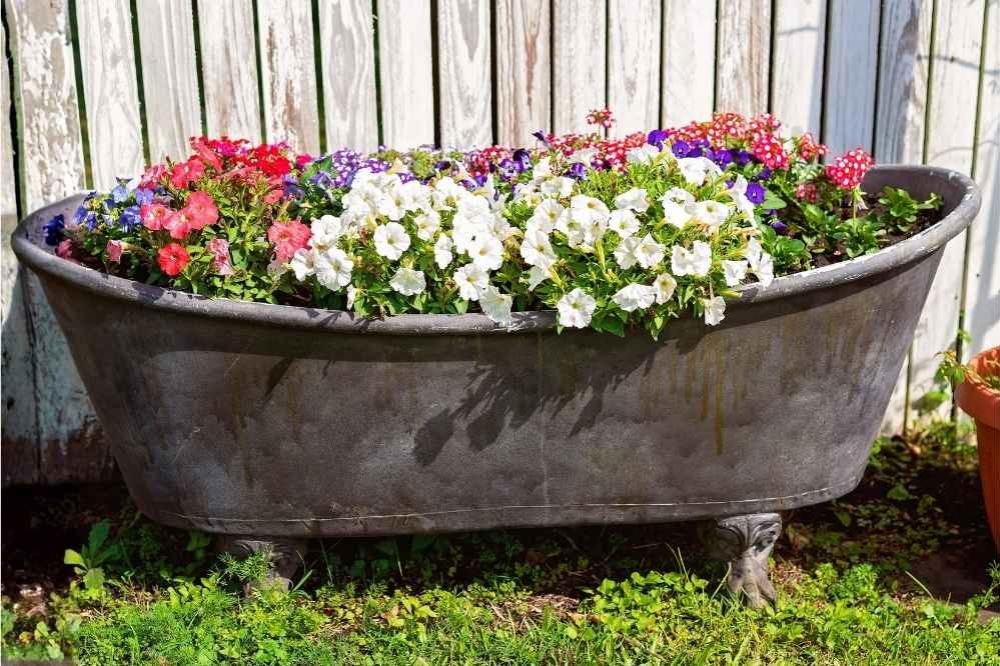
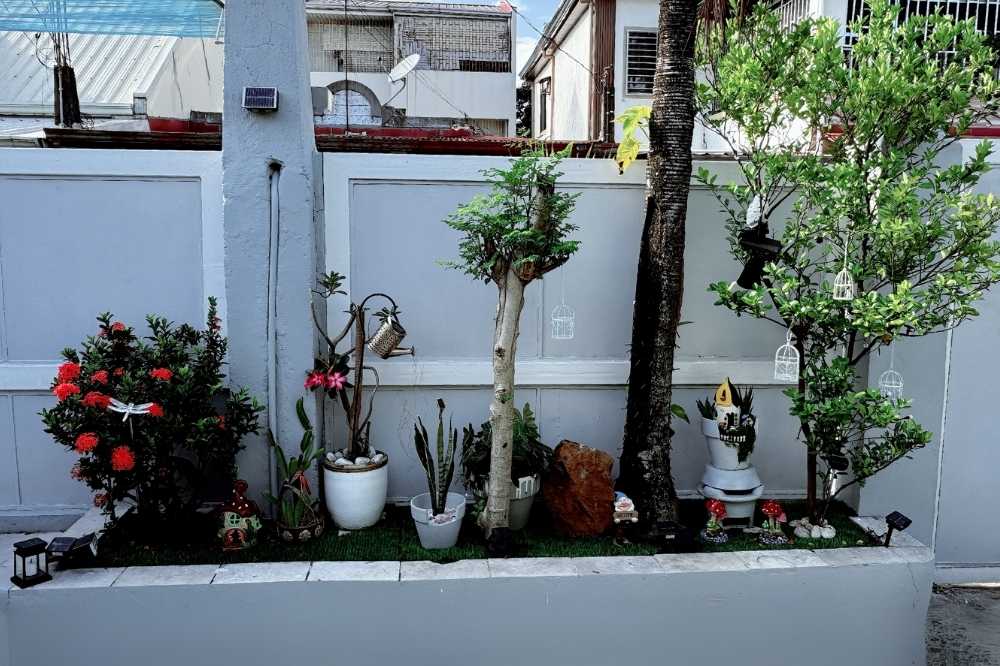
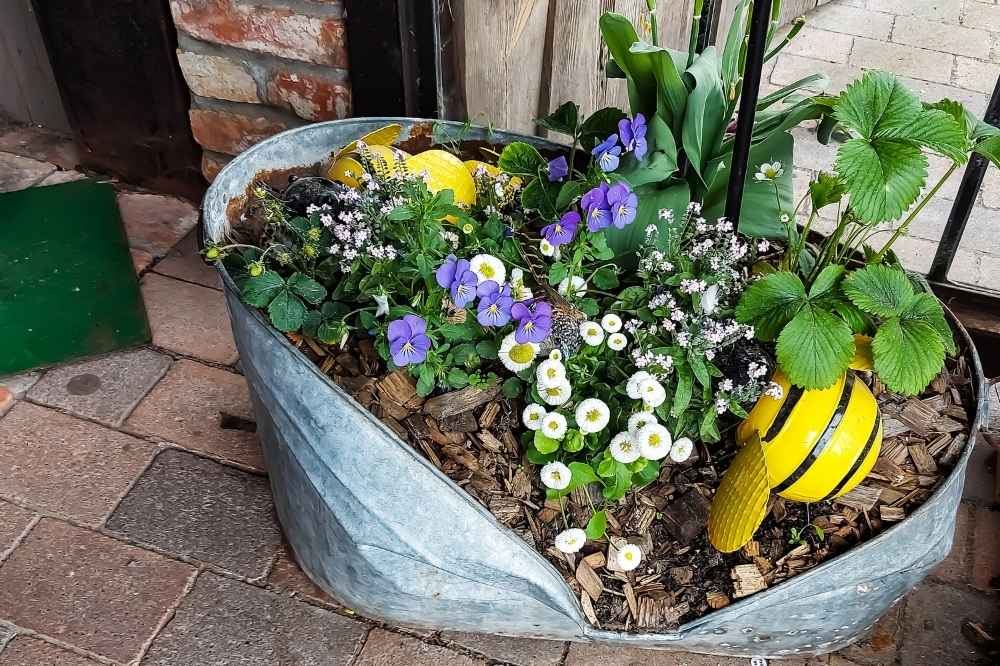
How to Repurpose Containers for Garden Beds
If you have old containers lying around your house, you can also use them as garden beds. You don’t have to spend money on materials, and you’re literally making a positive impact on our environment by recycling. Here’s what you can do:
1. Choose your container – You can use old buckets, tubs, storage bins, or galvanized containers. Just make sure they’re sturdy and deep enough for the plants you’ll grow.
2. Clean the container – Wash your container well to remove any dirt, chemicals, or residue. This helps prevent pests when you start planting.
3. Add drainage holes – Drill a few small holes at the bottom of the container to let excess water flow out. You wouldn’t want your plants’ roots to get waterlogged.
4. Layer the bottom part – Add gravel or small rocks at the base to help with drainage.
5. Place soil – Start placing quality garden soil. You can also add compost and organic matter to help your plants grow healthier.
There are easy-to-build raised garden beds with instructions included, which you can buy at Amazon or at Lowe’s if you don’t have time to DIY. Amazon and Lowe’s offer different designs and sizes that you can choose from at an affordable price.
And if you have no time to DIY or there are no existing used containers available at your home, you can purchase galvanized containers at Walmart, Home Depot, and Lowe’s. And if you’re too busy to go to your local store, you can just order one from Amazon and have it delivered to your doorstep.
Garden Bed Frequently Asked Questions
1. Why use raised garden beds?
Raised garden beds make gardening easier. It allows the soil to drain better, weeds are fewer, and it’s gentler on your back since you don’t have to bend too much.
2. How to maintain garden beds?
Keep the soil healthy by adding compost every now and then. Pull out weeds when you see them, and water your plants regularly.
3. What do I put at the bottom of a raised garden bed?
You can put cardboard, newspaper, or landscape fabric to block weeds, then add some gravel or small rocks to help with drainage.
4. Does a garden bed need to be raised?
No. You can still grow plants directly in the ground. Raised beds just make things neater and easier to manage.
5. What is the best shape for a garden bed?
Rectangular or square shapes are the easiest to work with when it comes to garden beds. They fit most spaces and make planting and watering simple.
6. Are wooden or metal garden beds better?
Wooden garden beds are great if you’re looking for affordability and easy customization. Metal garden beds are better if you’re more for durability and lower maintenance.
7. What is the safest material for a garden bed?
The safest materials for your garden bed are treated wood, galvanized metal, or food-safe plastic. They are all safe for growing vegetables and herbs.
8. What type of wood should you not use for a garden bed?
Don’t use pressure-treated or painted wood because they might have chemicals that can seep into your soil.
9. Are there any disadvantages of raised garden beds?
They can dry out faster and need more soil at first. But once set up, they’re easy to care for and really worth it.
10. How do you often water a raised garden bed?
Check the soil often. If it feels dry about an inch down, it’s time to water. Usually, once a day in hot weather is enough.
And That’s How I Made My Garden Beds
As a mom who loves getting her hands dirty in the garden, building a garden bed has been such a fun and rewarding way to grow fresh veggies and beautiful blooms for the family. It’s a simple project that delivers big results: healthy plants, fewer weeds, and a tidy space that’s easy to care for.