Christmas is coming, and it’s my favorite season of the year! I love decorating my house with Christmas decorations, and of course, my Christmas tree is the main attraction during this season. Every year, I have a different Christmas tree theme. I always enjoy adding my personal touch to my Christmas tree decor by making DIY Christmas tree ornaments.
Making your own Christmas decorations adds a unique charm to your holiday décor and creates lasting memories for you and your family. The bonding, the ideas, and the laughter you share while doing the DIY are gold!
Whether you’re looking to save money, reduce waste or to upcycle, or you just want to be creative this holiday season, making your own Christmas ornaments is a rewarding experience. So, gather your materials, spark your imagination, and get ready to make this holiday season extra special with your own personalized Christmas ornaments that bring personality to your tree!
1. DIY STYROFOAM LADDER CHRISTMAS TREE ORNAMENT
Materials:
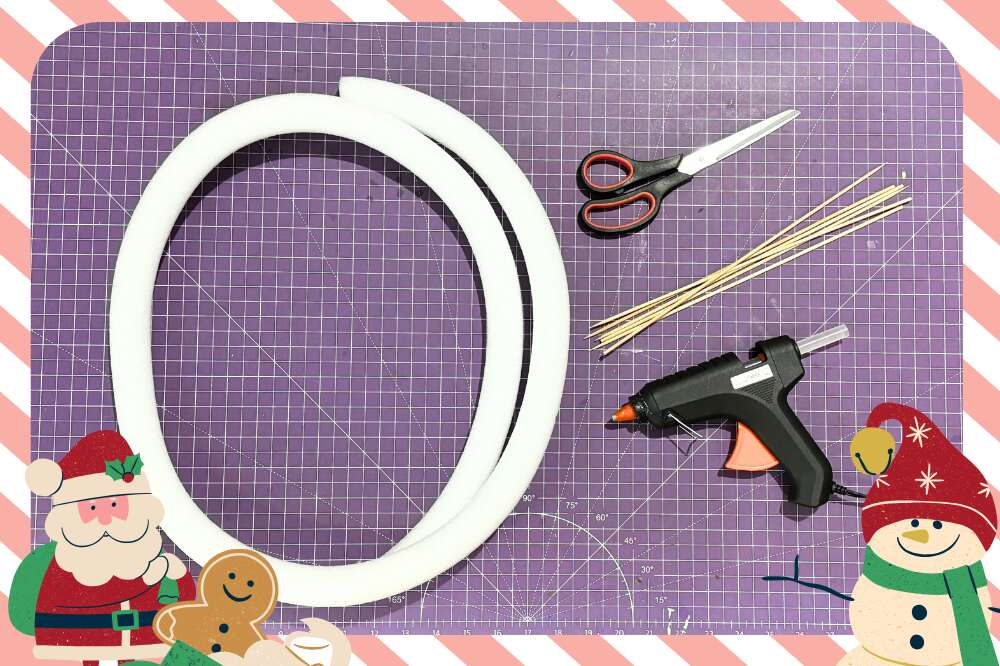
- Styrofoam stick (rounded)
- Glue gun
- Scissor
- Barbeque sticks
- Any Christmas ornament
Step 1: Cut the styro stick.
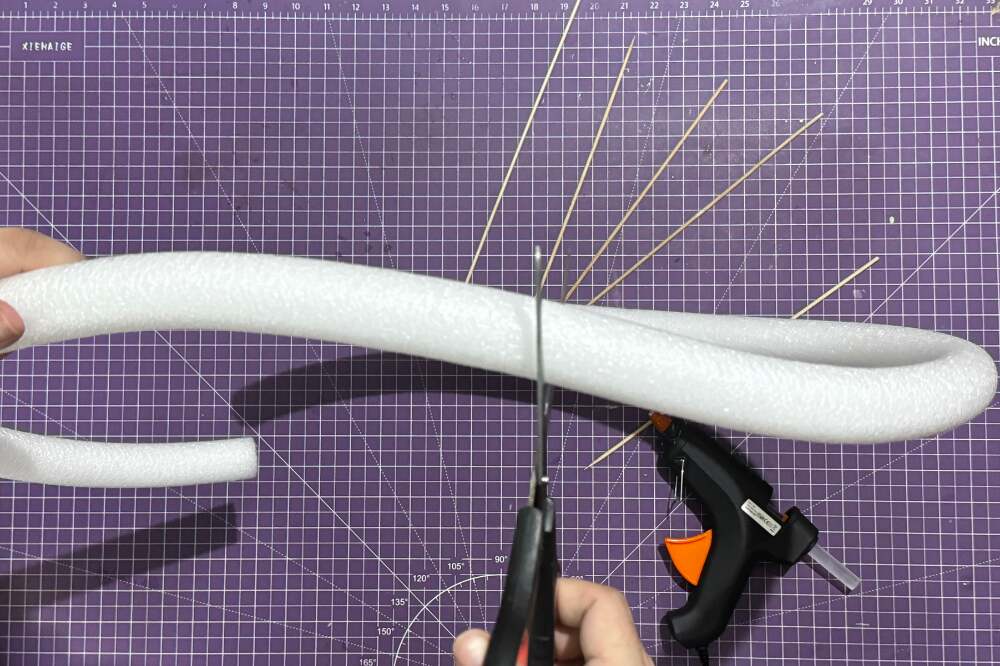
I don’t normally follow any measurements. I just try to figure out what is the best size for my 5-foot Christmas tree. First, I cut two long styrofoam sticks (same size) for the two sides of the ladder and then four small styrofoam sticks for the steps of the ladder.
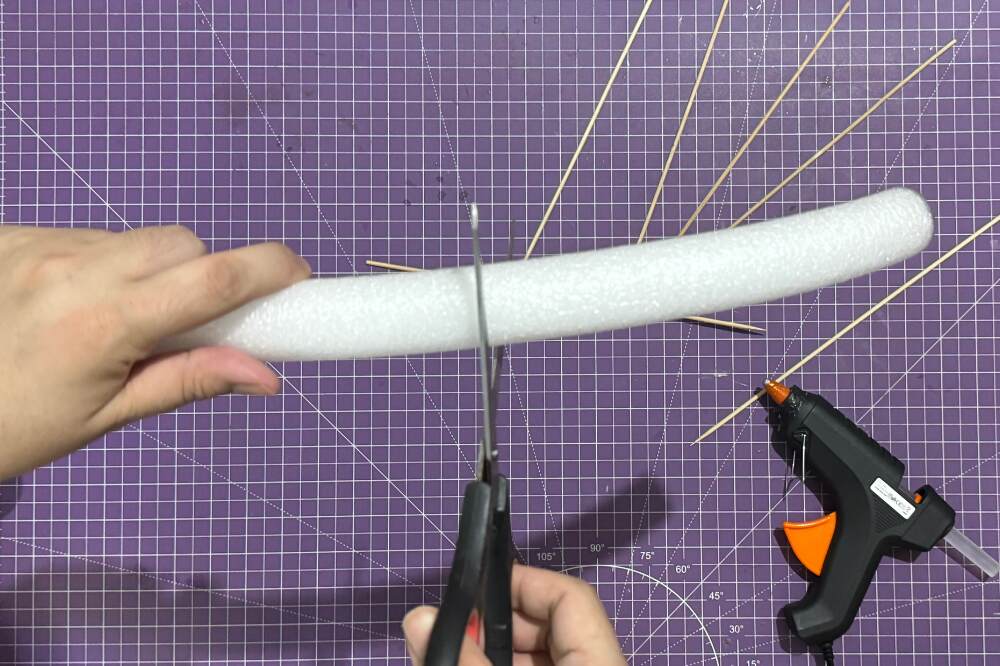
Step 2: Insert the barbeque sticks inside the styrofoam stick.
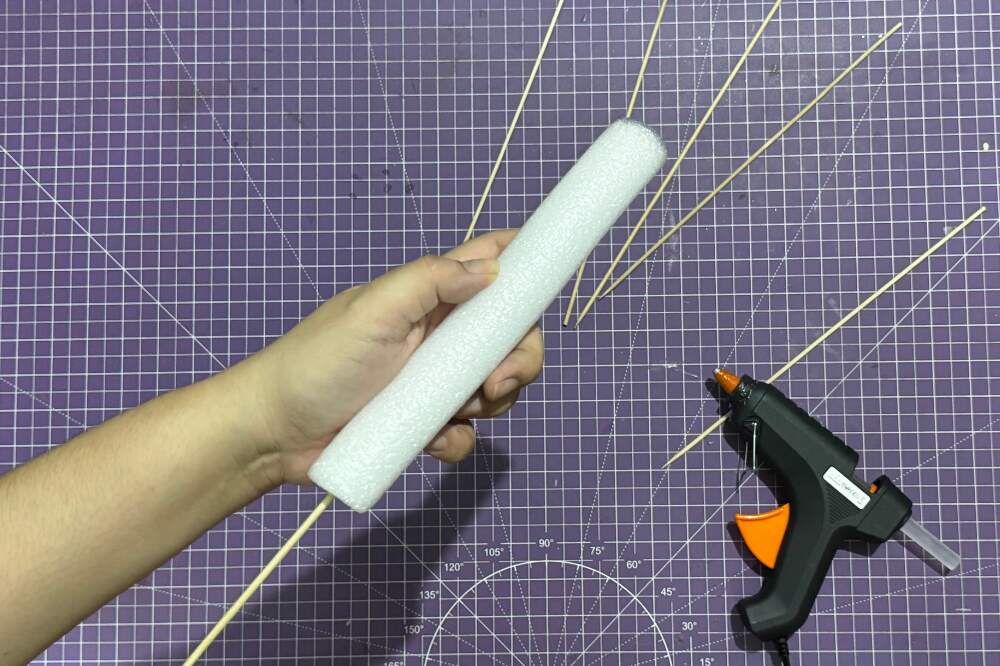
Since the styrofoam stick is not straight, I have to improvise it to make the styrofoam straight. Inserting the barbeque stick inside the styrofoam sticks makes it a little straighter. It doesn’t need to be perfectly straight, but straight enough to be a ladder rail. The barbecue stick also adds support to the styrofoam sticks. Just a side note, inserting the barbeque sticks is a bit tricky and takes effort. You’ll likely need extra strength to insert the sticks.
Step 3: Break the extra stick.
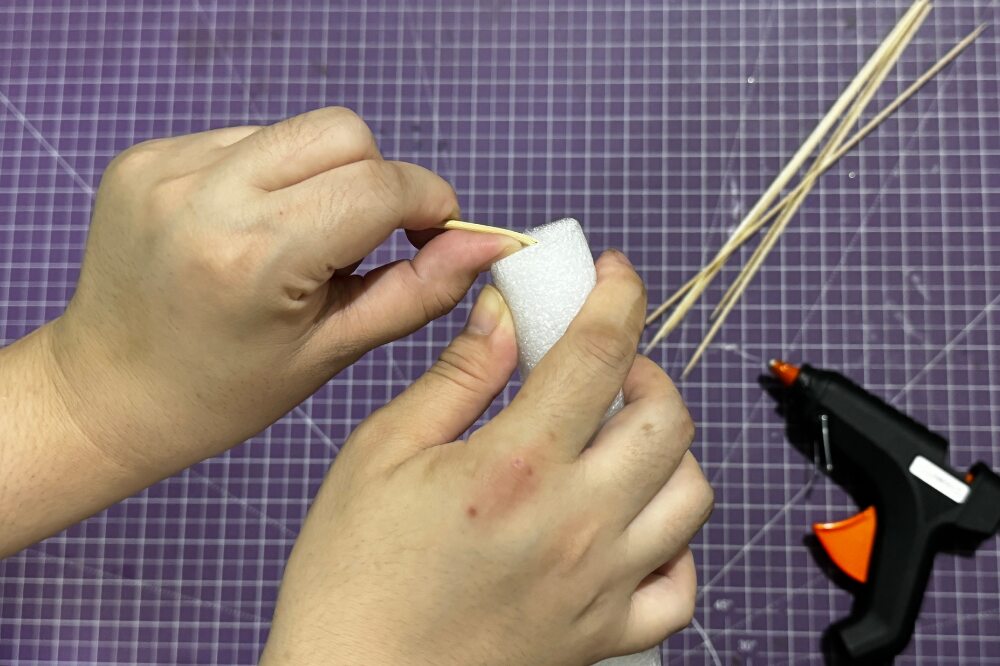
If an extra stick sticks out of the styrofoam, you need to break or cut it. Then, when you cut the remaining stick, tap the end on your table to balance the stick and styrofoam. This way, there will be no stick sticking out of the styrofoam.
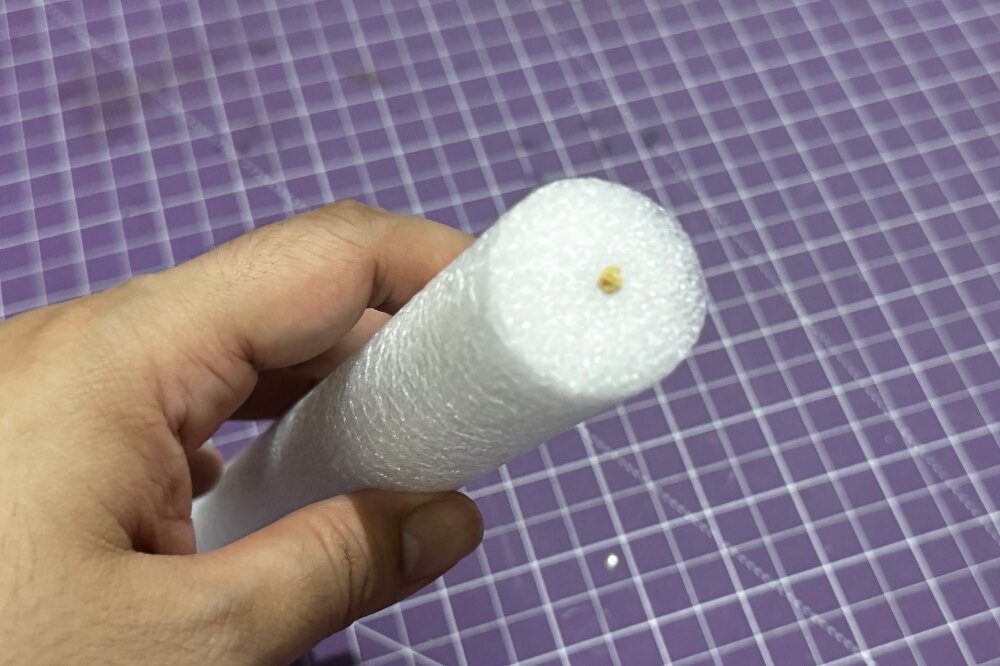
Step 4: Time to glue the pieces together!
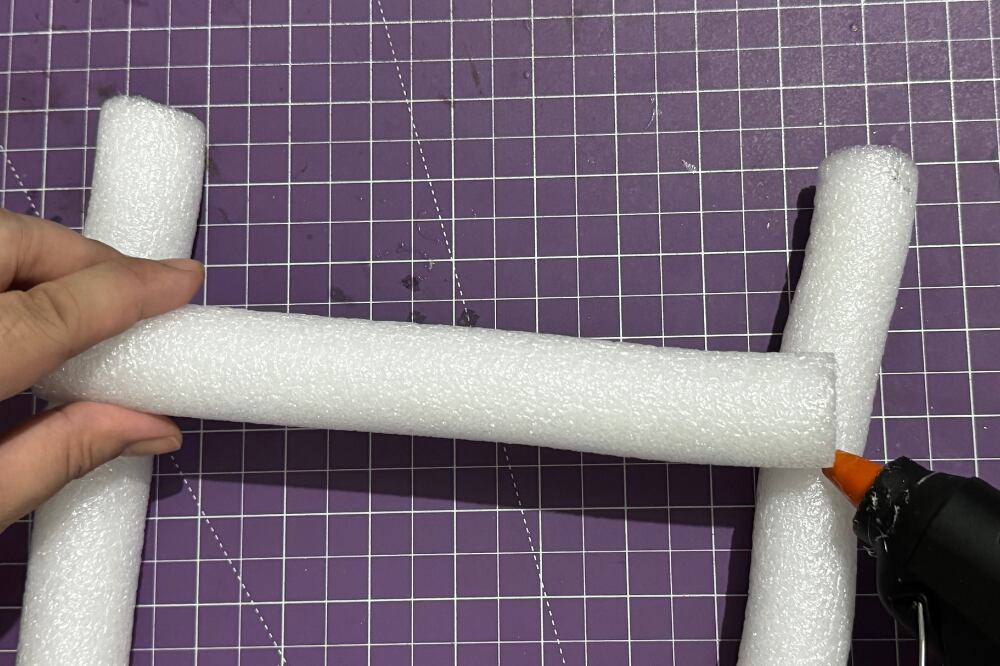
The trick is to glue the first 3 sticks together to make the DIY easier when glueing all the pieces together. First, prepare the two long styrofoam sticks side by side, and then place one small styrofoam stick in between and on top of the two long styrofoam sticks. This way, you can imagine what your ladder will look like, and it also helps when you put your glue on the small styrofoam.
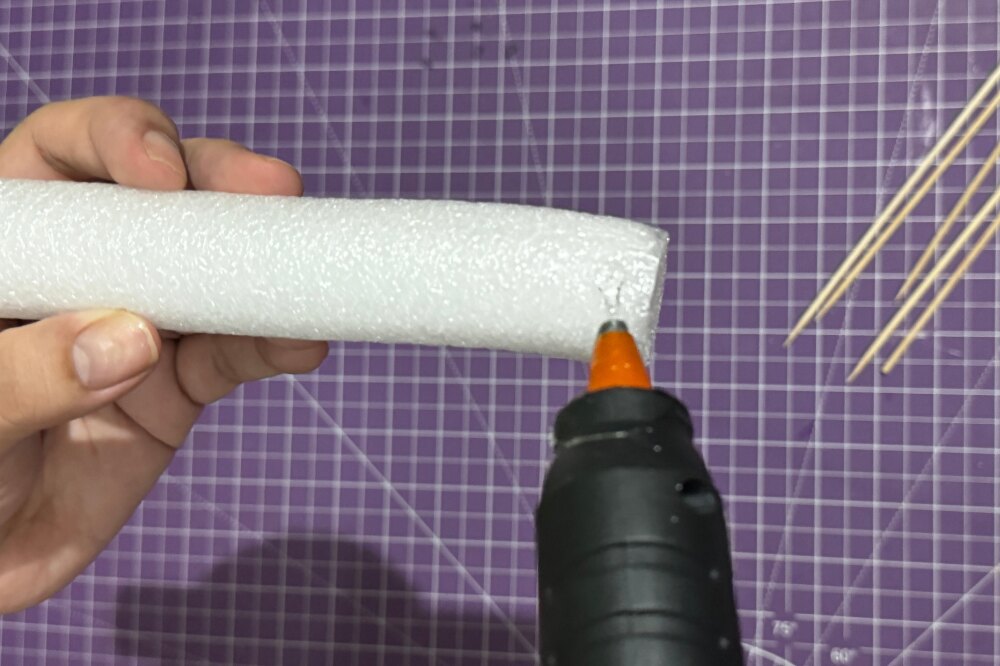
Then, put the glue on both sides of the short styrofoam stick and stick it to the two long styrofoam sticks. Let it dry for seconds. Repeat the steps for the remaining three short styrofoam sticks.
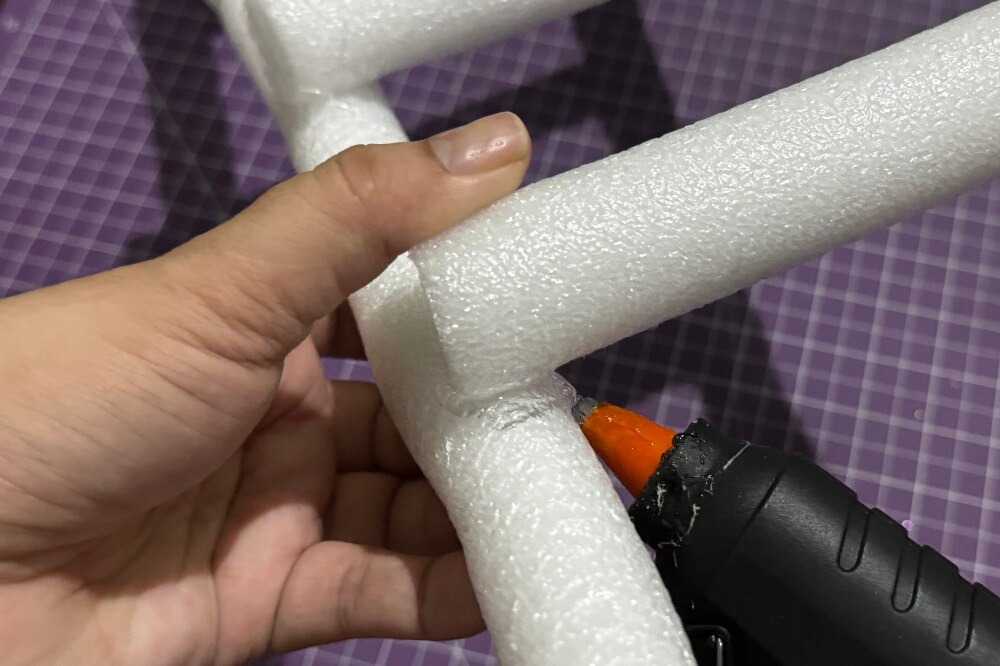
You need to secure the styrofoam ladder you made by adding more glue to each step. Put glue at the back and front of the ladder. Then, let it dry again.
Step 5: Add your chosen ornament to the ladder. (Optional)
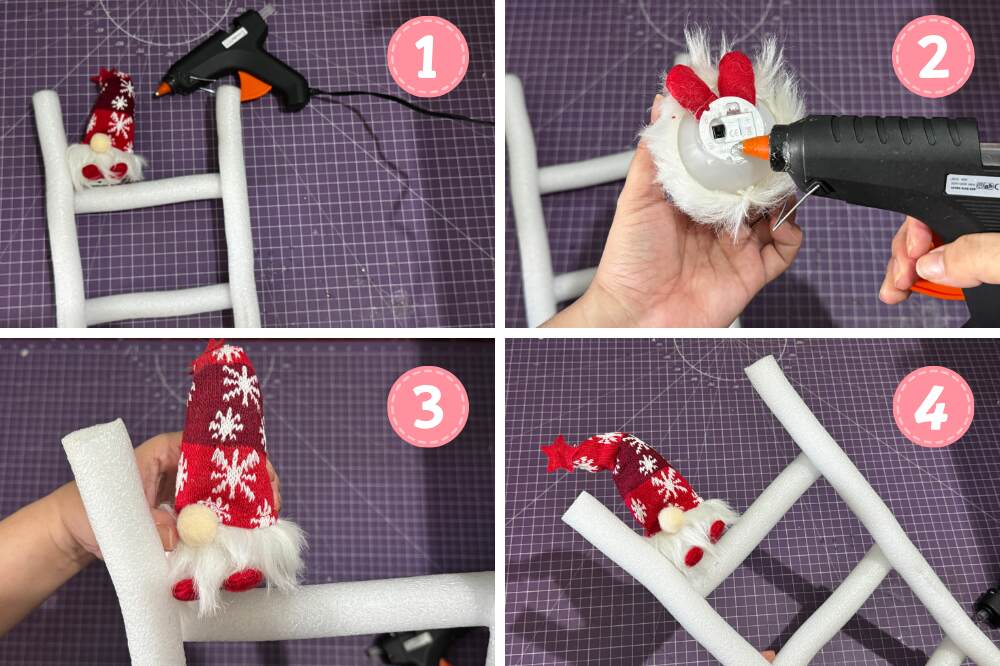
Glue the ornament you would like to add to the top of the ladder. This will spice up your DIY Christmas ladder, which you would like to add to your Christmas tree.
Santa Is Ready to Climb Your DIY Ladder!
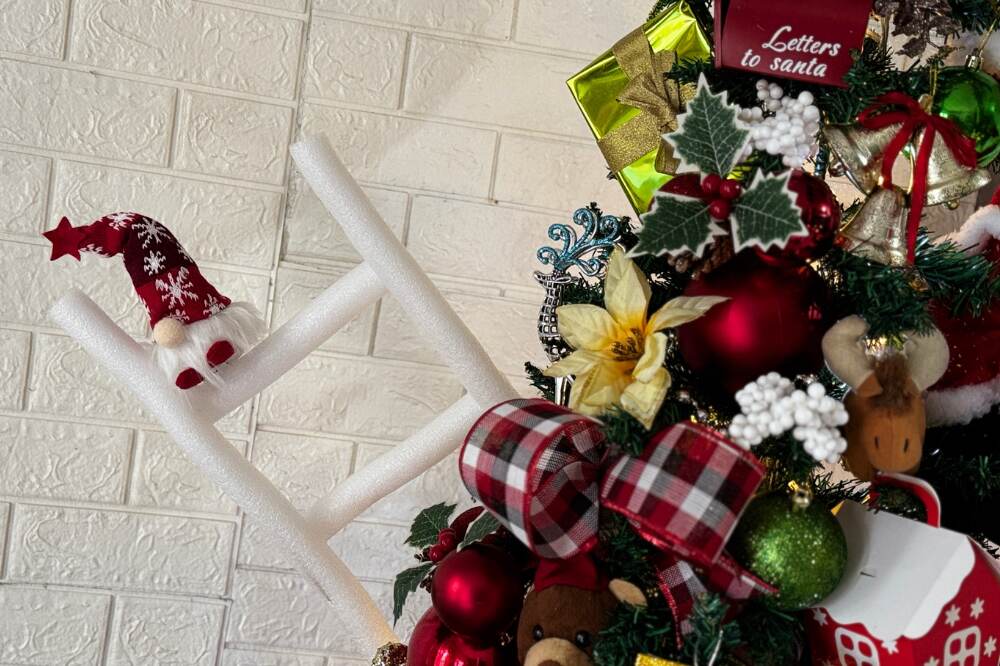
Making this is as easy as 1,2,3! It’s simple but adds a charm to your tree. You can put it in the tree itself! Just use a pipe cleaner stick and tie it to your ladder to your tree, or simply put it below your tree and add Santa Claus!
2. DIY PERSONALIZED PHOTO FRAME CHRISTMAS TREE ORNAMENT
Materials:
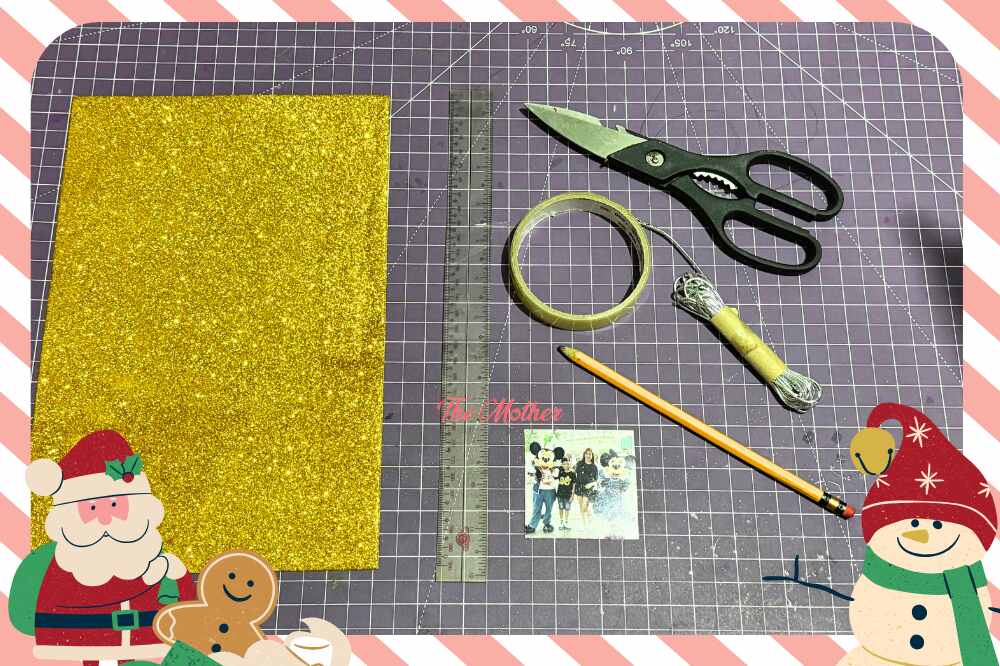
- Glitter foam paper (any color of your choice)
- Scissor
- Scotch tape
- String
- Photo (any size)
- Pencil
- Ruler
Step 1: Measure the glitter foam paper of your desired size.
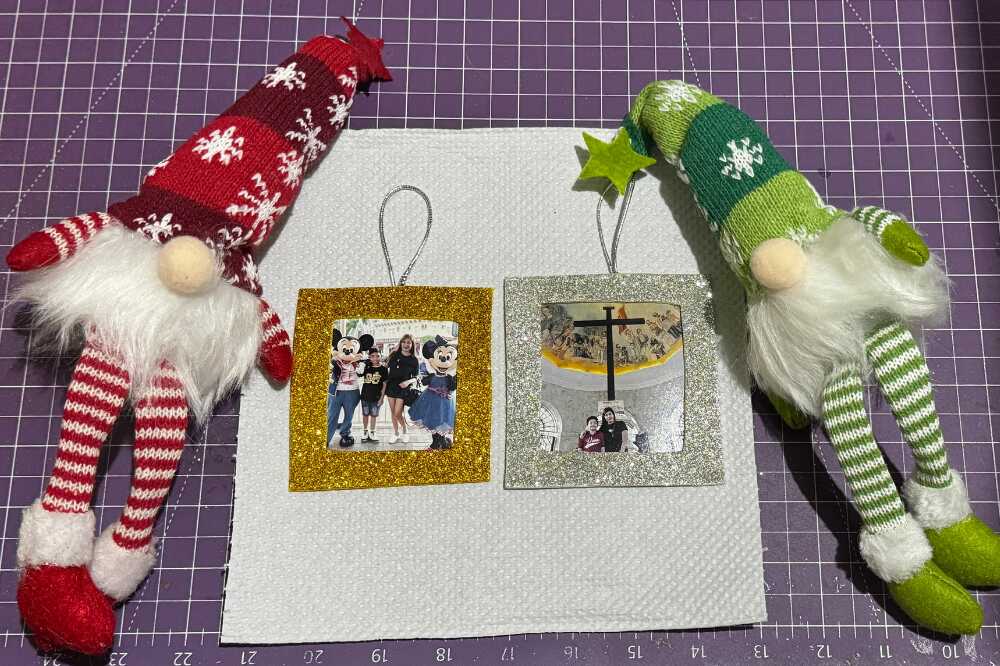
I’ve printed wallet-sized pictures of me and my son from our memorable vacation trips. The wallet-sized picture is my guide when measuring the glitter foam paper in square size. I cut the left and right sides of the picture to make it square.
At the back of the glitter foam paper, I placed the picture and adjusted the spacing of my desired size for the photo frame.
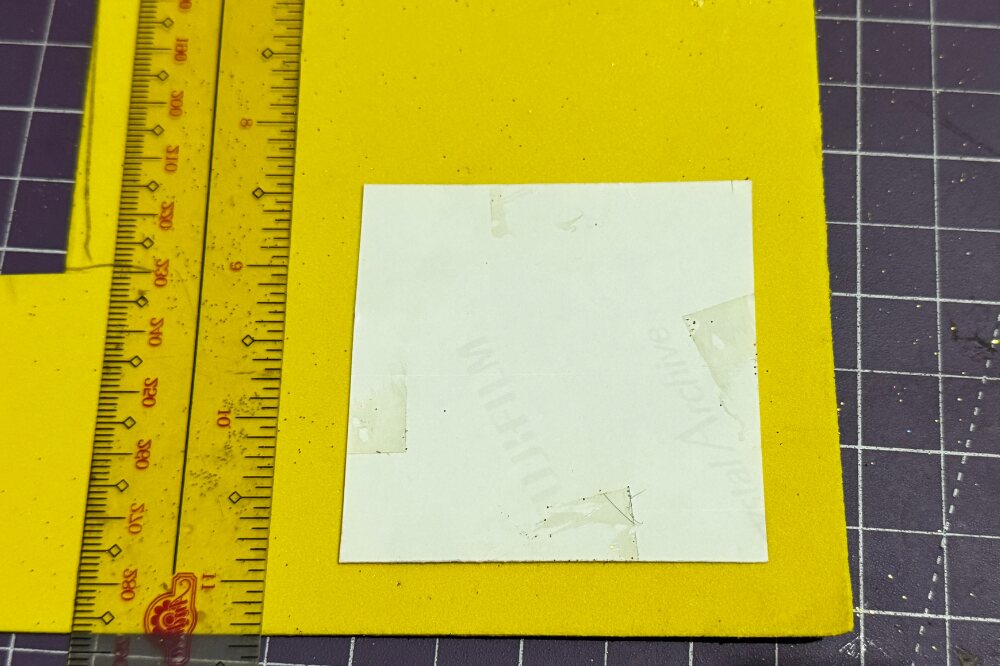
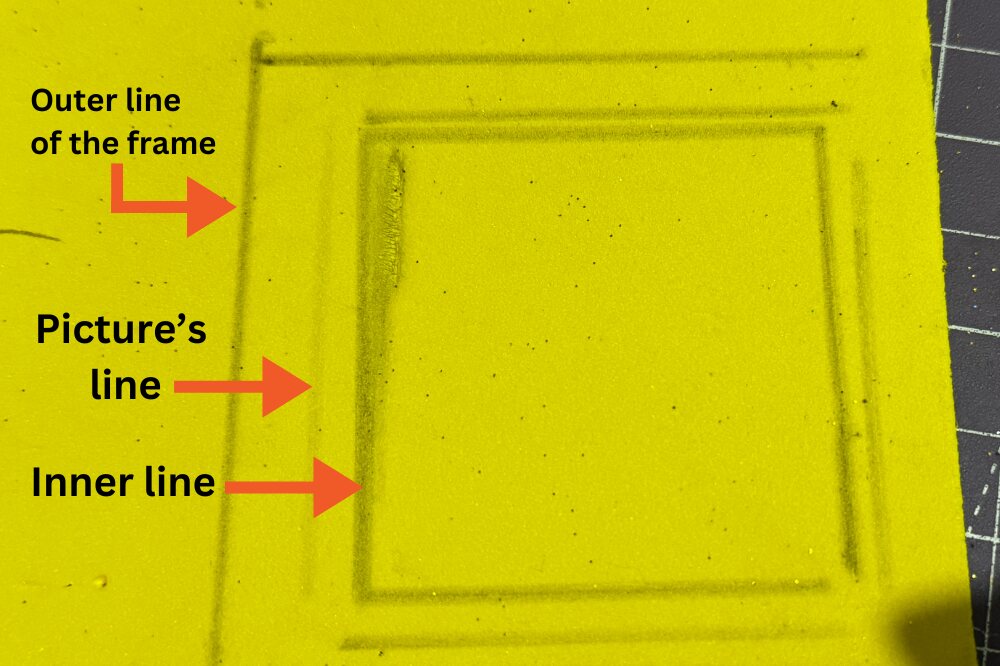
I used a pencil and ruler to draw the outer lines.
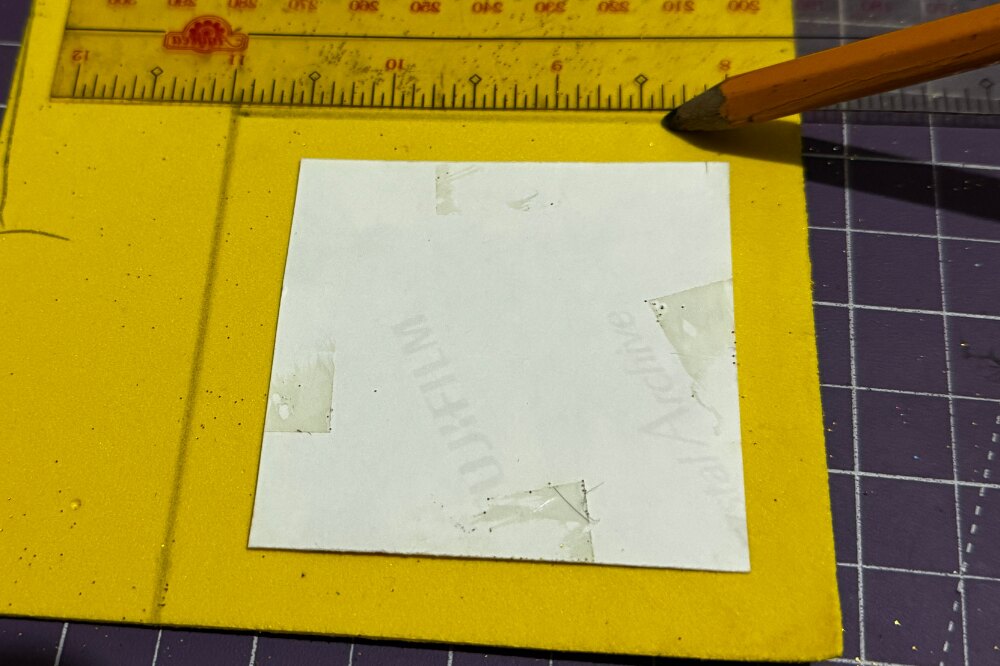
Then, draw another square of the same size as the picture. No need to use the ruler in this one since your guide will be the picture.
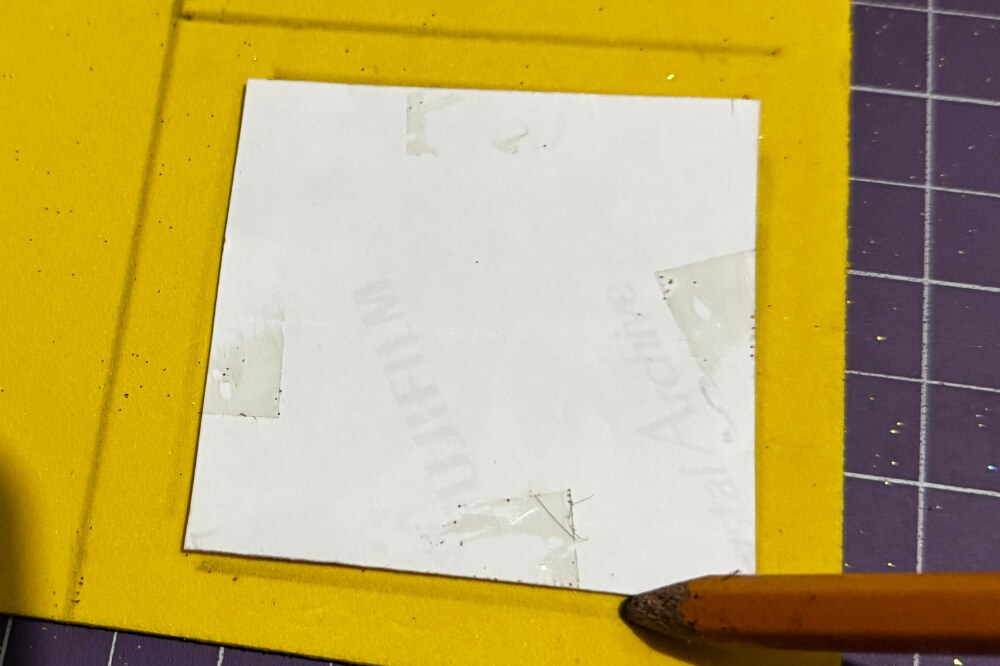
Remove the picture and draw another square inside the second square you draw. I just use my instinct to determine the size of my photo frame. When doing this, make sure to use a ruler to make it straight.
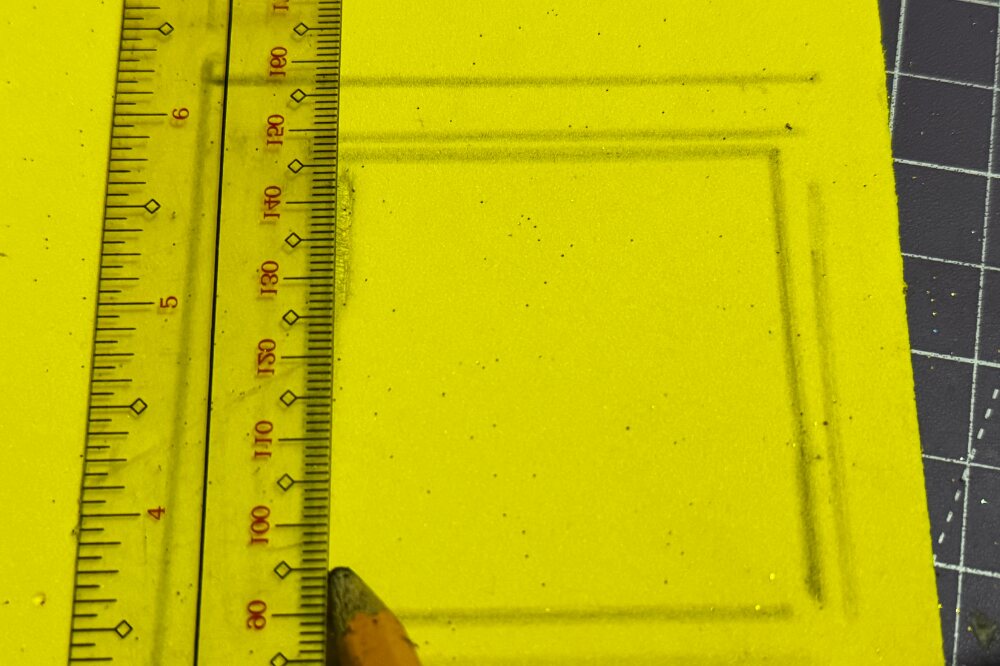
In the photo below, you will see how the square lines will look. This will be your guide in cutting your photo frame.
Step 2: Cut the glitter foam paper.
Firstly, you need to cut the first square or the outer line you draw.
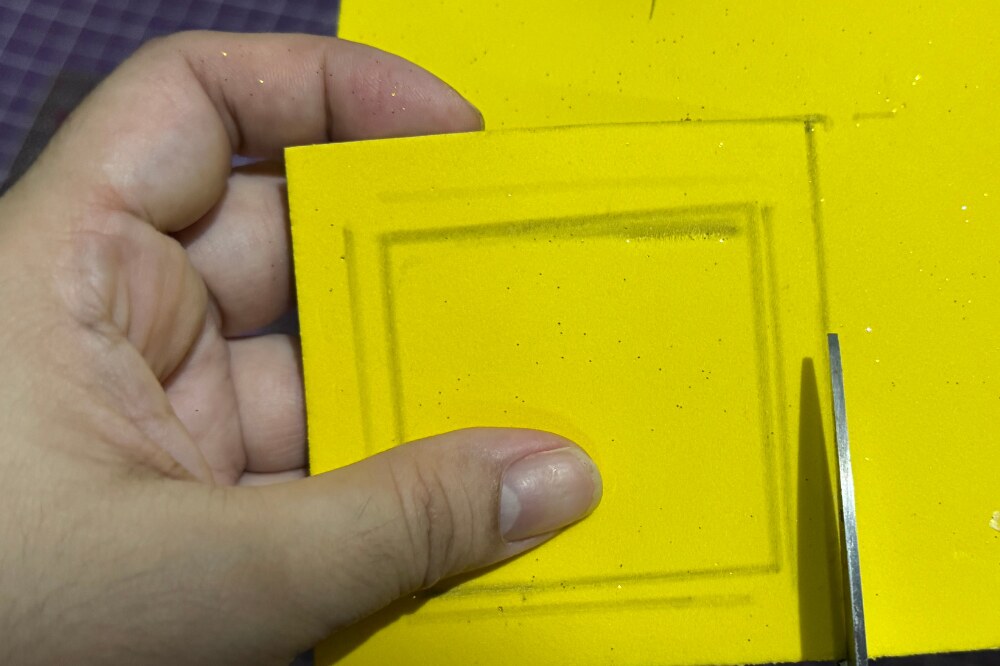
Then, cut the third square or the inner line you drew. The trick to cutting the third square without damaging the glitter foam paper is to make a hole in the center. What I did was just punch it with the scissors carefully in the middle of the glitter foam.
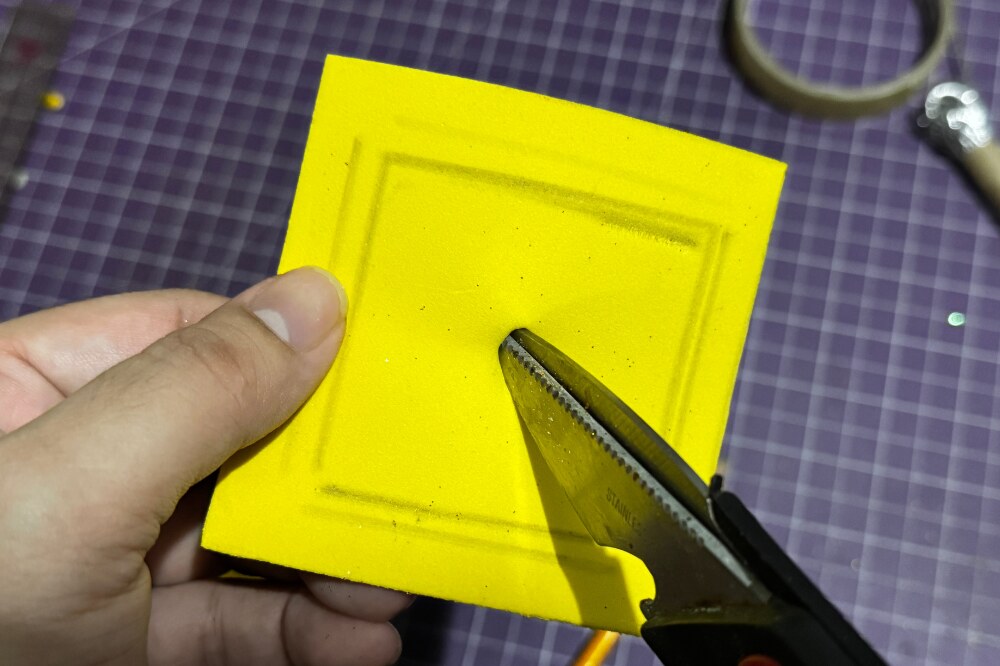
From there, you can start cutting from the hole you made, going to the corners of the square you drew.
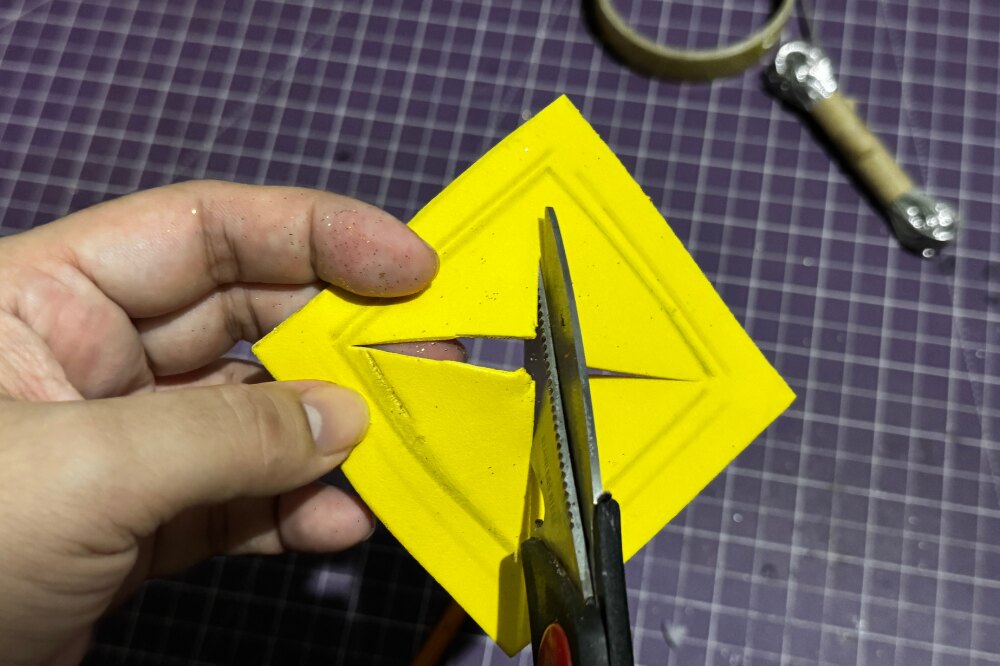
After you finish cutting each corner, you can now cut each side.
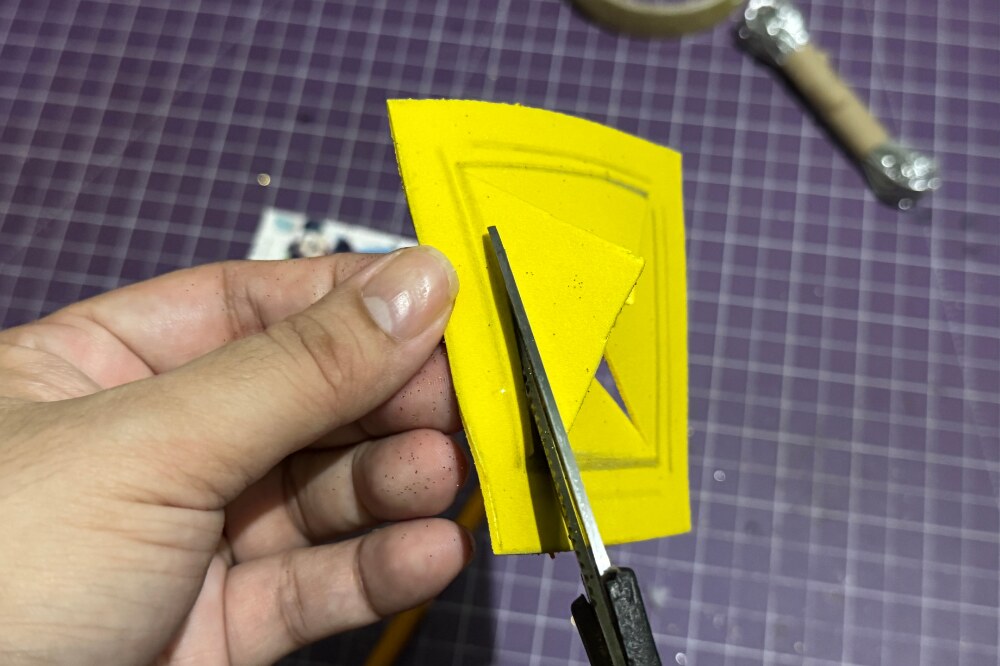
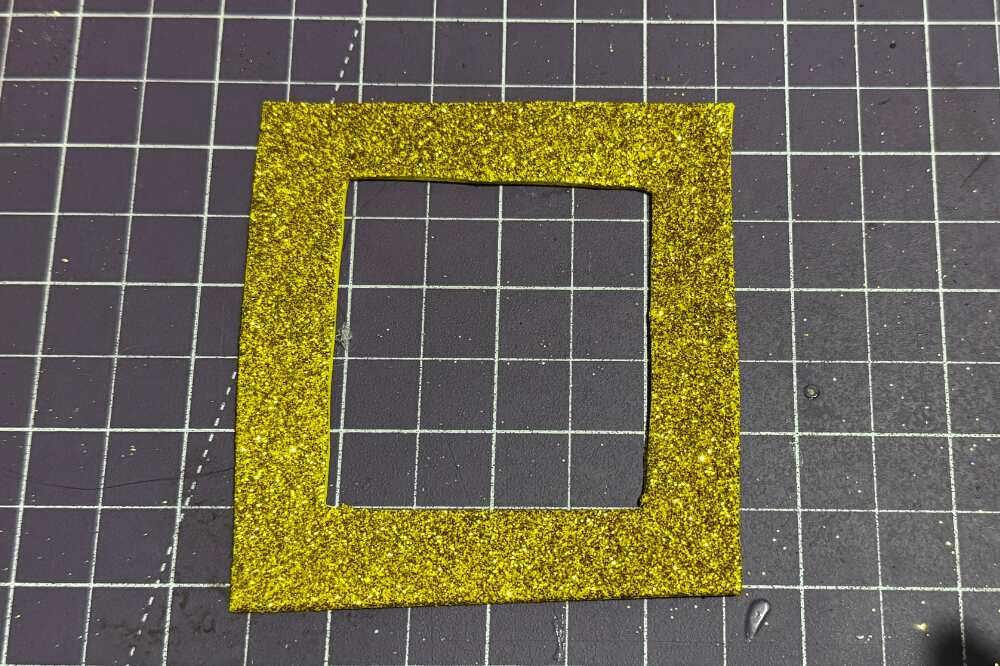
Voila! Your DIY photo frame is ready! 😀
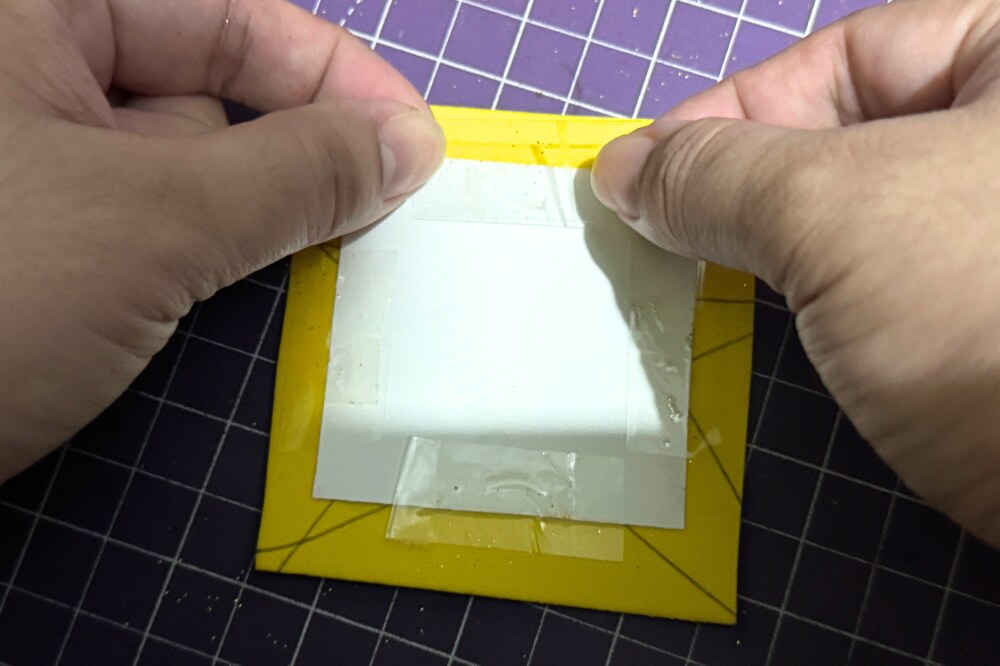
Step 2: Add the picture to the photo frame.
Place the picture behind the photo frame you just made. Make sure that the picture flips backward. Put scotch tape on each side of the picture and the frame.
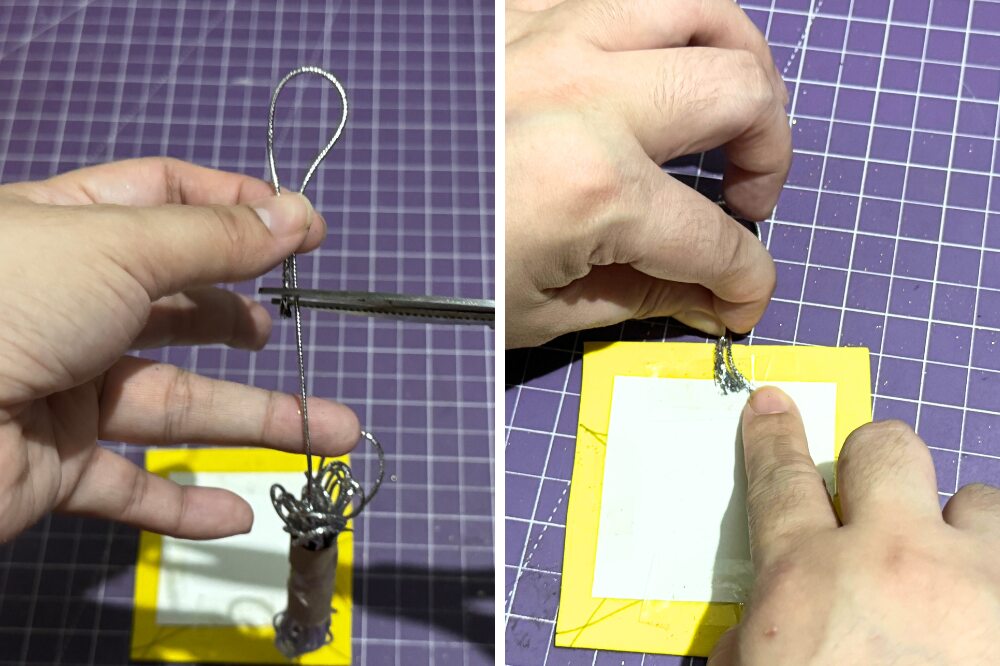
Step 4: Add the string in the photo frame.
Cut the string to your desired length and tape the string at the middle top of the photo frame.
 Christmas Tree Ornament That Is Close to My Heart
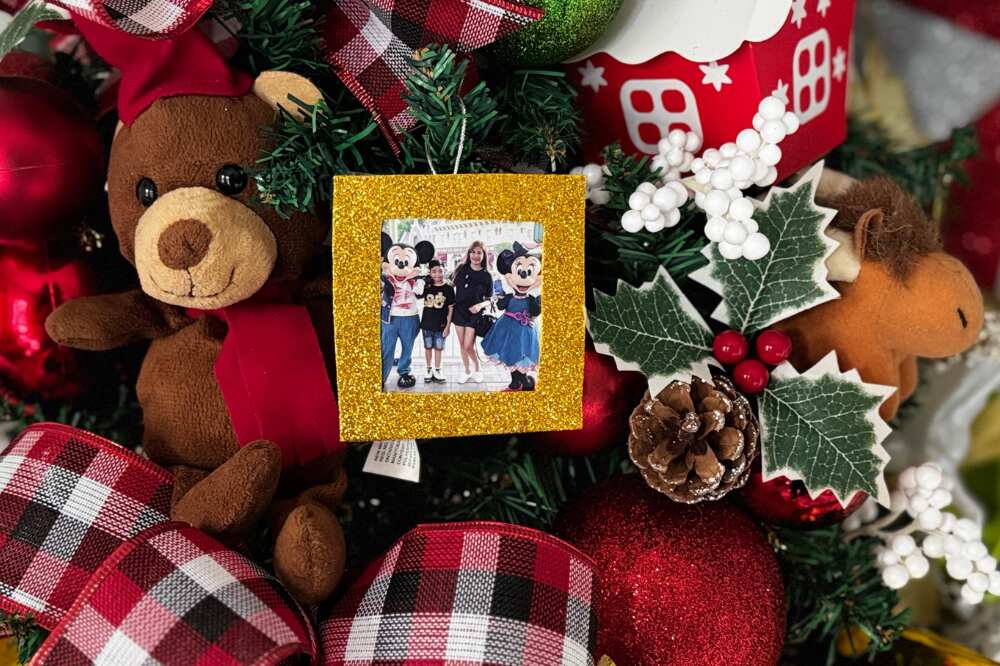
This DIY Christmas tree photo frame ornament is very special to me. It brought back happy memories of my son and me during our vacation trips. It’s great that I have it as one of the ornaments on my tree because every time I look at it, I feel HAPPINESS. All my family members and friends who visit my house look at my tree just to check out the photos, following a happy conversation because of the photos.
Feel free and proud to share your memories with your tree!
3. SIMPLE DIY CHRISTMAS TREE ORNAMENT
Materials:
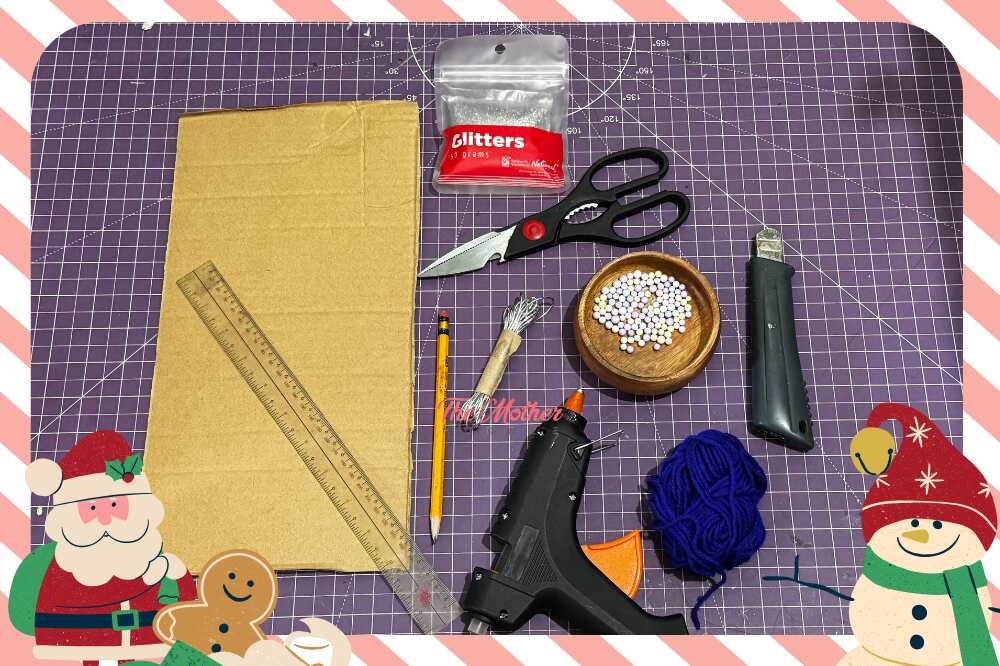
- Cardboard or used cartons
- Scissor
- Glue gun
- String
- Yarn (any color)
- Tiny colored styrofoam balls
- Cutter
- Glitter
Step 1: Draw a tree and cut your carton or cardboard.
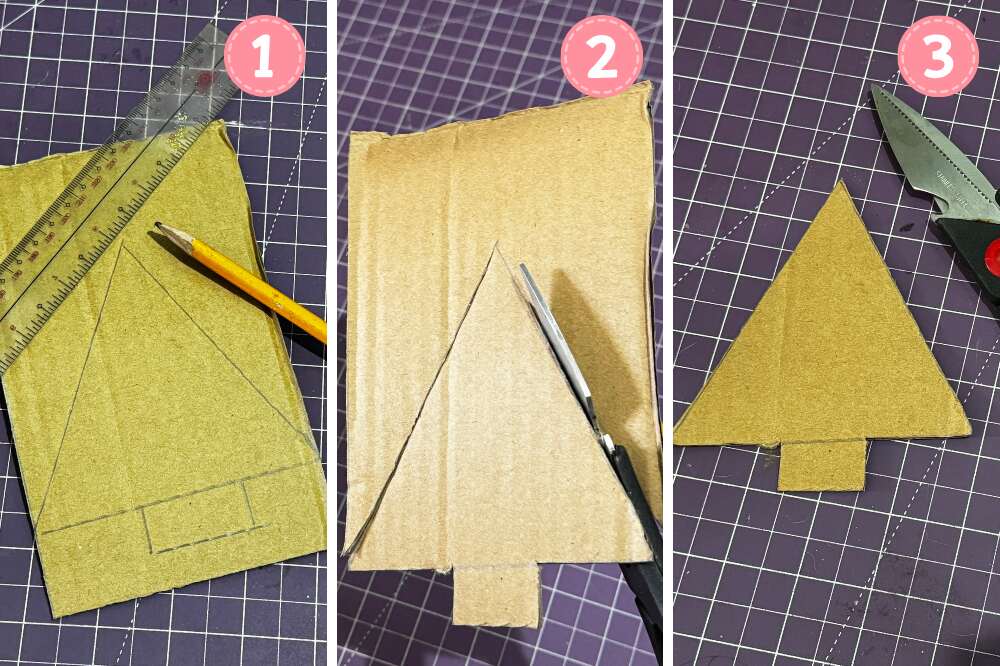
Draw a tree in a carton. The size depends on how small or big you would like your Christmas tree ornament to be. Cut your cardboard.
Step 2: Add the string and cover the tree with yarn.
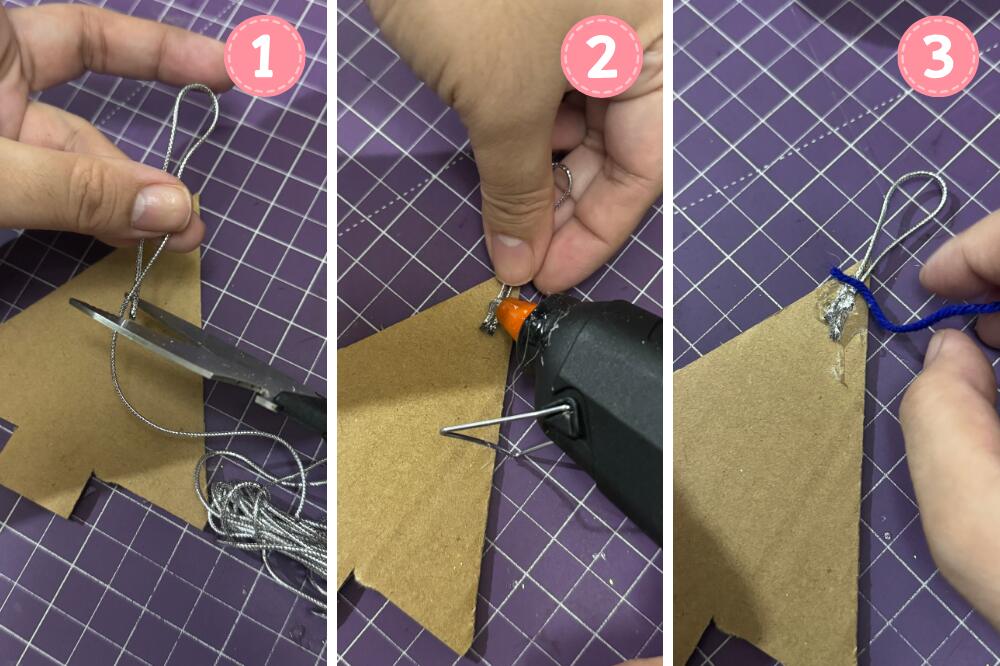
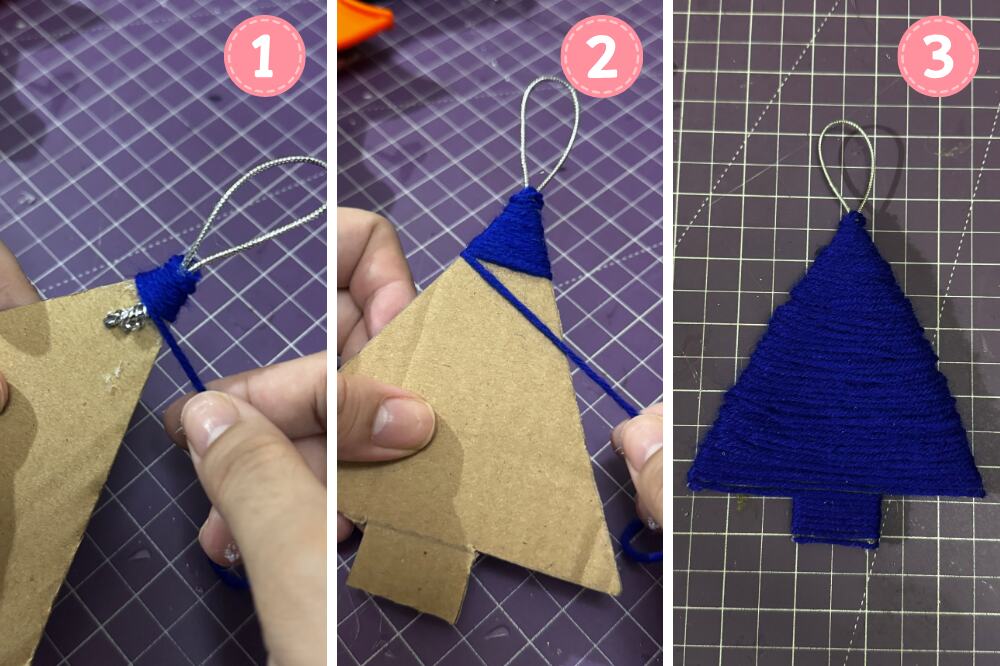
Cut the string to the desired length and glue it to the back of the tree using the glue gun and while the glue is still hot, start covering your tree with yarn at the top until you reach the bottom.
Step 4: Decorate your tree.
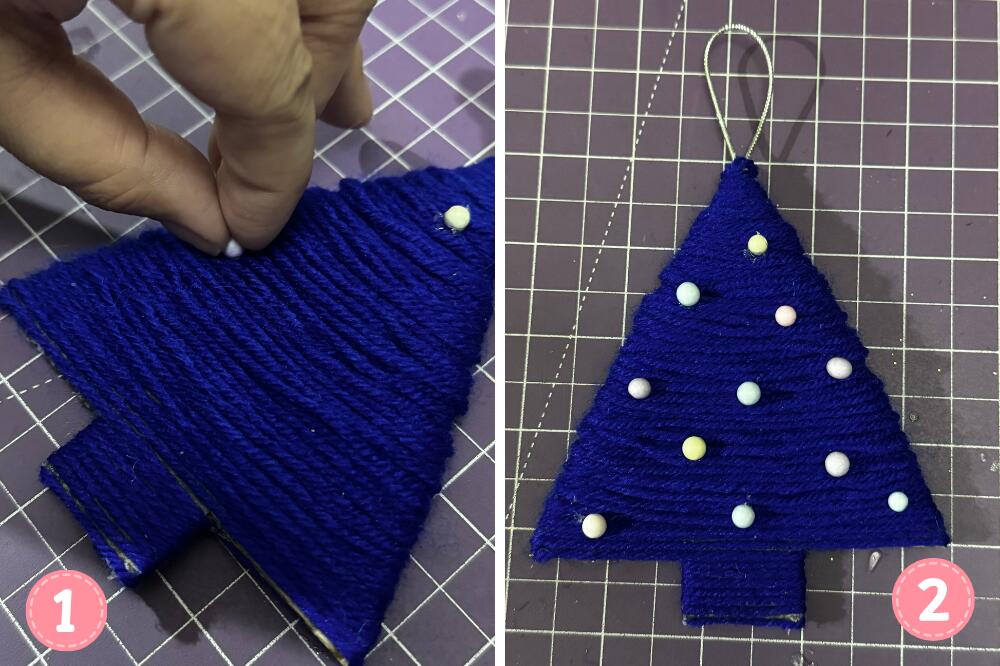
Glue the tiny styrofoam balls using a glue gun. You can also add glitter to your Styrofoam balls to make them shiny.
Note: If you have bigger styrofoam balls, you can cut them in half.
Step 5: Make the star for your tree.
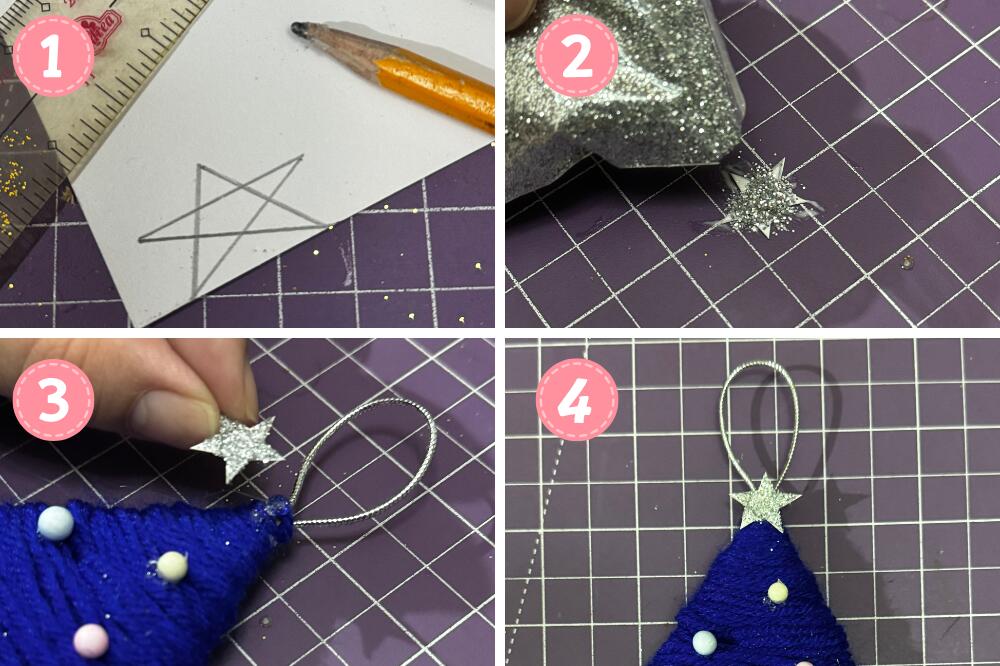
Lastly, draw a star and cut it and then pour glitter on it. Glue it on top of your tree.
A Tree to Another Tree!
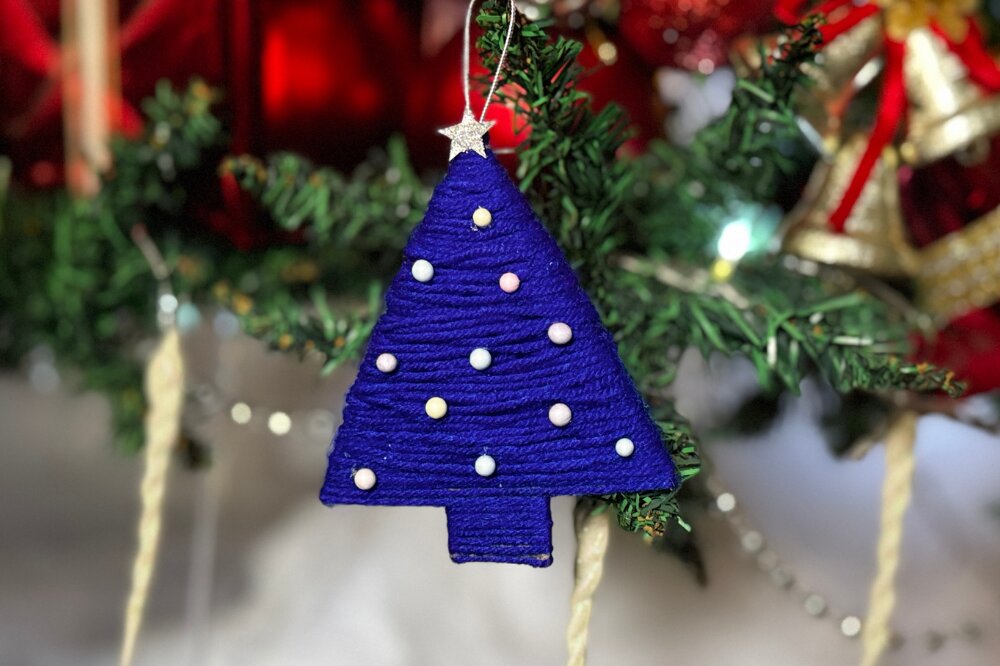
This DIY is so simple to make, and you can find the materials ready at home, especially if you have a kid who is already in school. You can add more tiny ornaments as long as they fit your DIY tree ornament.
4. DIY REINDEER CHRISTMAS TREE ORNAMENT
Materials:
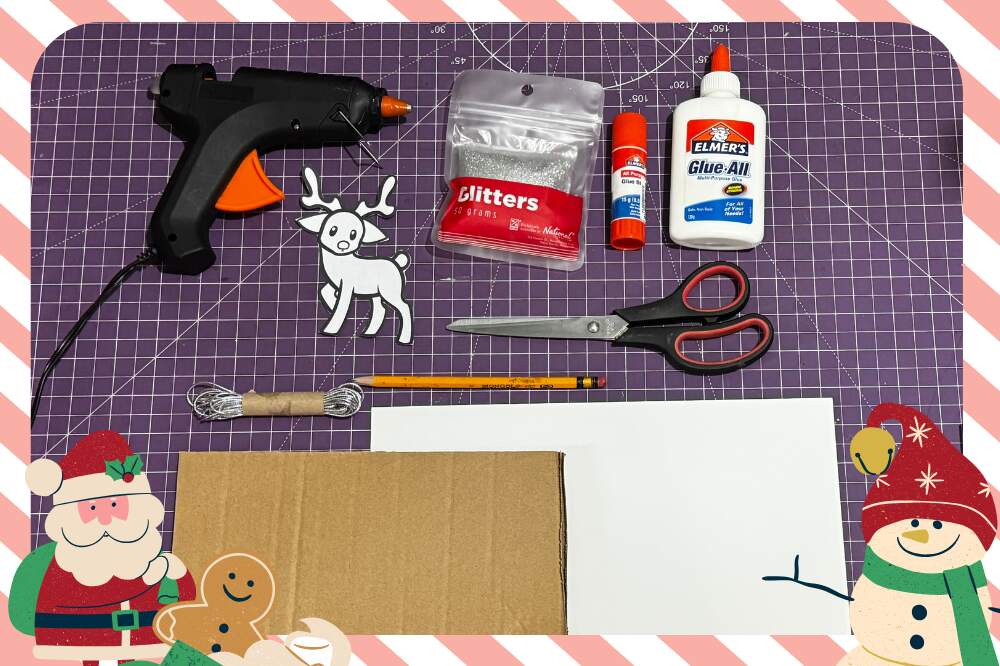
- Printed reindeer (to be used as your guide)
- Used carton or cardboard
- Scissors
- Elmer’s Glue
- Glitter
- String
- Pencil
- Thick white paper
- Glue gun
Step 1: Make your reindeer.
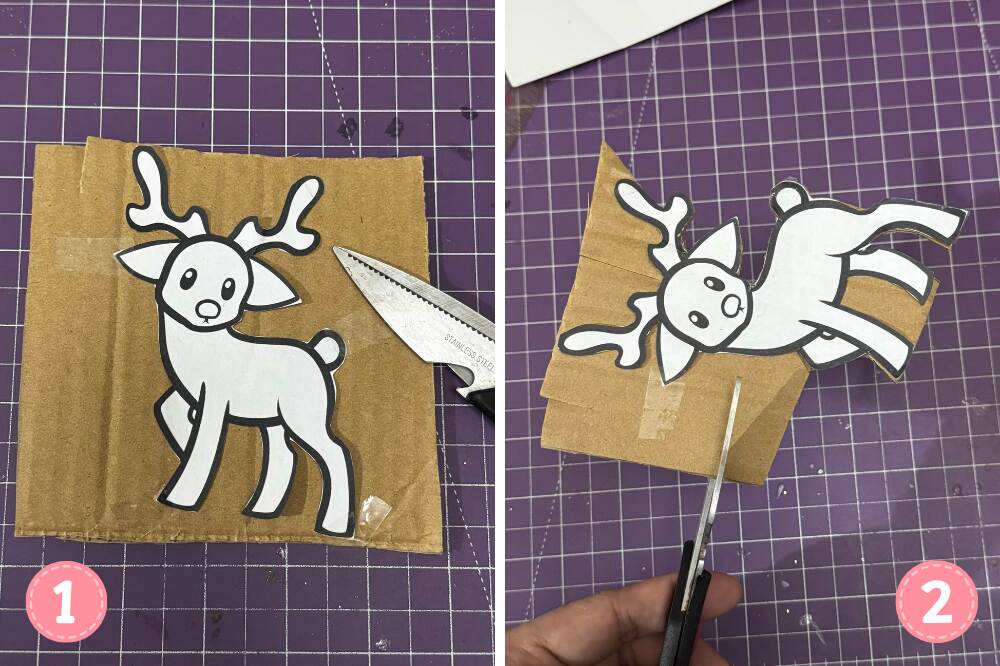
Tape your reindeer pattern in the carton and then cut your reindeer pattern. Take your time in cutting the carton.
Step 2. Cover your reindeer with white paper.
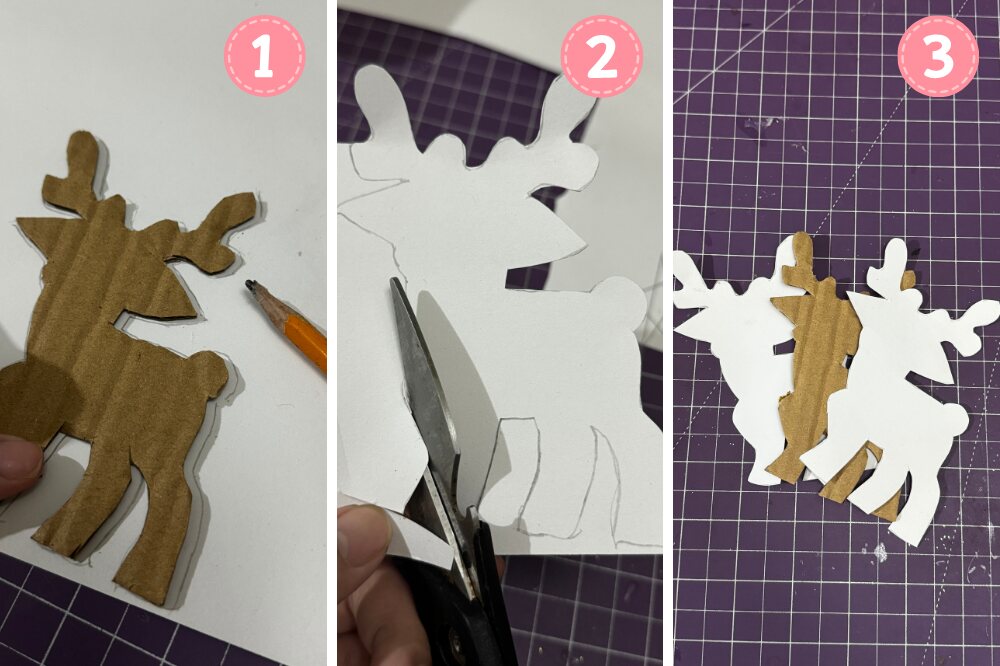
Draw a reindeer using the reindeer carton you just made as your guide in the thick white paper, then cut the paper following the reindeer pattern. Make two of these.
Glue the two papers in the reindeer carton to cover the front and back of the reindeer carton using Elmer’s Glue.
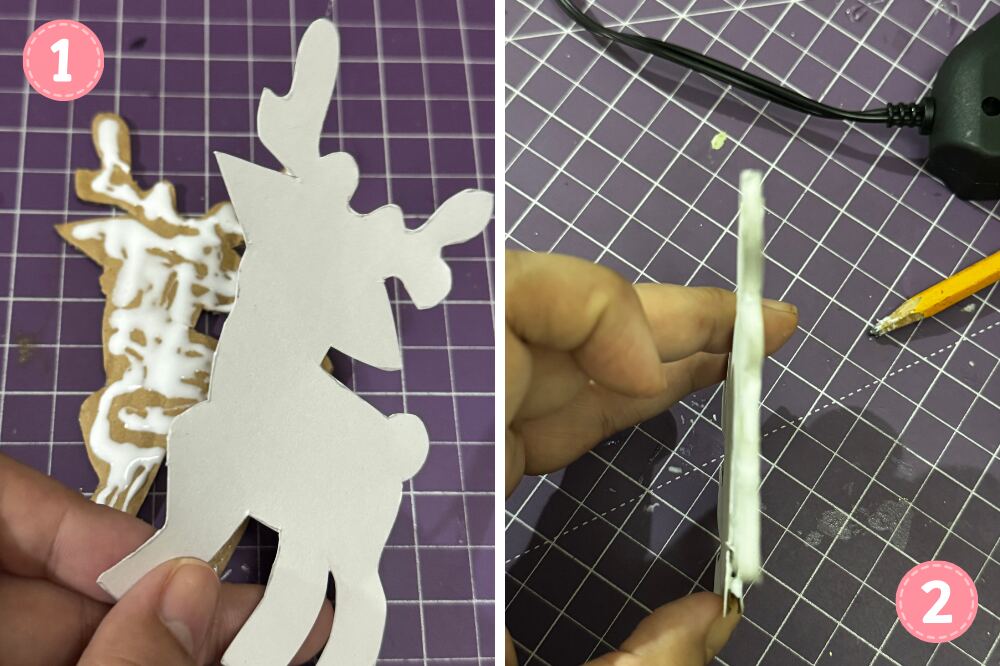
Don’t forget to cover the sides of the reindeer, too. You can cover the sides by cutting a strip of white paper and then gluing it to the sides of the reindeer. Let it dry.
Note: If you are using a white cardboard, there’s no need to cover it with thick white paper.
Step 2: Put glitters on your reindeer’s horn.
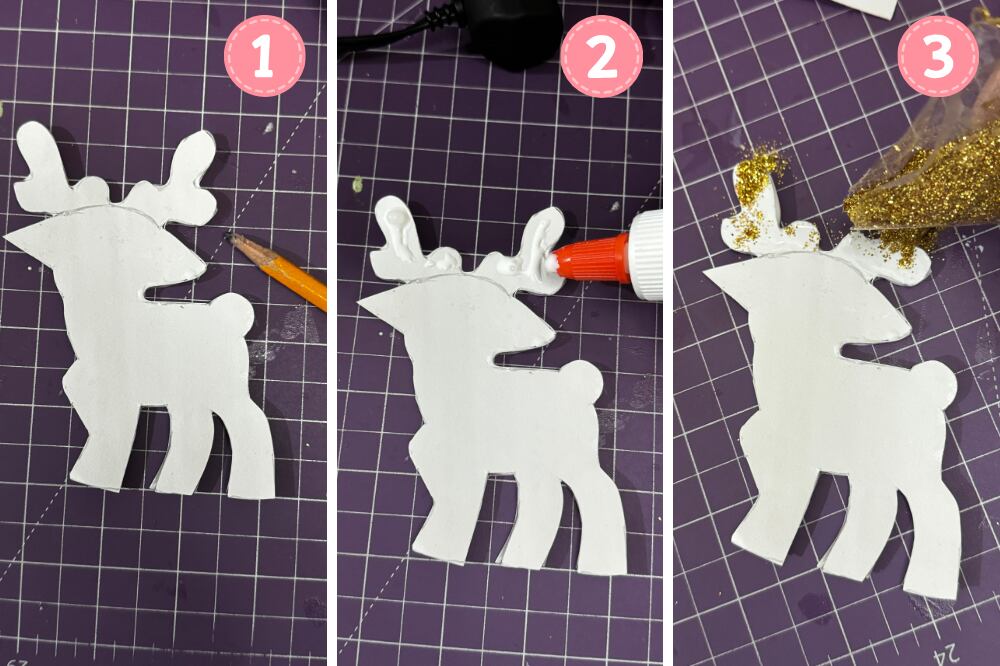
Draw a line between the reindeer’s head and its horn. This will be your guide when adding the glue to your reindeer’s horn. Add Elmer’s glue on the horn. I just used my point finger as I have no paintbrush to use at the moment. (Please wash your hands after touching the glue)
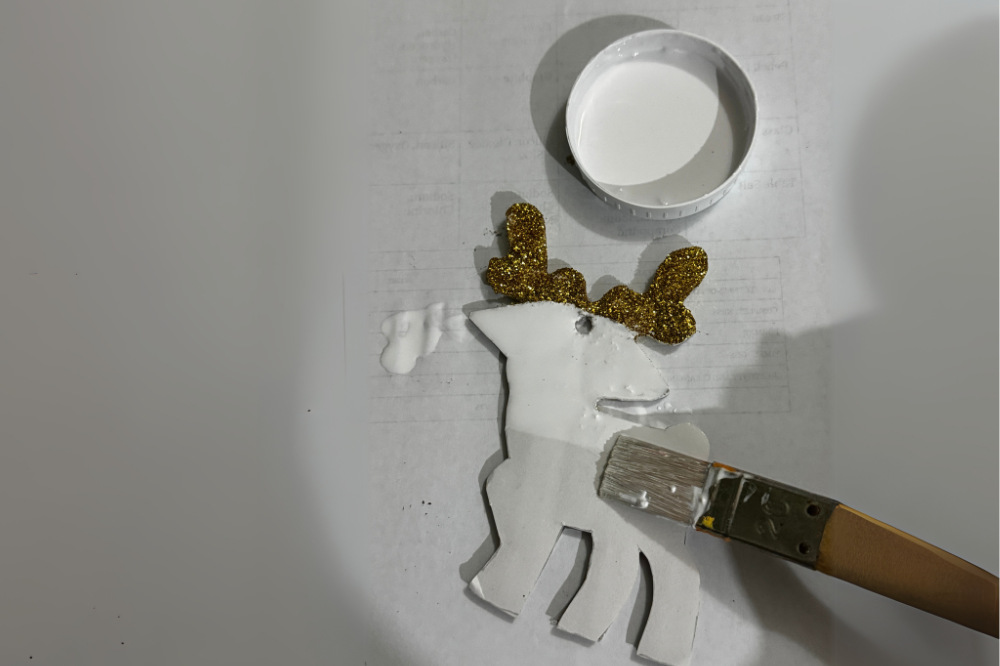
Elmer’s glue is safe for the skin for most people. Just make sure you don’t have allergies to the glue before using it with your fingers. But if you have a brush, please use it instead.
Pour a little glitter on the reindeer’s horn. Then tap the reindeer to remove excess glitter. Let it dry.
Note: If you messed up adding the glitter just like I did 😂, (the glitter spread on the body of my reindeer) try to remove the glitter by wiping it with tissue. If you can’t remove it, just paint your reindeer in white acrylic paint.
Step 3: Add the string.
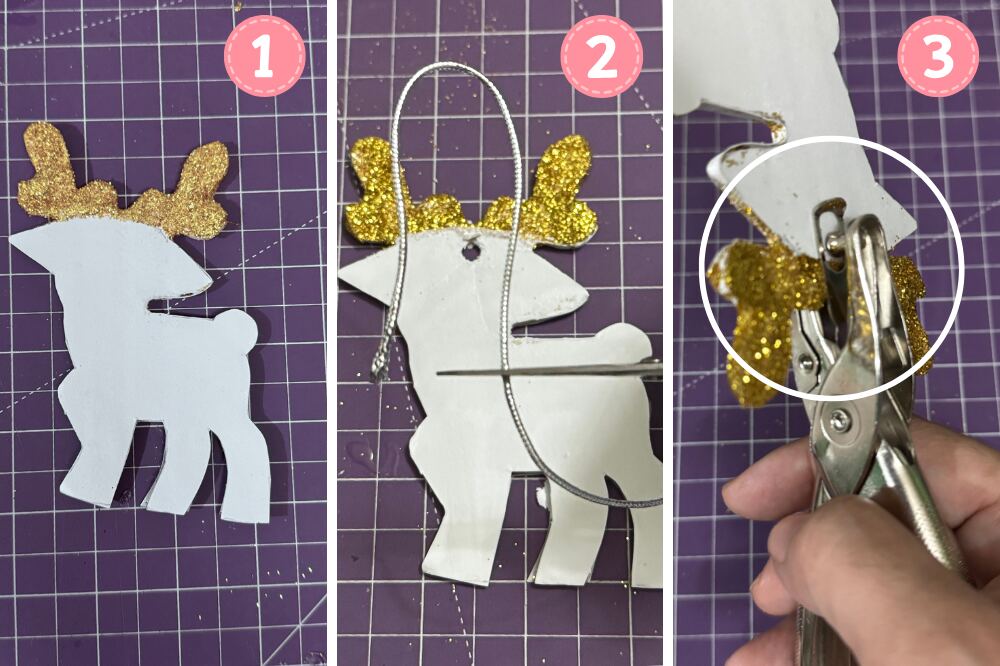
Cut the desired length of the string. Make a hole in the head of the reindeer using a puncher. Making a hole may require extra effort as we used a carton here. You may need a little help from a cutter once you punch the carton. Carefully follow the hole when cutting it with a cutter and push it with a pencil after. Tie the string in the hole.
Step 4: Add the ribbon.
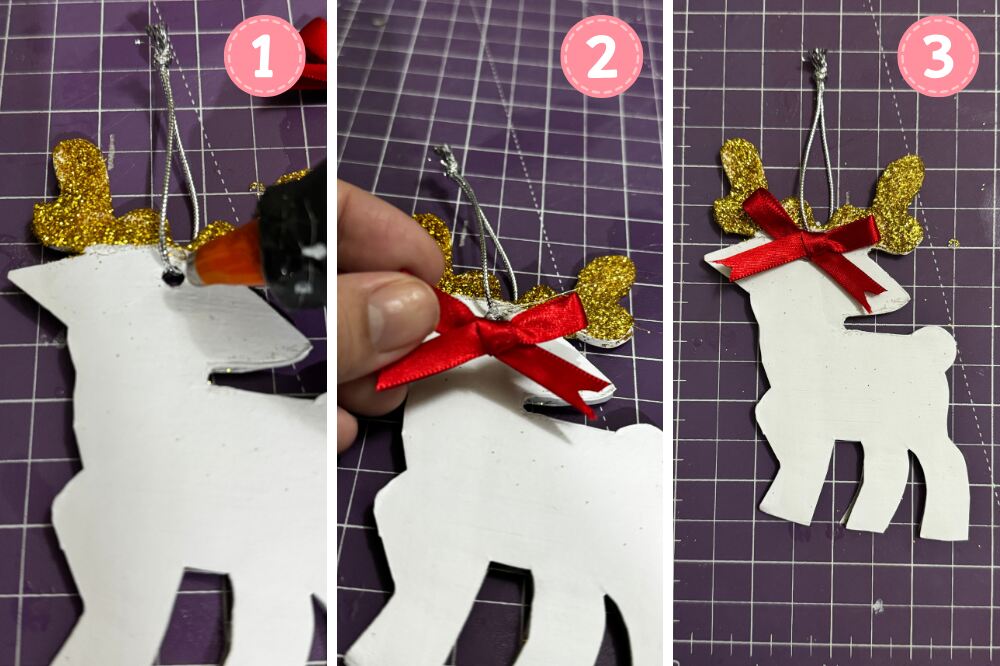
Lastly, add a small ribbon on the head of the reindeer covering the hole.
Reindeer on the Loose!
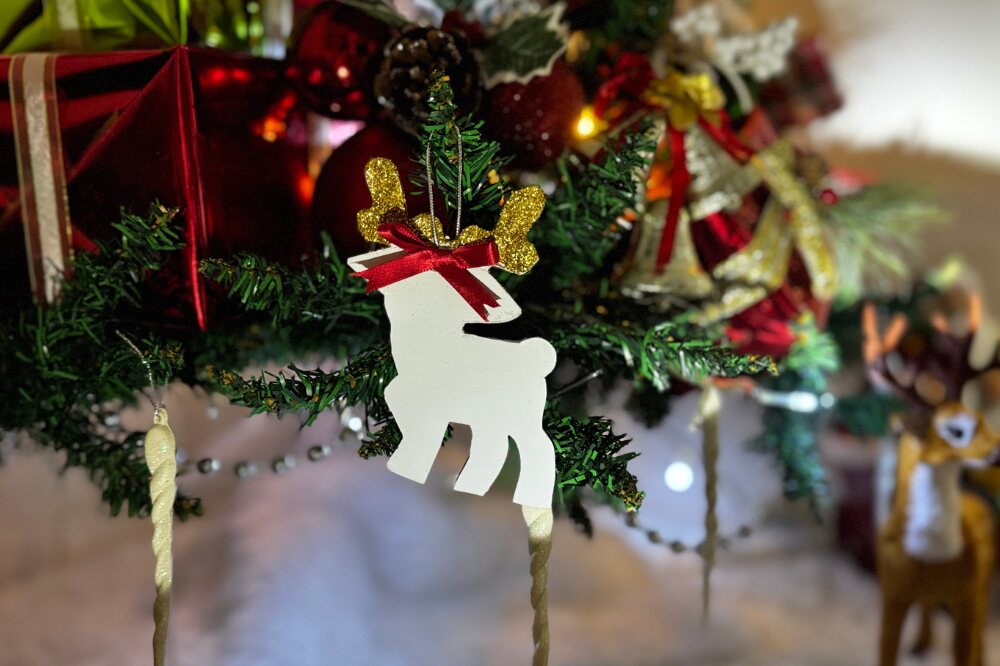
I enjoyed making this DIY with my son. It’s simple but super cute when hung in your tree and very cheap to make. Anyone can make this DIY. You can also do other Christmas characters using the same steps!
Hey, there’s more!
Do you like K-pop? Do you want to add your favorite K-pop idols to your Christmas Tree? Here’s my DIY BTS Christmas Tree Ornaments! In this tutorial, I shared how I made my favorite Korean boy band, BTS, as my Christmas tree ornaments. You can just replace it with your favorite K-pop idols and still follow the guide. 😀
The Christmas Tree Is Up and Ready to Twinkle!
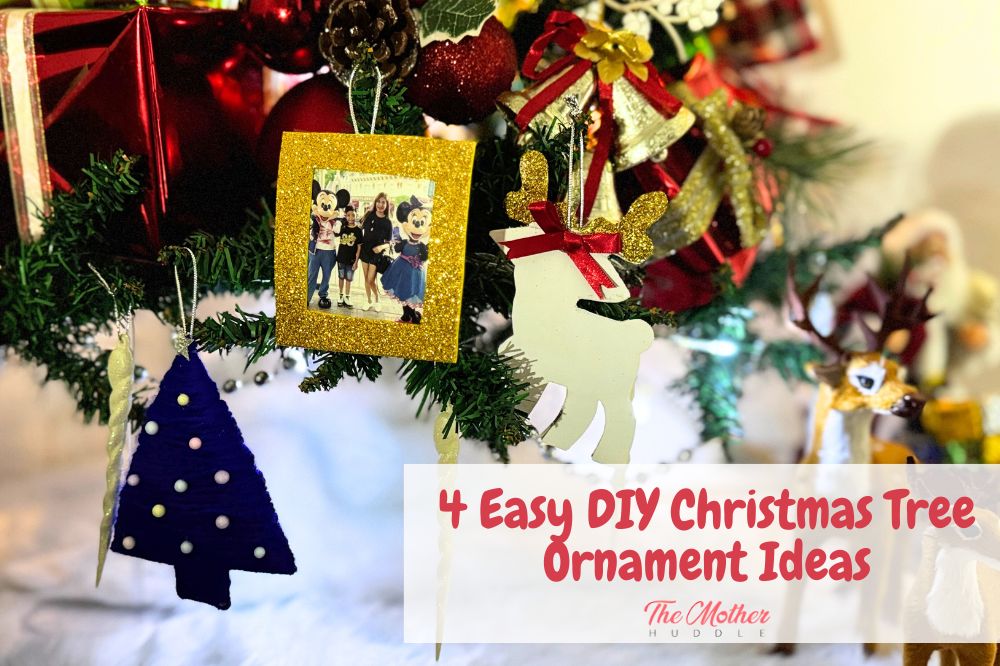
And there you have it! Four easy DIY Christmas tree ornament ideas to make your tree extra special this holiday season! These ornaments add a personal touch to your tree and a great picture for the gram!
If you try any of these ideas, I’d love to see your creations! Share your photos and videos and tag us on Facebook. Don’t forget to follow us on our Facebook page for more DIY projects!
Happy crafting, and may your holiday season be merry and bright!

 Christmas Tree Ornament That Is Close to My Heart