
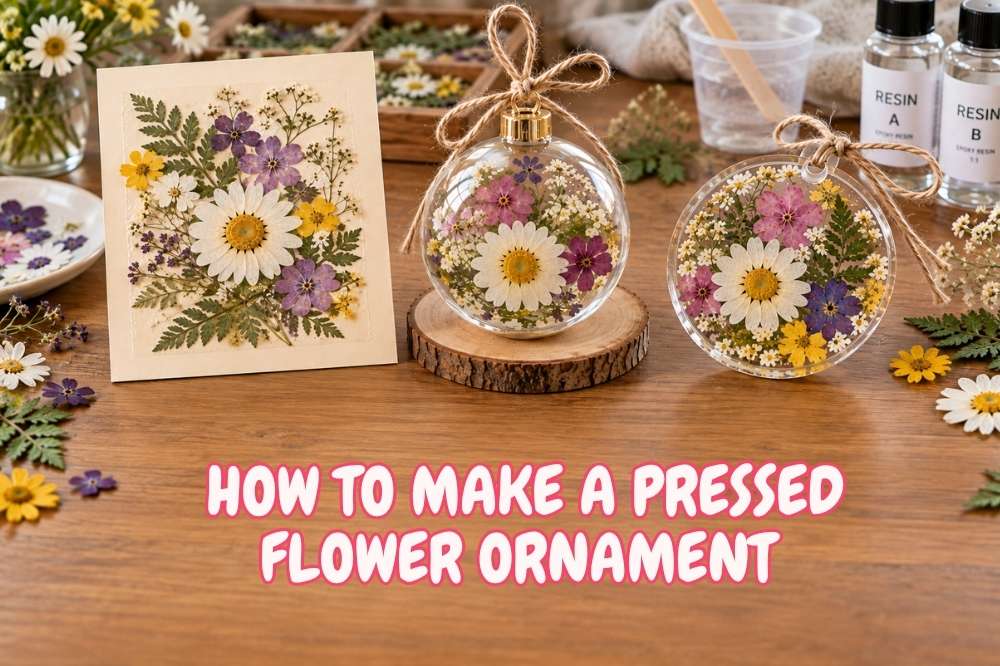
You’ve seen the version on Pinterest: a delicate pressed pansy suspended in a glass bauble, looking effortless and permanent. Then you try it with flowers from your own yard, and three weeks later the petals have gone brown at the edges, the glue has yellowed, and the whole thing looks like it’s decomposing rather than preserved. The gap between “cute craft photo” and “ornament that survives a full year on your shelf” is almost entirely about two decisions most tutorials skip: which flowers you start with, and how you seal them.
Here’s the short version: a pressed flower ornament that actually lasts comes down to picking flat, low-moisture flowers, pressing them until they’re completely dry (not just flat), and sealing them in a way that blocks light and air rather than just gluing them under glass and hoping. Get those three things right and the craft-fair version and the real version stop being different things.
The Myth: Any Pressed Flower Looks Good Under Glass
The common assumption is that pressing flattens a flower and glass or resin does the rest of the preservation work. In reality, the flower itself has to be right before it ever goes near a sealant. Thick, water-rich flowers like begonias and portulaca hold onto moisture that no amount of pressing removes completely, so they can mold or rot from the inside even after they look dry on the outside. Single-layer, flat-faced flowers, pansies, violas, zinnias, delphiniums, and small roses split in half before pressing, dry evenly and hold their shape because there’s simply less material for moisture to hide in. Flower choice, not the pressing method, is where most pressed flower projects fail.
Choosing and Pressing Your Flowers
Pick in the late morning, after dew has evaporated but before the heat of the day. Flowers picked wet take longer to press and are more likely to mold partway through.
Choose flowers close to full bloom, not past it. A flower already fading loses more color during pressing than one caught at its peak.
Best choices: pansies, violas, zinnias, delphiniums, ferns, small daisies, and roses (sliced in half lengthwise to remove bulk before pressing).
Avoid or press with extra care: begonias, portulaca, and other fleshy, high-moisture flowers. If you want to use a thicker flower anyway, silica gel drying (burying the bloom in silica gel crystals rather than flat-pressing it) handles the moisture better than a book or press ever will, though it changes the result from flat to lightly three-dimensional.
The Four Pressing Methods, Compared
| Method | Time | Quality | Best For |
|---|---|---|---|
| Book press | 2-4 weeks | Excellent color and texture retention | Anyone with time and no rush on the project |
| Wooden flower press | 2-4 weeks | Excellent, more even pressure than a book | Frequent pressers who want consistent results |
| Microwave | 1-2 minutes (in 10-25 second bursts, cooling between) | Good, strong convenience-to-quality tradeoff | When you want to use flowers today |
| Iron | A few minutes | Lowest quality, prone to wrinkling the parchment and rippling petals | Only when nothing else is available |
For the microwave method, sandwich the flower between two sheets of parchment paper, weigh it down lightly with a book, and microwave in a 25-second burst followed by 10-second bursts, letting everything cool completely between each one. Rushing this step is the most common cause of scorched or brittle petals.
Whichever method you use, change the absorbent paper every few days if you notice any moisture, and keep the whole setup somewhere dry. Humidity is the actual enemy here, not time. A book press in a damp basement will mold before a microwave-pressed flower ever gets the chance to.
Turning Pressed Flowers Into an Ornament: Three Methods
This is the step where most tutorials pick one method and don’t mention the other options, so here’s an honest comparison of the three real approaches.
| Method | Durability | Difficulty | What to Know |
|---|---|---|---|
| Mod Podge on cardstock/wood | Lowest, can yellow over time | Easiest | Best for a quick, low-cost project; needs a protective topcoat to last past one season |
| Glass ornament or frame | Medium to high | Easy | No resin skills required; relies on a tight seal to keep out moisture |
| Resin casting | Highest, can last indefinitely | Most involved | The most durable option, and the closest to a true “lasts all year” result |
Method 1: Mod Podge (Fastest, Least Durable)
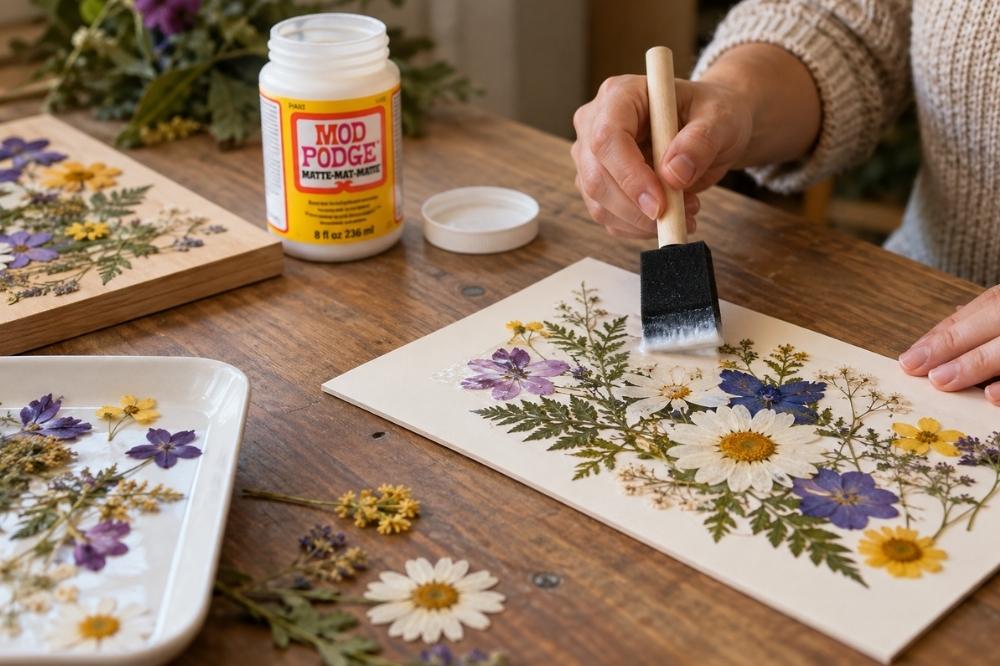
Arrange your pressed flowers on cardstock, wood, or paper. Apply a thin layer of Mod Podge on top with a brush or foam applicator, let it dry completely, then apply a second coat. If the paper curls while drying, flatten it under a book with wax paper protecting the surface. This method is the easiest entry point, but plain Mod Podge alone isn’t UV-resistant or airtight, so a piece made this way is better suited to indoor display, out of direct light, than to a tree ornament that gets packed away and unpacked year after year.
Method 2: Glass or Plastic Ornament (No Resin Required)
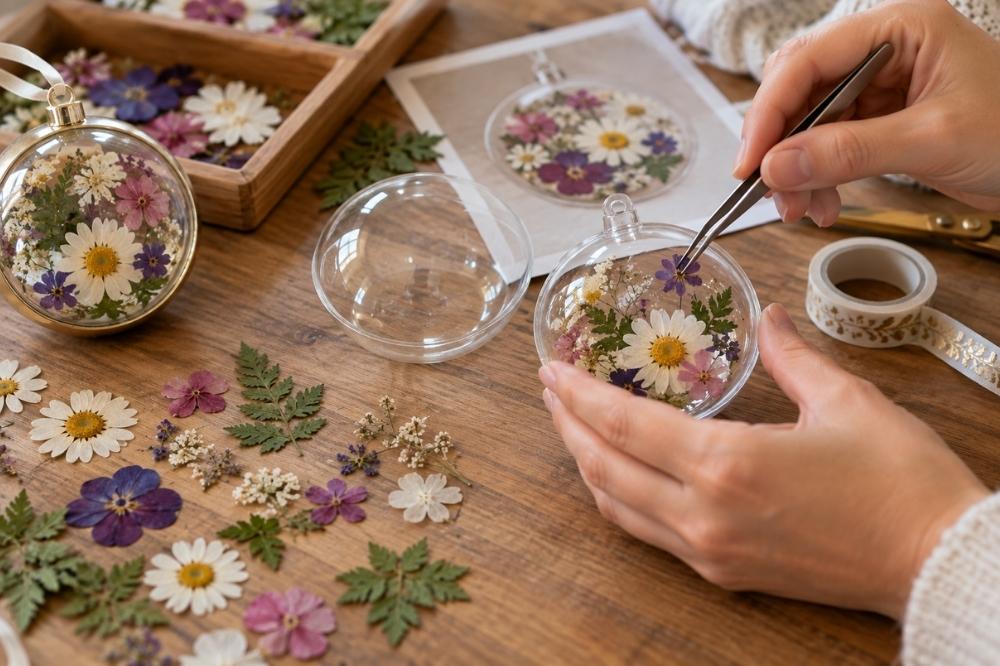
Clean both pieces of a two-part glass or acrylic ornament thoroughly. Arrange your flowers on one half using tweezers, working from a reference photo if you planned the layout in advance. Press the second half into place and seal the seam with decorative tape or a metal frame edge. This traps the flowers in a sealed, low-oxygen environment without requiring any resin work at all, and it’s the best middle-ground option if you want something that survives being boxed up between holiday seasons.
Method 3: Resin Casting (Most Durable)
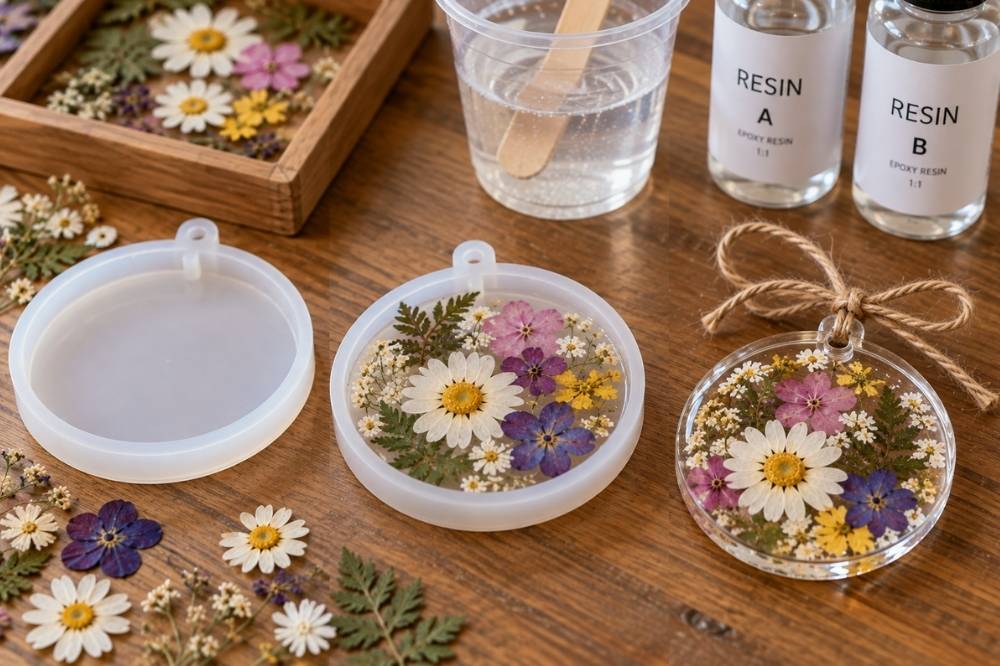
This is the method that actually earns the “lasts all year, every year” claim, and it’s worth doing right:
- Seal your flowers first. Before they touch resin, brush pressed flowers with a light coat of Mod Podge or a clear-drying craft glue. Skipping this step is the single most common reason resin-cast flowers turn washed-out and translucent instead of staying vivid.
- Mix your resin according to the package ratio (many craft resins run 2:1 or 1:1, part A to part B). Measuring by weight on a small scale is more accurate than eyeballing the included cups.
- Pour a thin base layer into your mold and let it sit until tacky, roughly 30 to 45 minutes.
- Place your sealed flowers with tweezers onto the tacky base layer, arranging them exactly as planned.
- Pour a thin covering layer over the top, working in small batches so the resin doesn’t thicken before you can clear bubbles.
- Watch for bubbles for the next 30 minutes, gently guiding them to the surface with a toothpick as they rise. Doming resin traps bubbles more than flat-pour resin, so budget extra attention if you’re using it.
- Let it cure fully, about 24 hours, before unmolding.
- Sand any rough edges with fine (600-grit or higher) sandpaper, then attach a hanging bail with E6000 glue rather than super glue, which tends to fail on cured resin over time.
Keeping the Color From Fading
Even a well-sealed ornament will fade eventually if it’s displayed wrong. Unsealed pressed flowers can last decades in the right conditions, but light exposure is what actually breaks them down: UV rays bleach pigment fast, and reds and blues in particular tend to shift toward brown or muddy mauve well before the flower itself falls apart. A handful of habits make a real difference:
- Keep finished ornaments out of direct sunlight when displayed, and store them somewhere dark and dry the rest of the year rather than in a hot attic or humid garage.
- Use drawing inks rather than acrylic paint if you want to boost or touch up flower color before sealing; acrylic tends to look flat and fades unevenly under resin.
- Store in an airtight container between seasons. Moisture during off-season storage is a bigger threat to longevity than a few months on display ever is.
Troubleshooting
My petals look see-through inside the resin. This almost always means the flower wasn’t sealed with Mod Podge or craft glue before casting. Resin pulls moisture and natural oils out of unsealed petals, leaving them translucent instead of vivid.
There’s a cloudy bubble I can’t get rid of. Small bubbles trapped early are easiest to clear with a toothpick while the resin is still workable. Once it thickens, a bubble is essentially locked in; prevention beats fixing it after the fact.
My pressed flowers went moldy before I even got to the ornament stage. This points back to moisture at the pressing stage, either the flower wasn’t fully dry when picked, the pressing environment was humid, or the absorbent paper wasn’t changed often enough. Start with drier flowers and a drier room next time rather than troubleshooting the ornament itself.
The paper curled while drying with Mod Podge. Flatten it immediately under a book with wax paper in between. Most pieces relax further once framed or mounted.
Which Method Should You Actually Use?
If you want something quick and low-stakes, Mod Podge on cardstock gets you a finished piece in an afternoon; just don’t expect it to survive years of holiday storage. If you want no-mess durability without learning resin work, a sealed glass ornament is the best trade-off available. If you actually want the “lasts all year, every year” version you saw and wanted to recreate, resin is the only method that earns that claim, and the extra 30 minutes of attention during curing is what separates a cloudy, bubble-filled failure from the ornament you were picturing in the first place.
Frequently Asked Questions
How long do pressed flowers actually last once sealed?
Properly sealed in resin, they can last indefinitely, with some yellowing possible over many years. Unsealed pressed flowers stored in dry, dark conditions can last decades on their own; historical pressed specimens have survived for centuries. Light and humidity, not time itself, are what cause them to degrade.
Can I use fresh flowers straight from the garden without pressing them first?
No. Fresh flowers still contain moisture that will mold or rot inside any sealed ornament. Full pressing and drying, whichever method you choose, is a required step, not an optional one.
Why did my flowers turn brown or lose their color?
Some color loss during pressing is normal, especially for reds and blues, which shift toward brown or mauve faster than other pigments. Picking flowers at peak bloom, pressing them promptly, and keeping the finished piece out of direct sunlight all slow this process significantly, though some shift over time is expected even with perfect technique.
Is resin or Mod Podge better for a beginner?
Mod Podge is the easier, faster starting point and a reasonable choice for a first project or a piece that won’t be handled much. Resin takes more setup and patience but produces a noticeably more durable result, which matters if the ornament is going into a holiday storage box every year rather than staying on permanent display.