
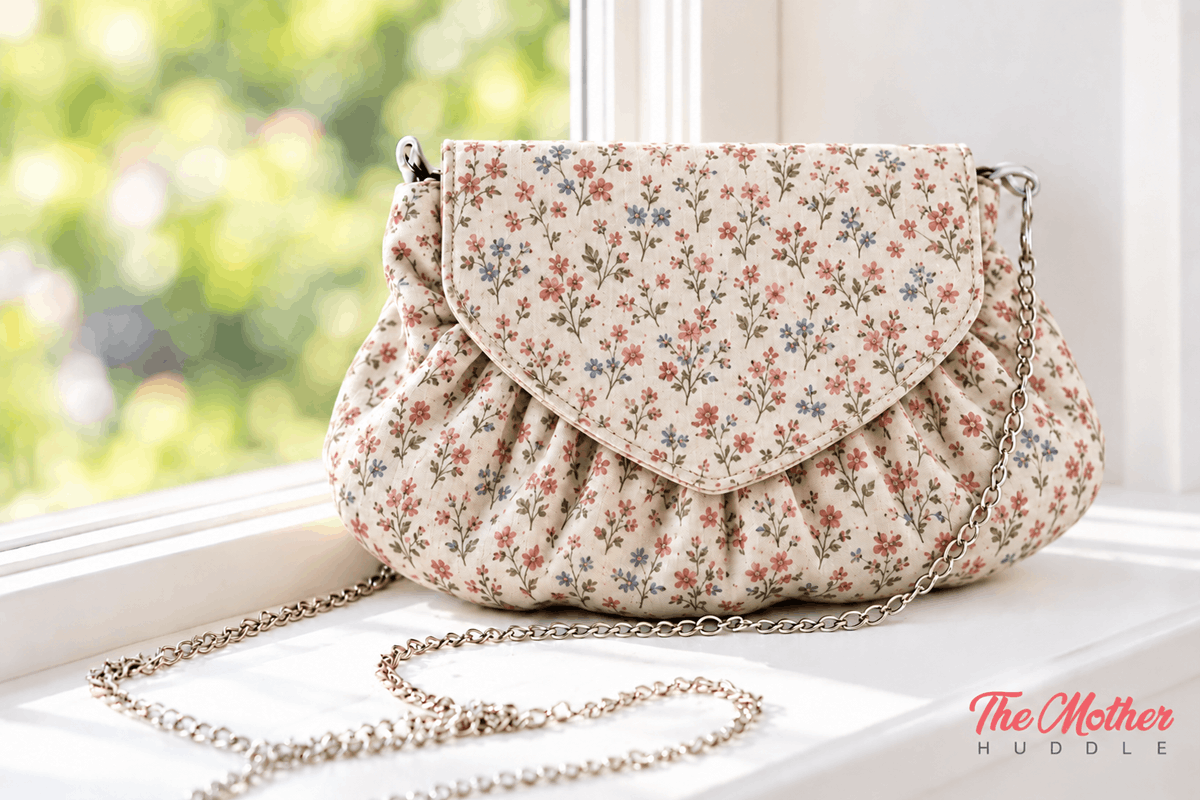
I’m so excited about how this little bag turned out! The Little Betty Bag is my favorite crossbody bag sewing pattern. It’s free, with printable PDF pattern pieces and a photo for nearly every step. I made five before I felt ready to share the pattern, tweaking it a little each time. This is the version that finally made the cut.
A crossbody is my go-to style. You put it on and forget about it- exactly what you want at the grocery store, or anywhere you need both hands free to chase little ones. It holds the essentials (a card sleeve, sunglasses, phone, and lip gloss) and doubles as a “purse for your purse” when you want to grab and go without your big bag.
Why you’ll love this DIY crossbody bag:
- Inexpensive: you need less than two fat quarters or a few scraps from your stash.
- Beginner-friendly: every step includes a photo, so even a newer sewist can finish it.
- Easy to make your own: swap the fabric, the strap, or the closure, and it looks like a completely different bag.
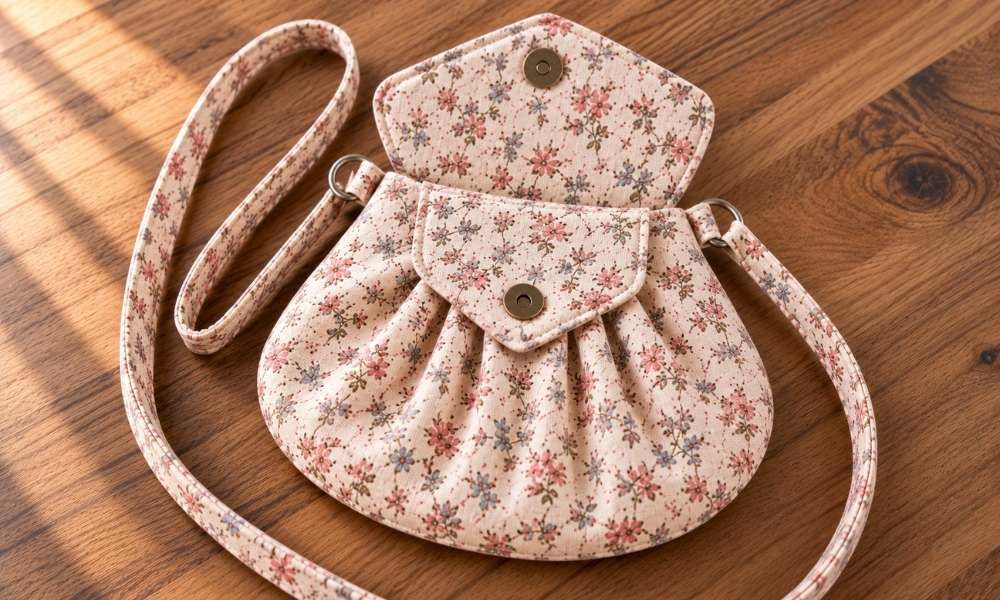
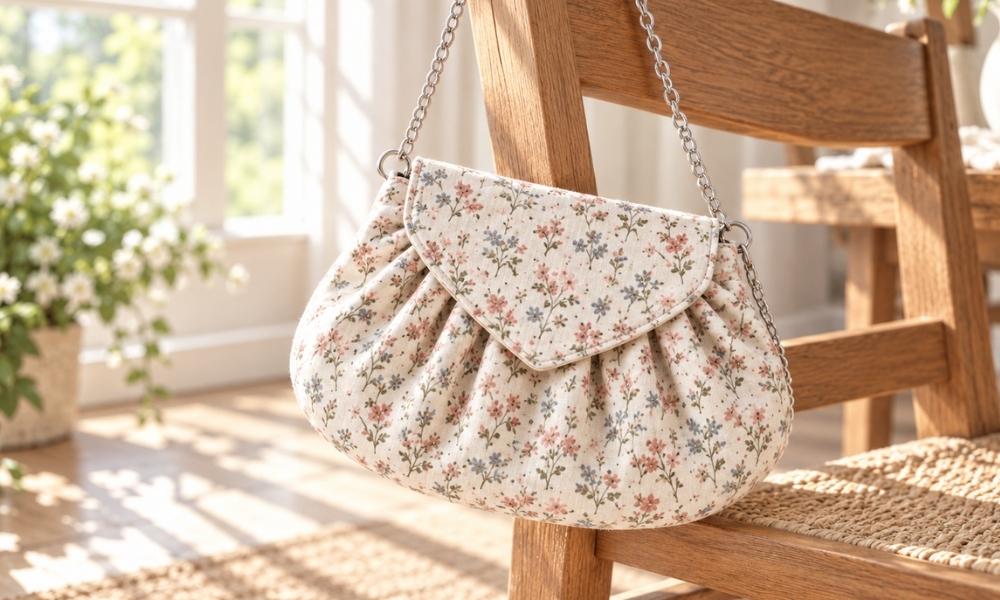
The finished bag features a gathered front panel beneath a pointed yoke, a flap with a magnetic closure, and a chain or fabric strap. Let’s make one!
What You’ll Need
Read through the whole tutorial before you start. If you’re new to sewing, keep my Sewing Tips Directory handy, and leave any questions in the comments.
Fabric
- Outer bag: half a yard total is more than enough. A sturdy fabric works best: canvas, twill, home decor weight or denim.
- Lining: if you want a contrast lining, two fat quarters are plenty. This is also a great fat quarter bag pattern for using up scraps.
- Interfacing (optional): if you’re using lightweight quilting cotton, iron fusible interfacing onto the fabric before cutting so the bag holds its shape.
Supplies
- Your basic sewing kit: machine, thread, pins or clips, scissors, seam ripper
- Magnetic snap closure (one set)
- A small scrap of fabric to reinforce the snap
- 2 D-rings, 1/2 inch or smaller (a small buckle or clasp also works)
- A scrap of 1/4- or 1/2-inch double-fold bias tape for the D-ring tabs (or make your own from fabric scraps)
- Strap: 48 inches of chain, or a 2 x 48 inch strip of fabric
- Needle-nose pliers, if using chain
- An iron set to steam
Strap tip: look for chain in the jewelry-making aisle of your craft store. It’s lighter and more comfortable to wear than hardware-store chain.
Hardware tip: check the button aisle, too. I found a tiny buckle clasp there that worked perfectly in place of D-rings. Just keep any ring or clasp 1/2 inch or smaller so it suits the bag’s size.
GET YOUR FREE LITTLE BETTY BAG PATTERN
Print the pattern on letter-size paper at 100% without scaling or “fit to page.” Measure the 1-inch test square on the pattern to confirm it printed at the correct size, then cut out the pieces.
Cutting list
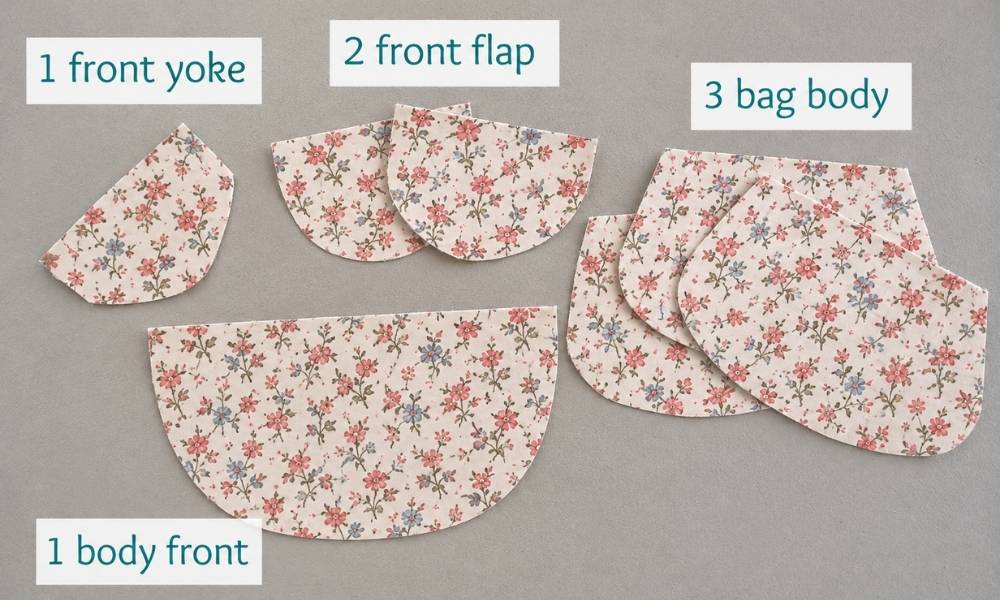
| Piece | Main fabric | Lining fabric |
| Front yoke | 1 | — |
| Front panel | 1 | — |
| Bag body | 1 | 2 |
| Flap | 1 | 1 |
| D-ring tabs (bias tape or fabric), 1/2 x 3 in | 2 | — |
| Fabric strap (optional), 2 x 48 in | 1 | — |
How to Sew a Crossbody Bag: Step-by-Step
Use the seam allowance marked on the pattern pieces. [Photo] markers indicate where the original step photos go.
Step 1: Make the D-ring tabs
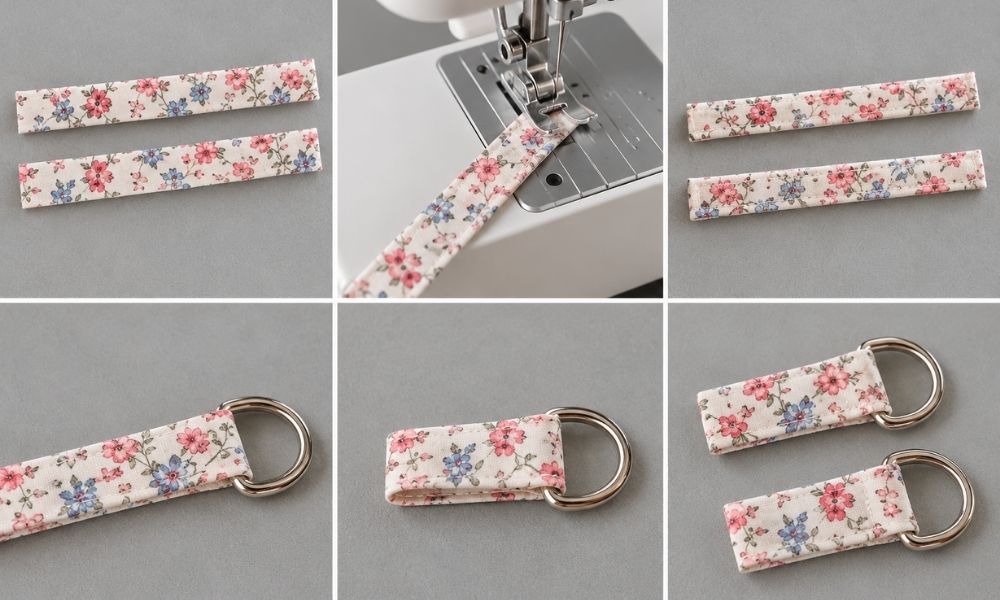
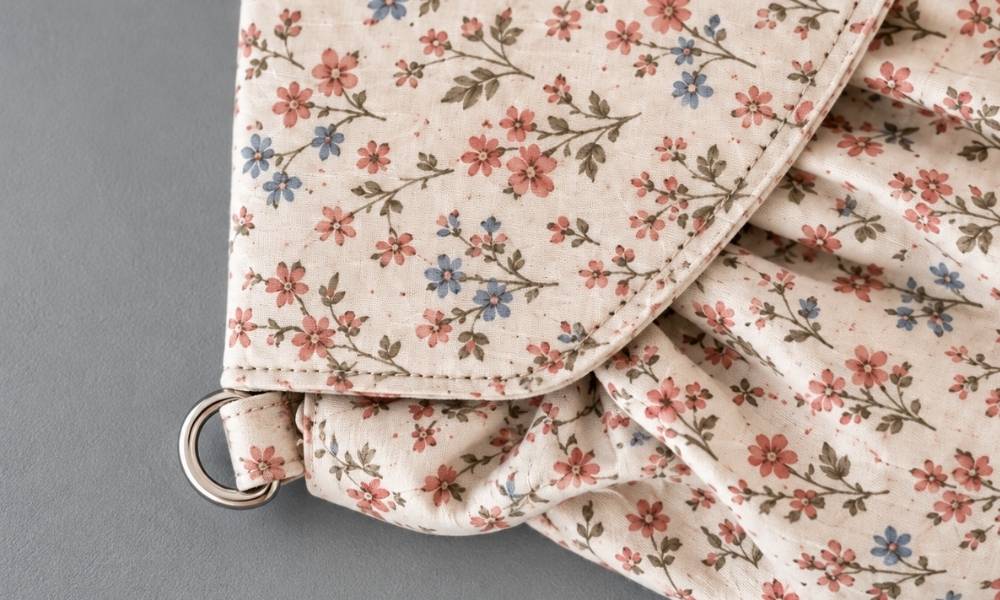
Cut two 3-inch bias-tape pieces, each about as wide as your D-ring (1/2 inch, or 1/4 inch for smaller rings). Stitch the open edges closed, slip each through a D-ring, then fold in half. Set aside.
Step 2: Make the fabric strap (skip if using chain)
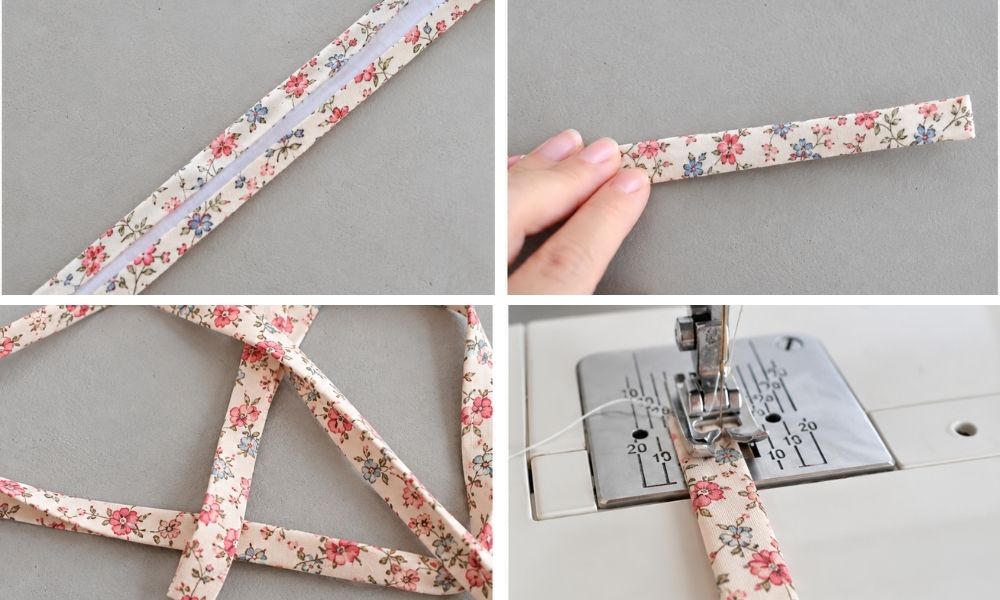
Cut a 2 x 48-inch strip; join two strips if needed, or cut shorter if you prefer. Fold both long edges 1/2 inch toward the center, press, then fold in half and press again. Stitch along the open side to make a 1/2 x 48-inch strap. Set aside.
Step 3: Press the front yoke
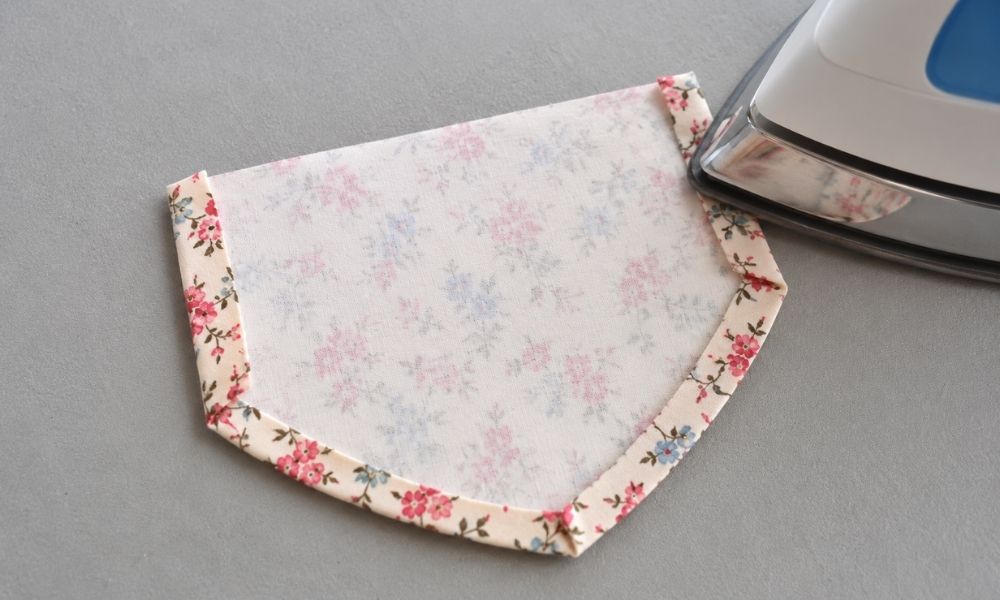
With the iron on steam, press the yoke’s outer edges under a full 1/4 inch. Start with the curved tips, easing the rounded edges with your fingers, and hold the iron for a few seconds. Let it cool, then fold and press the sides. Baste along the inside edge to secure the folds.
Step 4: Gather the front panel
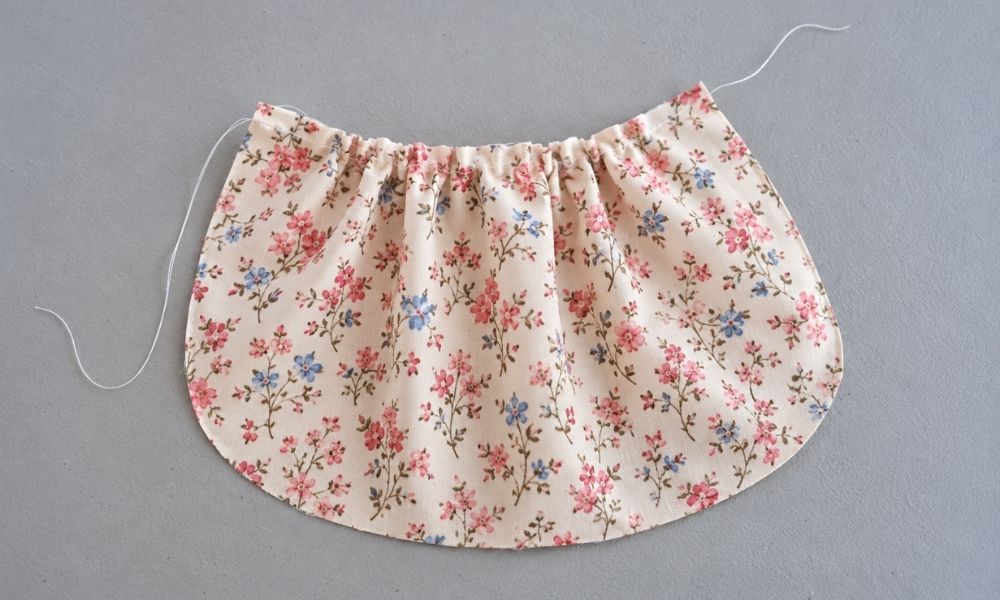
Run a basting stitch (your machine’s longest stitch) along the top edge of the front panel. Pull the bobbin thread to gather. Lay it on the bag body piece and adjust until the widths match. Keep the gathers toward the center and leave about an inch flat at each end.
Step 5: Attach the yoke
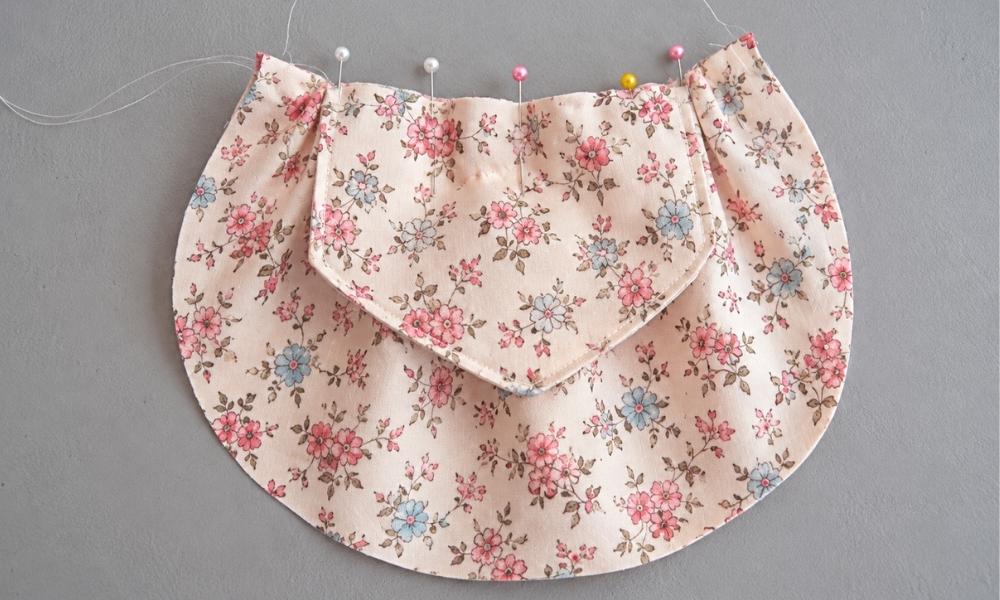
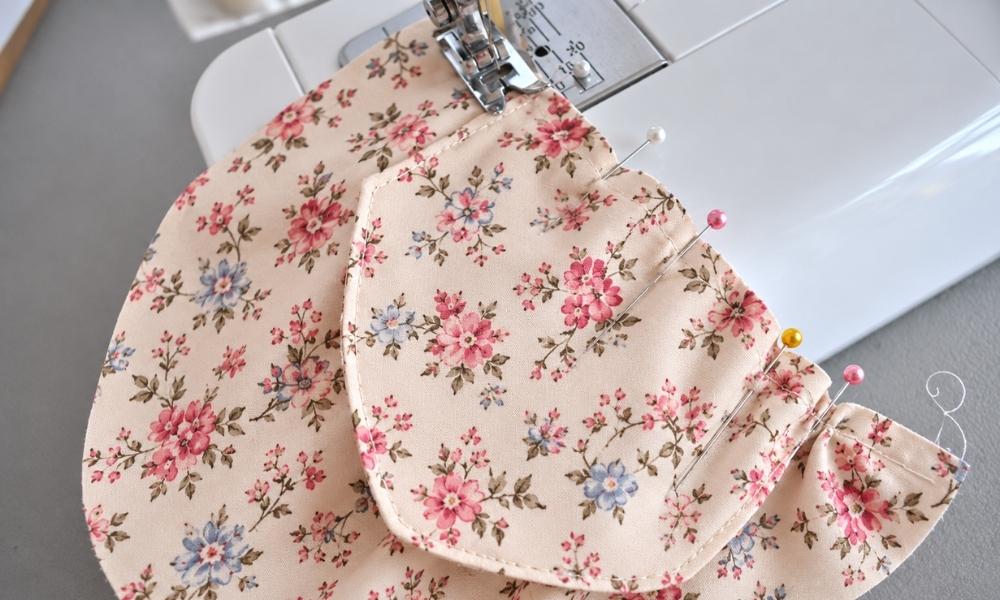
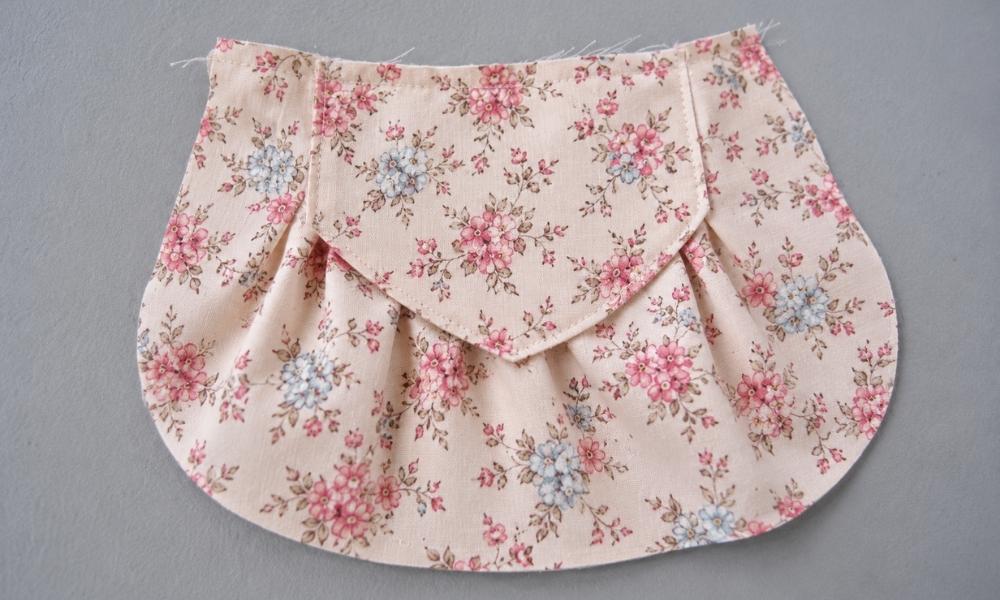
Pin the yoke to the center of the gathered panel so all gathers fall under the yoke and the ends remain flat. Check the width against the bag body again, then baste across the top. Press the gathers with a hot iron, keeping them within the yoke. Mine reach right to the edge of the yoke, which gives the front its full, puffed look.
Pin the yoke sides down. With a slightly longer stitch (good for topstitching), sew from the top of one side down to the point. Backstitch and cut the threads. Repeat on the other side. Remove the yoke’s basting stitch. There’s your front panel, with every gather tucked neatly under the yoke.
Step 6: Add the magnetic snap to the front
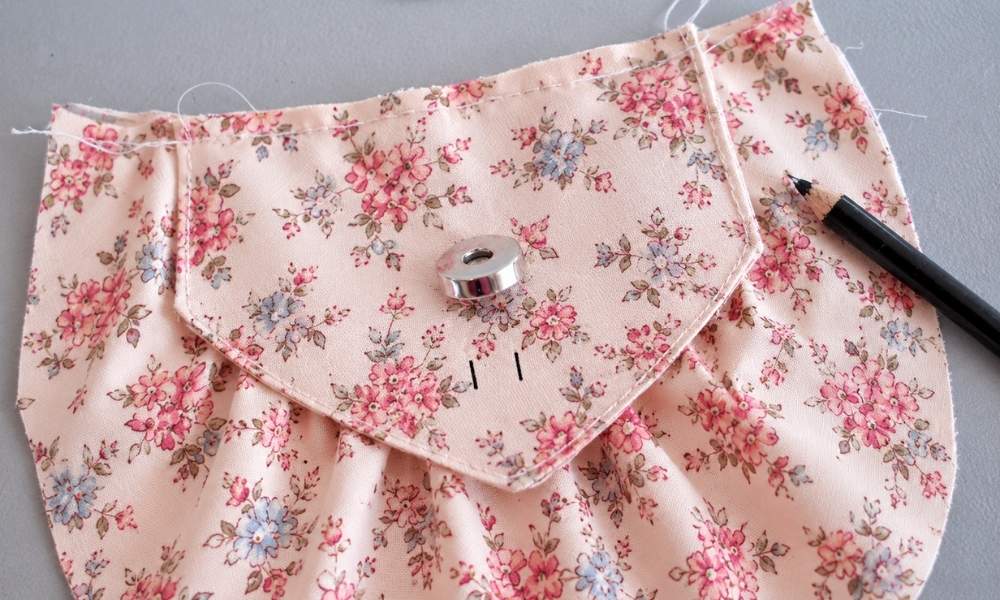
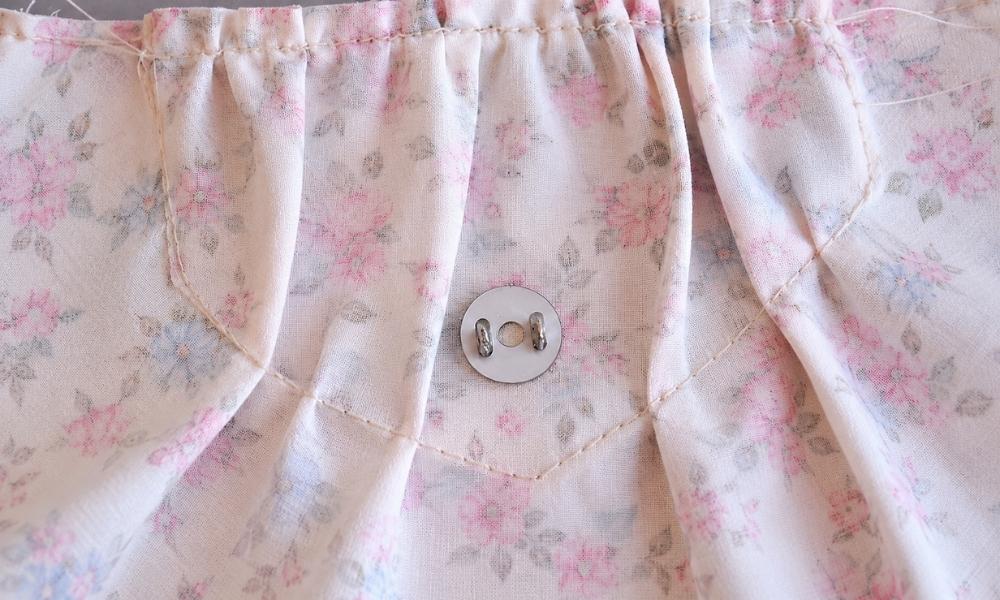
Center the female half of the snap just above the yoke’s bottom point, but not too close to the edges. Mark the prong slits, cut through all layers, and test the fit. Push the prongs through, add the washer, then bend the prongs flat.
Step 7: Sew the outer bag
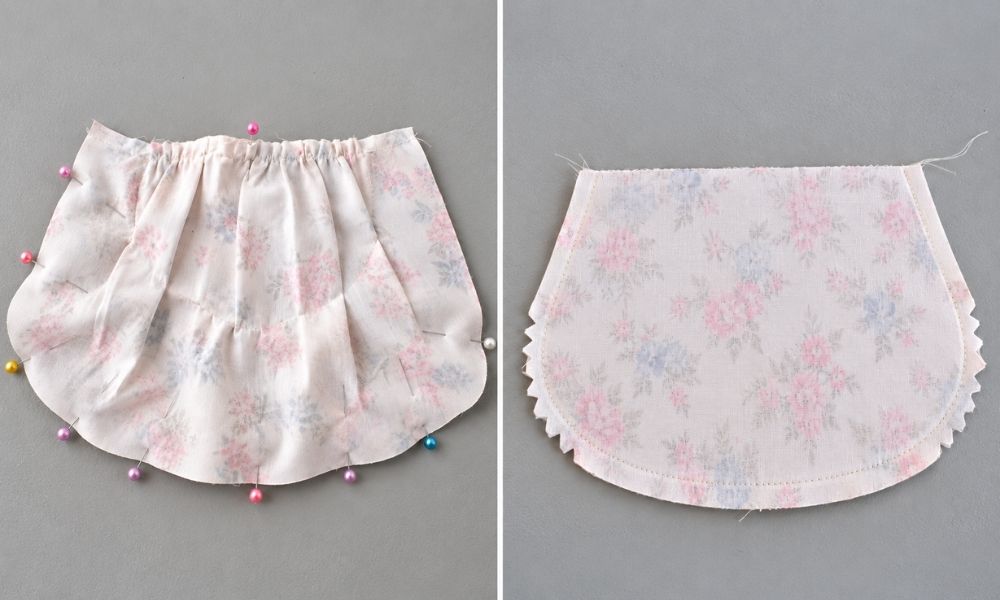
Pin the front panel to the bag body, right sides together. Pin the top and bottom first to center it, then work around the corners. The gathered front will pucker a little more than the back; that’s what you want. Line its edges up with the back panel, and it will look great once it’s sewn. Trim any corner that extends beyond the back panel.
At a regular stitch length, sew around the sides and bottom, leaving the top open. Notch the curved corners, turn right side out and press the corners round.
Step 8: Sew the lining
Place the two lining pieces right sides together and sew around the sides and bottom. Leave the top open and a 3-inch turning gap in the bottom. Notch the corners.
Step 9: Make the flap
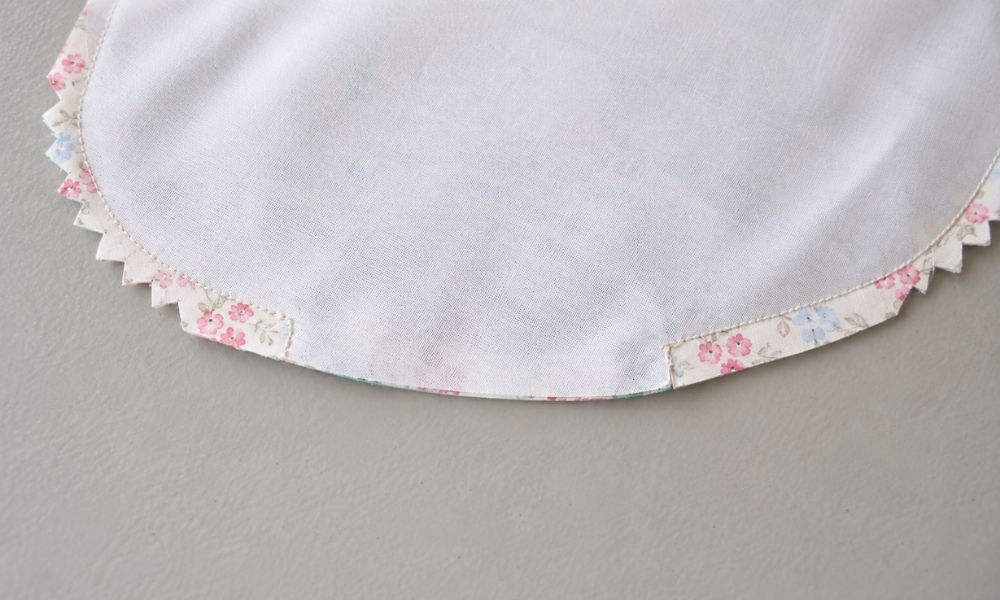
Sew the outer and lining flap pieces right sides together, leaving the top open. Notch the curves and clip the point. Turn, press the curves smooth and the point crisp, and topstitch the edge if you like.
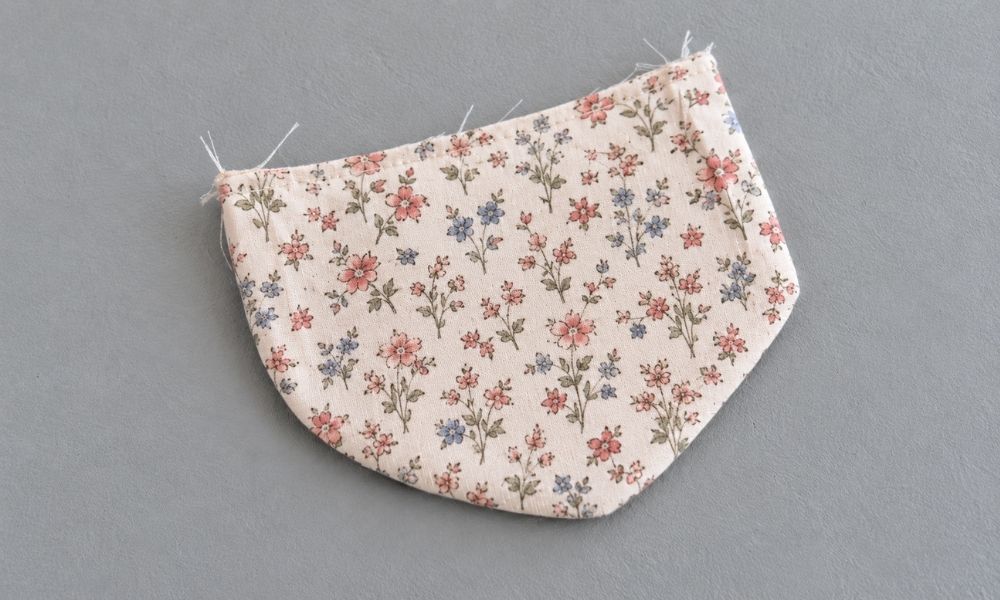
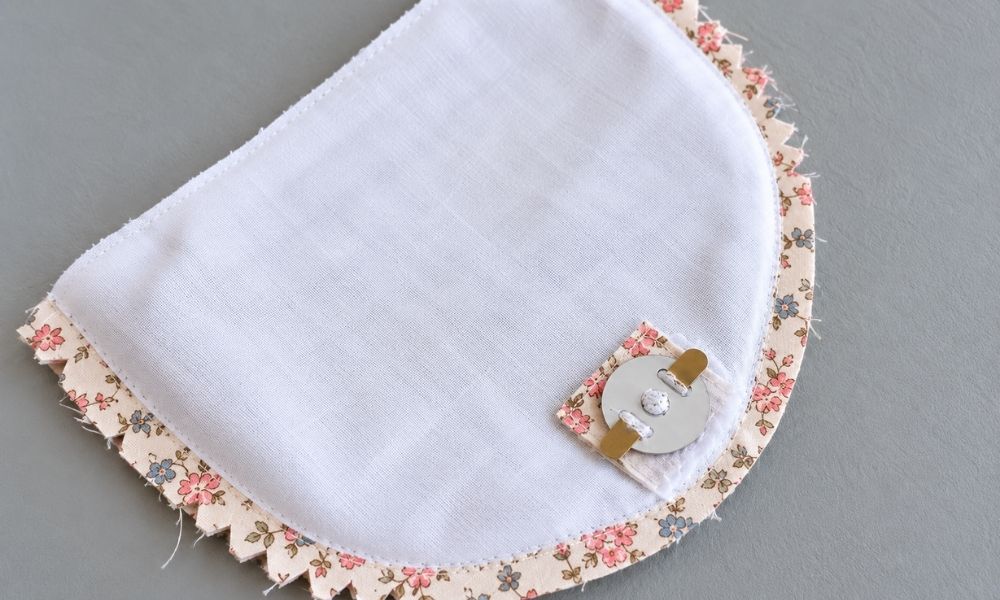
Lay the flap lining-side up over the bag’s yoke so it overlaps by 1/4 inch or less. Hold the male half of the snap in place, mark it, and measure twice before you cut. Install it through the flap lining only, with a small fabric scrap under the washer for reinforcement.
Step 10: Baste the flap and D-ring tabs
Center the flap on the back of the outer bag, right sides together and top edges matching. Pin a D-ring tab at each side seam; I left about 1/2 inch of tab showing. Baste the flap and tabs in place.
Step 11: Join the bag and lining
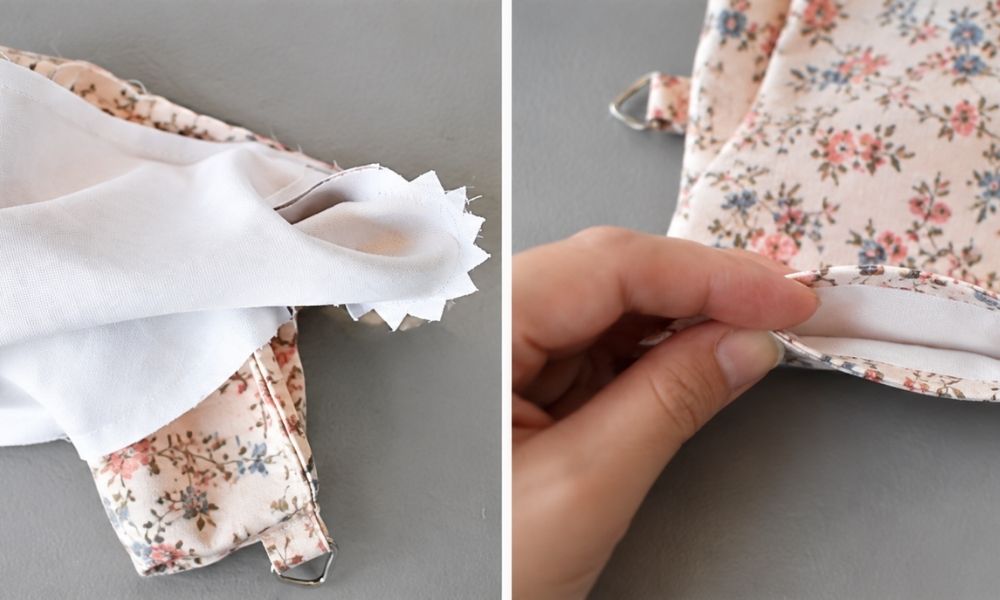
With the outer bag right side out, slip it inside the lining so the right sides face. Match the top edges and sew all the way around.
Pull the bag out through the gap in the lining. Press the gap edges in, stitch it closed, and push the lining down into the bag. Topstitch around the opening if you like.
Step 12: Add the strap
Fabric strap: loop each end through a D-ring and stitch in place.
Chain strap: cut or open the chain to 48 inches with needle-nose pliers, then close each end link around a D-ring.
Variations and FAQ
Can I make this bag without hardware?
Yes. Skip the D-rings and sew fabric straps straight onto the bag. When you sew the outer bag and lining together around the top (Step 11), leave a small opening at each side seam. After turning, tuck the strap ends into those openings and stitch them closed.
What’s the best fabric for a crossbody bag?
A medium-to-heavy fabric like canvas, twill, denim or home decor cotton gives the bag body without extra steps. Quilting cotton works too if you back it with fusible interfacing first.
How long should the strap be?
The pattern uses a 48-inch strap, which sits at the hip on most adults when worn crossbody. Shorten it for a shoulder bag or a child-size version.
How big is the finished bag?
The finished Little Betty Bag measures approximately 9 inches wide by 6 inches high, not including the strap. It’s the perfect size for carrying your everyday essentials, such as your phone, card holder, sunglasses, and lip gloss, without feeling bulky. Compact, lightweight, and easy to carry, it’s a cute little crossbody bag for quick errands, casual outings, or days when you want to travel light.
What else can I change?
- Use a contrasting fabric for the yoke or the flap.
- Topstitch the flap and bag opening in a contrast thread.
- Swap the magnetic snap for a turn lock or button loop.
- Turn it into an evening bag with velvet or metallic fabric and a fine chain.
Make Your Own Little Betty Bag
That’s it: a finished crossbody purse ready for a night out, a quick trip to the store, or tucking inside your bigger bag. Once you’ve made one, you’ll start dreaming up fabric combinations for the next.
Have a question? Leave it in the comments and I’ll help you out. And I’d love to see your finished Little Betty Bags, so share a photo!
