
In spite of having a mother who was a fabulous seamstress, I first learned to sew at school. I think it was grade 3, and our art teacher was this stylish, slightly eccentric-looking woman with naturally bright red hair cut into a mushroomesque bob. She always had on this lovely oversized blue shirt with rolled-up sleeves as her art smock and equally vivid blue eye shadow. She seemed really cool, and even baby potato me could recognise that she was a really good art teacher.
We did all sorts of artistic activities in that art room, not just your basic drawing, painting, and sticking coloured paper and cellophane to coloured card. One of the projects we did has stuck with me all these years, and I periodically return to it and make a few more just for fun.
On one fateful day in that art room, we learned to hand-sew by making simple little mice. I was HOOKED! After my first one, I made more and more of them, in funky scraps from my mother’s fabric stash.
Simple and Easy Mouse Sewing Project For Kids
I decided to use this project to teach my daughter to sew as well, and my husband joined in on the fun, too! His stitches were shockingly good for someone who hasn’t hand-sewn before, and honestly, his tension was better than mine, which I have taken on board and learned from. That’s part of what’s so valuable about projects like these; whether you’re new to sewing or very familiar with it, there’s probably something you can still learn from even a simple little mouse.
What you will need:
- Sewing needle
- Thread or embroidery floss
- Scissors
- Felt or fabric
- Stuffing or cut-up fabric scraps
- Pattern print-out
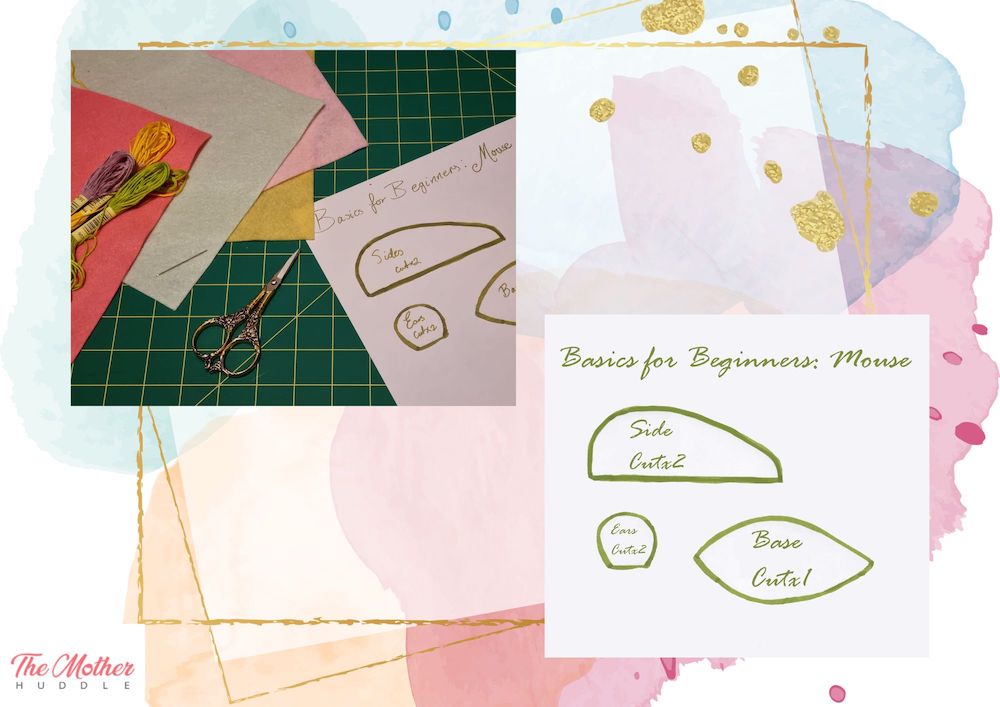
Step One
- Print and cut out your pattern then use the pieces to cut your mouse pieces out of your chosen fabric. I like to make each mouse unique and mix up the fabric colours and prints for each of the pieces.
Step Two
- Using four strands of embroidery floss or thread, cut a 60cm (24’’) long strand and knot one end.
- Thread the other end onto your needle and whip-stitch your two mouse sides together, beginning at the tapered end, and leaving the long tail coming from the broad end.
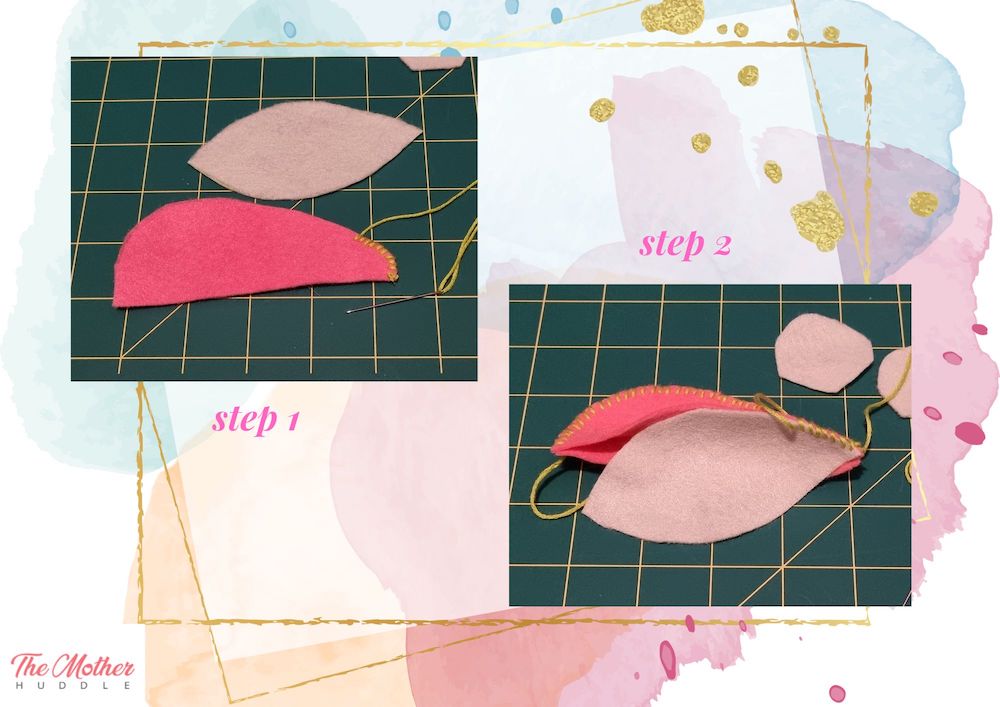
Step Three
- Cut another 60cm (24’’) long piece of four strands of embroidery floss or thread and knot one end.
- Thread the other end onto your needle and whip-stitch your mouse side to the mouse base, beginning at the tapered ends, and leaving a long tail at the other end next to our first long tail.
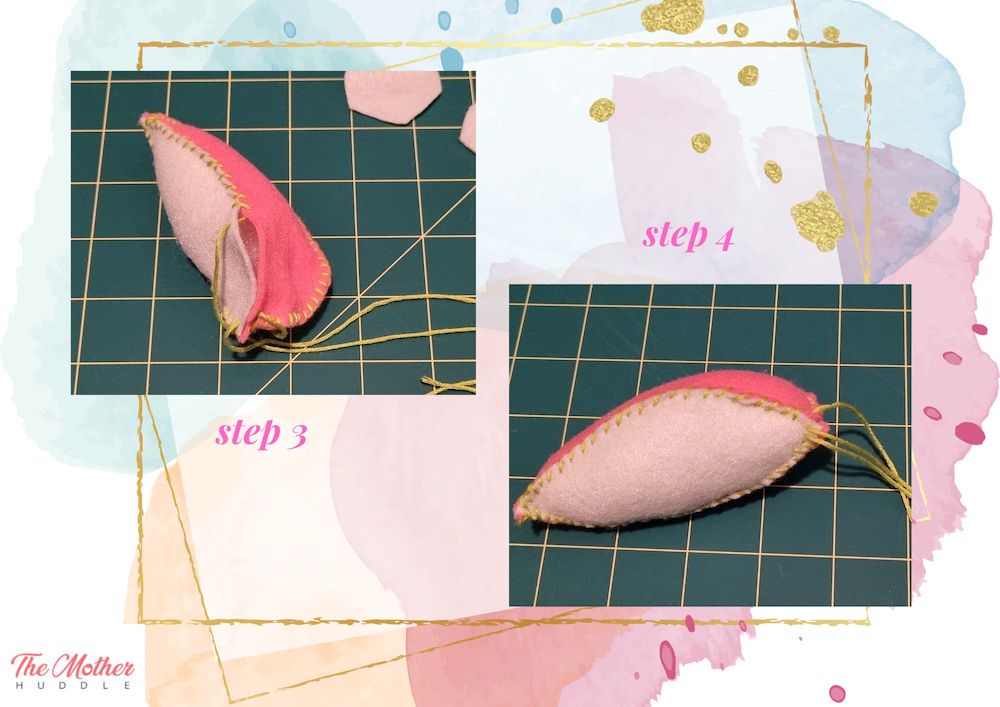
Step Four
- Cut one more 60cm (24’’) long piece of four strands of embroidery floss or thread and knot one end.
- Thread the other end onto your needle and whip-stitch your remaining mouse side to the mouse base, beginning at the tapered ends.
- When two-thirds of the way along your mouse side/base, stop and stuff your mousy, then continue whip-stitching along until the end. Leave this tail long, too.
Step Five
- Plait your tail ends together. You can have your tail as long or short as you like, then simply tie a knot and cut off the ends.
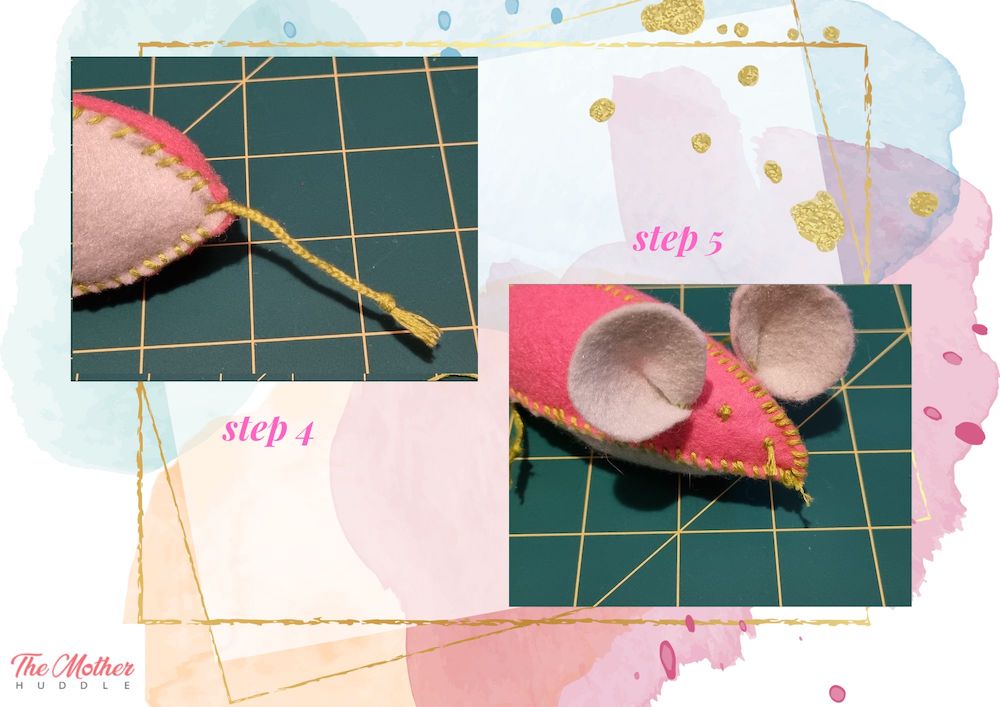
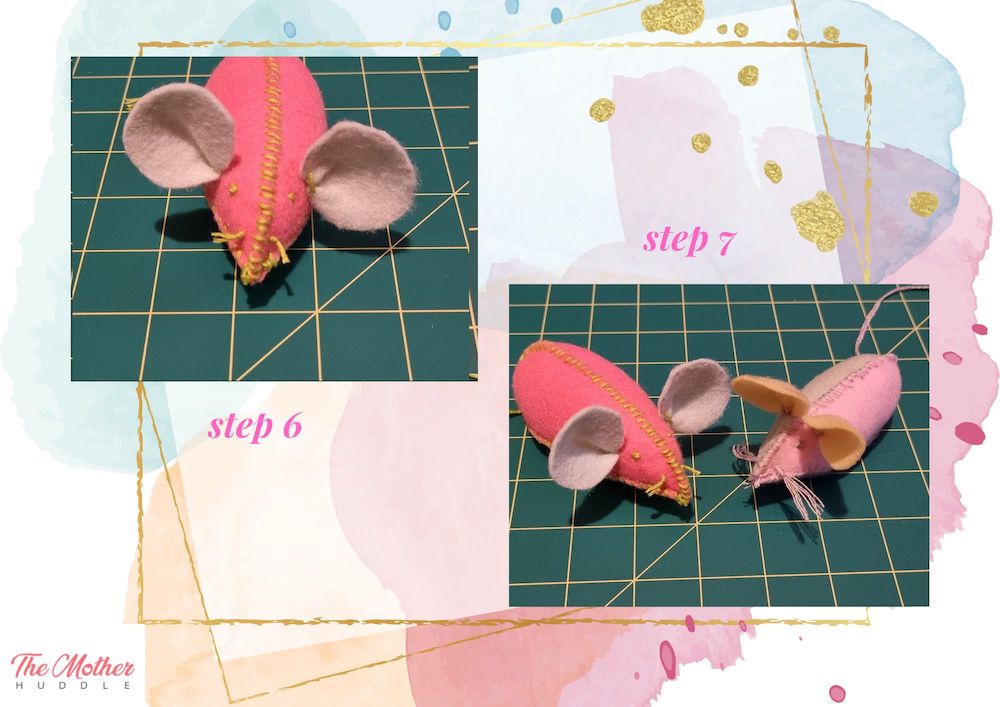
Step Six
- Thread your needle again with four strands of floss or thread but 30cm (12’’) long this time, and knot the end, then thread the other end onto your needle.
- Pinch the base of your mouse’s ear and put a couple of stitches in it to keep it pinched, then sew it onto the side of your mouse’s head with a few whip-stitches at the back of the ear base.
- Tie a knot, but don’t cut your thread, instead, push your needle through to where you want your eye on that side of your mouse’s head, and do a couple of small stitches to make your eye.
- Push the needle through to where you want your whiskers to come from. Tie a knot against the mouse’s nose, then cut the thread 1 to 2cm (1/2’’ to 1’’) from the knot.
- Repeat above steps for the other ear on the other side of your mouse and you’re done!
Step Seven
- Make your little mouse some friends!
Finding Simple Joys
I had fun making these little mice, even though I’ve made them many times before. They make great cat-toys or fun little things to hide around the house for your family to find, or even to make and leave in public spaces as random-acts-of-fun for others to find! My daughter hasn’t finished hers yet but she’s certainly enjoying the process and is really proud of the mouse that’s taking form in her precious little hands, as I am of her for tackling a new skill with such gusto! That’s part of what’s so great about these little mice, they’re fabulous for not only learning to sew but for increasing fine-motor skills or keeping fingers nimble! You can also make all sorts of changes to them to make them entirely unique, from scaling the pattern larger or smaller, adding embellishments, changing the eyes, placement of the ears, and so on. It’s also a fantastic project on those days when you can’t go outside and your little ones need a directed activity. I hope you have fun making some cute little mousy friends of your own!